How to Set Up Photoshop Droplets to Batch-Apply Watermarks for Tech Blog Galleries

How to Set Up Photoshop Droplets to Batch-Apply Watermarks for Tech Blog Galleries
When each picture needs branding via a watermark, managing big numbers of photographs for a technology blog may rapidly become stressful. This is particularly true when the watermark is required for each image. Not only does manually adding watermarks to each and every picture take a lot of time, but it also has the potential to result in inconsistencies. By transforming laborious operations into a simple drag-and-drop operation, Photoshop droplets provide a solution that is both extremely effective and very efficient. Bloggers, content producers, and digital publishers will find this tool to be particularly useful since it enables them to immediately apply predetermined actions to many photos. It is possible to guarantee that each and every picture in your gallery will continue to have the same branding and placement if you establish a process that is organized. The procedure involves the creation of a repeatable action, the configuration of droplet parameters, and the optimization of output quality. Once in place, this technique dramatically cuts down on the amount of time spent editing while also boosting accuracy. Your image processing pipeline may be transformed into a more efficient and professional operation if you have a solid understanding of how to successfully employ droplets.
Gaining an Understanding of Photoshop Droplets and the Benefits They Offer to Workflow
Droplets in Photoshop are basically little executable files that, when files are placed into them, immediately execute actions that have been recorded that have been recorded to pictures. As an extension of Photoshop’s batch processing capabilities, they provide a more user-friendly interface than Photoshop’s native batch processing capabilities. It is possible to process whole directories with only a single drag-and-drop operation, providing an alternative to launching Photoshop and manually performing actions. The usage of this is especially helpful for tech blog galleries, which often include dozens or even hundreds of photographs that need a consistent treatment. The fact that droplets always adhere to the same set of instructions makes them a reliable method for achieving uniformity. Additionally, they lessen the likelihood of human mistake, which might include things like getting a watermark wrong or applying the wrong settings. The incorporation of droplets into your workflow allows you to establish a system that is scalable and improves both the speed and the reliability of your operations. This makes them an essential tool for anybody who is responsible for maintaining a large amount of visual material.
Putting Together Your Watermark Design in Order to Ensure Consistent Branding
Before you begin the process of generating a droplet, it is essential to develop a watermark that is consistent with the identity of your site. It is important that the watermark be legible, professional, and has a minimal amount of intrusion. It is generally the case that a transparent PNG file is the most effective since it enables smooth blending with a variety of backdrops. To guarantee visibility without detracting from the primary picture, great consideration should be given to both the size and location of the elements. Because consistency is of the utmost importance, the watermark need to be consistent throughout all of the photographs. In the event that it is required, you may also wish to make variants for both bright and dark backgrounds. In order to guarantee that your automated process will generate polished results, it is important to prepare this asset in advance. Your brand identification may be strengthened and your material can be protected from unlawful usage with the help of a well-designed watermark.
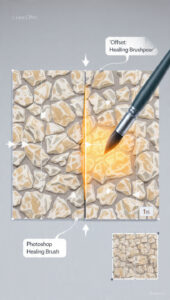
The process of recording a Photoshop action for the application of a watermark
An action in Photoshop that specifies the steps that are to be applied is the fundamental component of every droplet. Open a sample image and add your watermark on it. This is the first step in the process. You may obtain the desired appearance by adjusting the size, location, and opacity of the image. Once the satisfaction has been achieved, you should start documenting the activity and carefully repeat these procedures. In order to guarantee consistency, do not forget to include resizing, alignment, and any blending modifications. It is essential to make use of relative positioning strategies in order to ensure that the watermark is able to accommodate a variety of picture sizes. After you have finished the procedure, you should stop recording and test the action on a number of different pictures. By doing so, it guarantees that it will respond appropriately in a variety of circumstances. An effective droplet is built on the foundation of an activity that has been meticulously documented.
The Process of Creating and Configuring the Droplet in Photoshop
After your action is complete, you may use the automation options in Photoshop to generate a droplet when you are ready. In the course of this procedure, you will choose the action that was recorded and choose the manner in which files should be handled. Among the available choices are the ability to choose input directories, output destinations, and file naming standards. Additionally, you have the option to either save new copies or permanently overwrite the original files. The parameters for compression and format should be specified in such a way as to preserve picture quality while simultaneously optimizing file size. Having the droplet configured correctly guarantees that it will behave just as it was designed to. The convenience of using the droplet on a daily basis is enhanced by storing it in a position that is readily accessible. Because of this configuration, your action will be transformed into a powerful automation tool.
In order to optimize the placement of watermarks for images of varying sizes
When doing batch processing, one of the issues that might arise is the difficulty of maintaining consistent watermark placement across photos that have different dimensions. Instead of using fixed coordinates, your action should make use of alignment tools in order to handle this challenge. Maintaining a consistent location of the watermark may be accomplished by positioning it in relation to the edges, such as the bottom-right corner. Increasing the uniformity of the watermark by scaling it appropriately to the size of the picture is another option. This ensures that the watermark does not seem too huge on photos that are tiny or excessively small on images that are large. It is helpful to adjust these settings by testing them in a variety of contexts. Optimisation done correctly guarantees that your watermark will seem balanced and professional across all of the photos. Because of this meticulous attention to detail, the overall quality of your gallery is improved.
Improving the Efficiency of Processing Entire Image Galleries in Batch
Following the configuration of the droplet, the process of adding watermarks to a complete gallery becomes a straightforward procedure. It is possible to drag a folder containing photographs onto the droplet, and it will automatically process each file in accordance with the action that was recorded. In this way, the necessity for manual intervention is eliminated, which results in a considerable acceleration of the process. Maintaining a close eye on the procedure from the beginning helps to guarantee that everything goes well. It has been shown that the droplet is capable of managing enormous batches with just minimum oversight. Because of its efficiency, technology blogs, which typically post information that is heavy on images, might benefit considerably from it. Batch processing not only helps save time but also guarantees that all of the graphics are consistent with one another.
Standardization of Image Quality and Compression and Their Maintenance
The maintenance of picture quality is just as crucial as the improvement in efficiency that automation brings about. With improper compression settings, you run the risk of losing detail, which may have a negative impact on the aesthetic appeal of your photographs. It is important to choose export options during droplet formation that strike a balance between quality and file size. Whenever it is practicable, high-resolution photographs should be kept, particularly for product shots that are very detailed. Adjustments for sharpening may be included into the operation in order to improve clarity following the resizing process. Setting the output parameters in a consistent manner guarantees that all of the photographs will be of the same quality. For the sake of preserving a professional image across your site, this is really necessary. When these particulars are given careful consideration, it guarantees that the visual integrity of the automation will not be compromised.
Constructing a Workflow That Is Capable of Scaling for Long-Term Content Production
The configuration of Photoshop droplets is not only a one-time work but rather a component of a more comprehensive approach for the generation of scalable material. The number of photographs that you upload to your blog will rise as it expands, which will make automation an even more essential tool. Making ensuring that your actions and watermark design are regularly updated guarantees that your process will continue to be current. It is possible to further improve efficiency by organizing droplets for various activities, such as resizing or color correction. The process of maintaining consistency throughout time is made simpler by the use of documentation and standards. Investing in a structured system allows you to decrease the amount of labor that is repetitive and concentrate more on the development of content. Taking this strategy allows for sustaining high-quality visual standards while also supporting expansion over the long run.