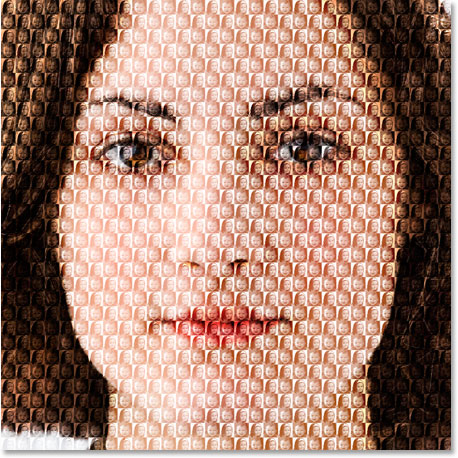
Photomontage Mastery: A Comprehensive Guide to Filling a Photo with More Photos in Photoshop
Introduction:
Photomontage, the art of combining multiple images into a seamless composition, opens up a world of creative possibilities in digital design. One intriguing and visually captivating technique within the realm of photomontage is filling a photo with more photos. Adobe Photoshop, a powerhouse in digital image manipulation, provides the tools and features necessary to execute this complex yet rewarding process. This comprehensive guide will walk you through the intricate steps, creative considerations, and advanced techniques required to seamlessly fill a photo with an array of additional images, transforming it into a rich and visually dynamic composition.
I. Understanding the Art of Filling a Photo with More Photos:
- Purpose and Impact: Filling a photo with additional images serves various artistic purposes, from creating surreal landscapes to telling intricate stories within a single frame. Understanding the intended impact informs the approach to the process of combining diverse elements into a cohesive whole.
- Narrative and Composition: Consider the narrative or theme you wish to convey through the photomontage. The arrangement and interaction of the additional photos should contribute to the overall composition, telling a story or evoking a specific emotion.
II. Selection of Appropriate Images:
- Choosing a Base Photo: Select a base photo that serves as the foundation for the composition. Consider factors such as the theme, colors, and overall atmosphere of the base image. It should provide a solid canvas for integrating additional photos.
- Diverse Image Selection: Choose a variety of additional images that complement the base photo and contribute to the desired narrative. Consider elements such as scale, perspective, and lighting to ensure seamless integration.
III. Preparing the Base Photo:
- Color and Tone Adjustments: Before adding more photos, fine-tune the color and tone of the base image. Adjust saturation, brightness, and contrast to create a cohesive visual foundation that harmonizes with the upcoming elements.
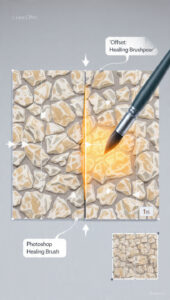
- Retouching and Cleaning: Use Photoshop’s retouching tools to clean the base photo. Remove distractions, blemishes, or unwanted elements that may interfere with the overall composition.
IV. Isolating Additional Photos:
- Precise Selection Techniques: Use selection tools such as the Lasso, Magic Wand, or Pen Tool to isolate the additional photos from their backgrounds. Achieving clean selections is crucial for seamless integration.
- Refining Edges: Apply the Refine Edge tool to fine-tune the edges of the selected images. Feathering and smoothing can be adjusted to match the soft and natural appearance of real-world elements.
V. Placing Additional Photos onto the Base Photo:
- Layering Technique: Open the selected additional photos in Photoshop and place them as new layers onto the base photograph. Arrange them in positions that contribute to the overall composition and narrative.
- Scaling and Rotating: Adjust the size and rotation of each additional photo layer individually. This step ensures that the scale and orientation of the inserted elements align with the perspective of the base image.
VI. Creating a Harmonious Composition:
- Spatial Arrangement: Experiment with the spatial arrangement of the additional photos. Consider factors like depth, foreground, and background to create a visually engaging and harmonious composition.
- Overlapping and Integration: Allow the additional photos to overlap with each other and the base image in a natural and integrated manner. This step enhances the depth and complexity of the photomontage.
VII. Mimicking Lighting and Shadows:
- Understanding Light Sources: Analyze the existing light sources in the base photo. Mimic these light sources when adding shadows and highlights to the additional photos. Consistency in lighting enhances realism.
- Adding Shadows and Highlights: Use brushes with low opacity to paint subtle shadows and highlights on the additional photo layers. This simulates the interaction of light, creating a cohesive and convincing visual narrative.
VIII. Adjusting Transparency and Blending Modes:
- Opacity for Realism: Adjust the opacity of each additional photo layer to blend it seamlessly into the composition. Vary the opacity based on the distance, scale, and intensity of each element.
- Experimenting with Blending Modes: Explore blending modes such as Overlay, Multiply, or Screen to enhance the interaction between the base photo and the additional images. Blending modes add depth and richness to the overall montage.
IX. Creating Depth and Perspective:
- Size Variation for Depth: Vary the size of additional photos to create a sense of depth. Larger elements can appear closer, while smaller ones recede into the background, contributing to a three-dimensional effect.
- Foreground and Background Elements: Consider the placement of additional photos in relation to foreground and background elements in the base photo. This step ensures that the photomontage appears cohesive and integrated.
X. Fine-Tuning with Layer Styles and Filters:
- Layer Styles for Refinement: Explore layer styles such as Drop Shadow or Outer Glow to refine the appearance of additional photos. These effects add subtle highlights, shadows, or glows, enhancing the overall visual impact.
- Applying Filters for Cohesion: Experiment with filters such as Gaussian Blur or Motion Blur to create a sense of cohesion and movement within the photomontage. Use filters judiciously to maintain a natural and polished look.
XI. Attention to Details:
- Micro-Details with Brushes: Utilize brushes to add micro-details, such as reflections, texture, or small elements that enhance the realism of the photomontage. This meticulous step contributes to the overall authenticity of the composition.
- Color Matching: Ensure that the colors of additional photos align with the surrounding environment. Use the Eyedropper tool to sample colors from the base photo and apply them to the inserted elements for seamless integration.
XII. Final Review and Adjustments:
- Zooming In for Precision: Zoom in for a close inspection of the entire composition. Pay attention to details, edges, and the overall cohesion of the additional photos within the photograph.
- Iterative Refinement: The process of filling a photo with more photos may involve several iterations of refinement. Make incremental adjustments, seeking a balance between realism and visual impact.
XIII. Saving and Exporting:
- Preserving Layers: Save the Photoshop project file with layers intact to preserve the flexibility for future adjustments or edits. This is particularly useful when fine-tuning specific elements.
- Exporting for Different Platforms: When satisfied with the composition, export the final image in the desired format. Consider the platform where the image will be showcased – whether for print, web, or social media – and adjust the resolution accordingly.
XIV. Exploring Artistic Variations:
- Theme and Genre Exploration: Experiment with different themes and genres for your photomontage. From fantastical landscapes to abstract compositions, varying the style allows for artistic exploration and diversity.
- Mixed Media Integration: Combine photography with other media, such as digital illustrations or textures, to create a mixed media photomontage. This adds layers of complexity and visual interest to the composition.
XV. Troubleshooting Common Challenges:
- Seamless Integration: Ensure that the additional photos seamlessly integrate into the base photo. Address any discrepancies in lighting, scale, or perspective to maintain a cohesive and realistic visual narrative.
- Consistency in Style: Maintain a consistent style across all elements of the photomontage. Consistency in color, lighting, and overall aesthetics contributes to a polished and professional-looking composition.
XVI. Inspiration and Learning Resources:
- Study Photomontage Masters: Explore the work of renowned photomontage artists. Analyze their techniques, styles, and creative approaches to gain inspiration for refining your own skills.
- Online Tutorials and Courses: Engage in online tutorials and courses dedicated to advanced Photoshop techniques. Continuous learning and exposure to diverse styles contribute to the evolution of your artistic capabilities.
XVII. Conclusion: Mastering the Art of Filling a Photo with More Photos in Photoshop
In conclusion, filling a photo with more photos in Adobe Photoshop is a nuanced and rewarding process that allows digital artists to create intricate visual narratives and dynamic compositions. Through a combination of precise selection, thoughtful arrangement, and meticulous detailing, ordinary photographs can be transformed into captivating scenes that tell compelling stories. Armed with the comprehensive guide provided here, aspiring creators can embark on a journey of mastery, exploring the intricacies of photomontage and leaving an indelible mark on the canvas of digital creativity.