Mastering Visualization: A Comprehensive Guide to Setting Up and Rendering Finished Designs in AutoCAD

Introduction:
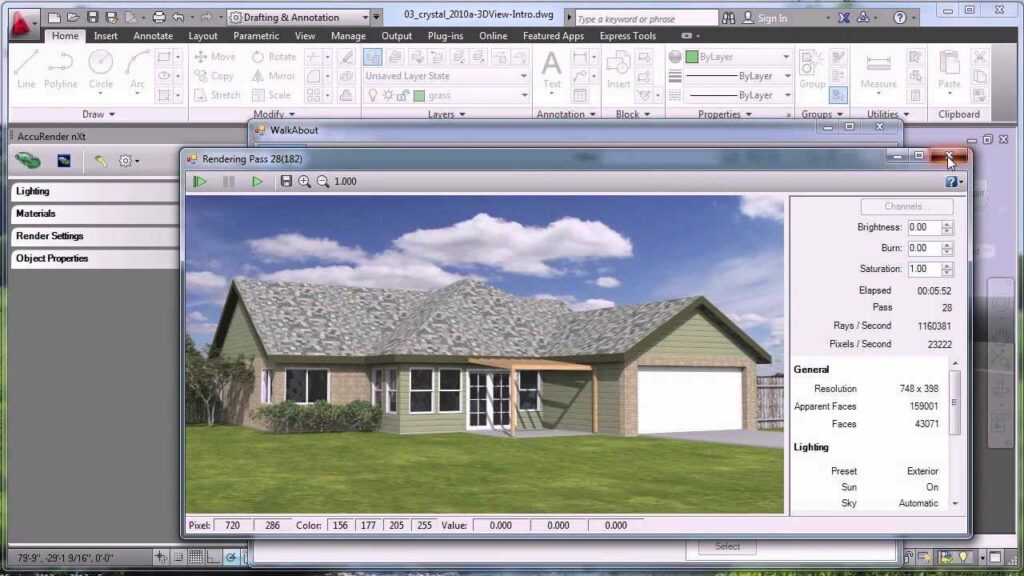
In the expansive field of Computer-Aided Design (CAD), AutoCAD stands as a powerhouse, offering a multitude of tools to create intricate and detailed designs. However, the journey from a conceptual model to a polished, visual masterpiece involves the crucial step of rendering. This comprehensive guide aims to delve into the intricacies of setting up and rendering finished designs in AutoCAD, exploring the functionalities, applications, and the profound impact this process has on bringing designs to life with realism and visual appeal.
Section 1: The Significance of Rendering in AutoCAD
1.1 Elevating Designs through Visualization: Rendering is the transformative process that breathes life into your CAD designs, allowing stakeholders, clients, and collaborators to visualize the finished product with realistic lighting, materials, and details. This step bridges the gap between technical drawings and tangible, visually stunning representations.
1.2 Communication and Decision-Making: Rendering in AutoCAD is more than just creating aesthetically pleasing images; it serves as a powerful communication tool. Visualizations enable effective communication of design intent, aiding decision-making processes and garnering support for projects by providing a clear and compelling vision.
Section 2: Preparing Your Design for Rendering
2.1 Finalizing the Design: Before rendering, ensure that your design is finalized. Address any outstanding issues, refine details, and organize layers and components for a streamlined rendering process. A polished design is the foundation for a successful visualization.
2.2 Optimizing Performance: Optimize your AutoCAD model for rendering by managing file size, simplifying geometry where possible, and using proxy objects for complex components. Efficient models contribute to faster rendering times and a smoother workflow.
Section 3: Setting Up Lights for Realistic Illumination
3.1 Types of Lights in AutoCAD: Understand the various types of lights available in AutoCAD, including point lights, spotlights, and distant lights. Each type serves a unique purpose in creating realistic illumination within your rendered scenes.
3.2 Placing Lights Strategically: Explore strategic placement of lights to enhance the visual appeal of your designs. Learn how to position lights to highlight key features, cast shadows effectively, and create a balanced and visually pleasing composition.
Section 4: Adjusting Environmental Settings
4.1 Sun and Sky Settings: Leverage AutoCAD’s sun and sky settings to simulate natural lighting conditions. Understand how to set the location, date, and time to achieve accurate sunlight and shadows, contributing to the realism of your rendered scenes.
4.2 Background and Environment: Explore the customization of background and environment settings. Learn how to choose appropriate backgrounds, apply sky textures, and control environmental factors to create immersive and contextually rich visualizations.
Section 5: Applying Materials for Realism
5.1 Material Assignment: Assign materials to objects in your AutoCAD model to mimic real-world appearances. Understand how to define material properties such as color, texture, reflectivity, and transparency, contributing to the overall realism of the rendered scene.
5.2 Custom Material Creation: Delve into the creation of custom materials in AutoCAD. Learn how to tailor material properties to specific design requirements, allowing for a high level of customization and control over the visual representation of objects.
Section 6: Camera Setup for Compelling Views
6.1 Camera Placement and Angles: Experiment with camera placement and angles to find the most compelling views of your design. Learn how to set up camera positions, adjust angles, and define focal lengths to capture the essence of your project from different perspectives.
6.2 Depth of Field and Focus: Explore advanced camera settings such as depth of field and focus. Understand how adjusting these settings adds cinematic depth to your renderings, emphasizing key elements while blurring background details for a realistic and visually appealing effect.
Section 7: Configuring Render Settings in AutoCAD
7.1 Rendering Presets: Explore AutoCAD’s rendering presets to streamline the rendering process. Learn how to choose predefined settings or create custom presets based on the desired level of detail, resolution, and quality for your specific visualization needs.
7.2 Output Formats and Resolution: Understand the importance of output formats and resolution settings. Learn how to choose the appropriate file format (JPEG, PNG, etc.) and adjust resolution settings to ensure high-quality renderings suitable for presentations, publications, or digital media.
Section 8: Real-Time Rendering and Iterative Design
8.1 Real-Time Visualization Tools: Explore real-time visualization tools available in AutoCAD. Understand how these tools provide instant feedback on lighting, materials, and camera adjustments, facilitating an iterative design process and allowing for quick refinements.
8.2 Virtual Reality (VR) Integration: Delve into the integration of virtual reality (VR) with AutoCAD rendering. Learn how VR capabilities enhance the immersive experience of exploring 3D models, allowing designers and stakeholders to engage with designs in a more interactive and realistic manner.
Section 9: Collaborative Rendering Workflows
9.1 Rendering Collaboration: Understand how collaborative rendering workflows enhance teamwork. Explore techniques for sharing rendering setups, distributing rendering tasks among team members, and maintaining consistency in visual styles across collaborative projects.
9.2 External References (Xrefs) and Rendering: Explore the integration of external references (Xrefs) with rendering in AutoCAD. Learn how Xrefs can be utilized to enhance collaboration, allowing team members to work on specific sections of a drawing while maintaining the continuity of rendering setups.
Section 10: Challenges and Troubleshooting
10.1 Common Rendering Challenges: Address common challenges encountered during the rendering process. From issues with lighting to unexpected artifacts in materials, gain insights into effective problem-solving strategies to ensure high-quality and visually stunning renderings.
10.2 Troubleshooting Tips: Explore troubleshooting tips for resolving issues related to rendering in AutoCAD. From optimizing performance to addressing conflicts with other design elements, understand how to maintain precision and reliability in your rendered 3D models.
Section 11: Future Trends and Emerging Technologies
11.1 Artificial Intelligence (AI) in Rendering: Delve into the potential impact of artificial intelligence on rendering in AutoCAD. Explore how AI-driven tools may streamline the rendering process, optimize lighting setups, and provide new possibilities in achieving even more realistic results.
11.2 Cloud-Based Rendering Solutions: Explore emerging technologies that leverage cloud-based rendering solutions. Understand how these platforms offer enhanced computing power for complex renderings, enabling designers to achieve high-quality visuals without overburdening local hardware.
Conclusion:
As we conclude this exhaustive exploration of setting up and rendering finished designs in AutoCAD, it is evident that rendering is a transformative step in the design process. Whether you are an architect aiming to present a vision to clients or a product designer showcasing the aesthetic details of a prototype, mastering rendering techniques elevates your designs from technical drawings to visually stunning representations. Embrace the power of realistic lighting, materials, and compelling views in your AutoCAD workflow, and witness how this transformative process breathes life into your creations. With continuous practice, exploration, and innovation, you will navigate the intricate landscape of rendering with confidence, producing visuals that stand as testaments to the power of visualization in the dynamic world of CAD.


