Mastering Slideshow Creation: A Comprehensive Guide to Making Slideshows in Windows Movie Maker
Introduction: Slideshows are a versatile and engaging way to showcase photos, videos, and other multimedia content in a dynamic presentation format. Windows Movie Maker, a user-friendly video editing software developed by Microsoft, offers a simple and intuitive platform for creating professional-looking slideshows with ease. In this comprehensive guide, we’ll explore the intricacies of creating slideshows in Windows Movie Maker, covering techniques, workflows, and expert tips to help you master this essential aspect of multimedia storytelling.
Understanding Slideshow Creation in Windows Movie Maker: Slideshow creation in Windows Movie Maker involves assembling photos, videos, transitions, and audio clips into a cohesive sequence that conveys a narrative or theme. With Windows Movie Maker’s intuitive interface and robust set of features, you can easily arrange and customize your slideshow to achieve the desired visual and emotional impact. Whether you’re creating a family photo album, a travel montage, or a professional presentation, Windows Movie Maker provides the tools and flexibility needed to bring your ideas to life.
Step-by-Step Guide to Creating a Slideshow in Windows Movie Maker:
- Import Your Media Files: Start by importing your photos, videos, and other media files into Windows Movie Maker. You can do this by clicking on the “Add photos and videos” button in the toolbar and selecting the desired files from your computer.
- Arrange Your Media Clips: Once your media files are imported, arrange them in the timeline in the desired sequence. Drag and drop the files onto the timeline to arrange them in the order you want them to appear in the slideshow.
- Add Transitions Between Clips: To create smooth transitions between your media clips, click on the “Animations” tab in the toolbar and select a transition effect from the available options. Apply the selected transition effect between each pair of adjacent clips in the timeline.
- Add Text and Titles (Optional): If desired, you can add text and titles to your slideshow to provide context or enhance the storytelling. Click on the “Home” tab in the toolbar and select the “Title” or “Credits” option to add text overlays to your slideshow.
- Apply Visual Effects (Optional): Windows Movie Maker offers a variety of visual effects that you can apply to your media clips to enhance their appearance. Click on the “Visual Effects” tab in the toolbar and select a desired effect from the available options.
- Add Background Music: To add background music to your slideshow, click on the “Home” tab in the toolbar and select the “Add music” option. Choose a music file from your computer and import it into your project. Drag and drop the music file onto the timeline to add it as a background soundtrack.
- Adjust Music Volume and Duration: Once the music is added to your slideshow, you can adjust its volume level and duration to suit your preferences. Click on the music clip in the timeline to select it, then use the volume controls and trim handles to adjust the volume and duration of the music clip as needed.
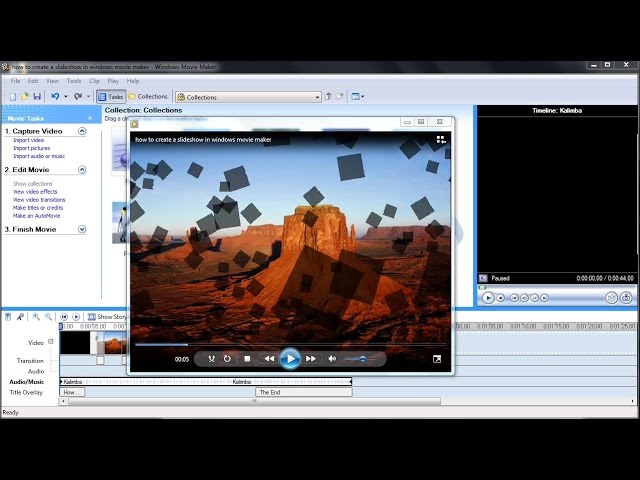
- Preview Your Slideshow: After assembling your slideshow, click on the “Play” button in the preview window to preview the slideshow in real-time. Review the timing, transitions, effects, and audio to ensure that everything is aligned and synchronized correctly.
- Make Adjustments and Edits: If necessary, make any adjustments or edits to your slideshow to improve its visual and audio quality. You can rearrange clips, adjust timings, change transitions, or modify visual effects to achieve the desired result.
- Save and Export Your Slideshow: Once you’re satisfied with your slideshow, click on the “File” tab in the toolbar and select the “Save movie” option. Choose a destination folder and file format for your slideshow, then click “Save” to export the slideshow to your computer.
Tips and Best Practices for Creating Slideshows in Windows Movie Maker:
- Organize Your Media Files: Before importing your media files into Windows Movie Maker, organize them into folders based on themes, events, or categories. This will make it easier to locate and import the desired files when creating your slideshow.
- Use High-Quality Media: When selecting photos and videos for your slideshow, choose high-resolution and high-quality media files to ensure optimal visual clarity and fidelity. Avoid using low-resolution or blurry images that may detract from the overall quality of your slideshow.
- Keep it Concise and Engaging: To maintain viewer engagement, keep your slideshow concise and focused on the main theme or message. Avoid overcrowding the slideshow with too many photos or videos, and strive to maintain a balanced pace and flow throughout.
- Experiment with Transitions and Effects: Windows Movie Maker offers a variety of transition effects and visual effects that you can use to enhance the visual appeal of your slideshow. Experiment with different transitions, effects, and settings to find the combination that best suits your slideshow’s aesthetic.
- Choose Suitable Music: Select background music that complements the mood, tone, and theme of your slideshow. Consider factors such as tempo, genre, and instrumentation to choose music that enhances the emotional impact and storytelling of your slideshow.
- Sync Music with Visuals: When adding background music to your slideshow, ensure that the timing and pacing of the music align with the visuals. Sync music cues with key moments or transitions in the slideshow to create a cohesive and immersive audiovisual experience.
- Preview and Seek Feedback: Before finalizing your slideshow, preview it multiple times to check for any errors or inconsistencies. Share the slideshow with friends, family, or colleagues to gather feedback and insights on its overall quality and impact.
- Save Your Project Regularly: To avoid losing your work, save your project regularly while working on your slideshow in Windows Movie Maker. This will ensure that you can easily recover your progress in case of unexpected computer crashes or software issues.
Conclusion: Creating a slideshow in Windows Movie Maker is a straightforward and rewarding process that allows you to showcase your photos, videos, and other multimedia content in an engaging and dynamic format. With its user-friendly interface and versatile set of features, Windows Movie Maker provides everything you need to bring your creative vision to life and create professional-looking slideshows with ease. By following the steps outlined in this comprehensive guide and embracing best practices, you’ll be well-equipped to master the art of slideshow creation in Windows Movie Maker. Whether you’re creating a family photo album, a travel montage, or a professional presentation, Windows Movie Maker offers the tools, flexibility, and creativity you need to create stunning slideshows that captivate and inspire your audience. So, dive in, experiment fearlessly, and let your creativity shine as you create beautiful and memorable slideshows in Windows Movie Maker.


