Mastering Audio Integration: A Comprehensive Guide to Adding Music to a Video in Sony Vegas Pro
Introduction: Adding music to a video is a crucial aspect of post-production, enhancing the emotional impact, pacing, and overall quality of the content. Sony Vegas Pro, a professional video editing software, offers a robust set of tools and features for seamlessly integrating music into your videos. In this comprehensive guide, we’ll explore the intricacies of adding music to a video in Sony Vegas Pro, covering techniques, workflows, and expert tips to help you master this essential aspect of video editing and storytelling.
Understanding Music Integration in Sony Vegas Pro: Music integration involves synchronizing audio tracks with video footage to create a cohesive and engaging viewing experience. In Sony Vegas Pro, you can import music files, arrange them in the timeline, adjust volume levels, apply effects, and synchronize music cues with specific moments in the video. Whether you’re editing films, music videos, commercials, or vlogs, Sony Vegas Pro provides the tools and flexibility needed to add music seamlessly to your projects.
Step-by-Step Guide to Adding Music to a Video in Sony Vegas Pro:
- Import Your Video Footage: Start by importing your video footage into Sony Vegas Pro. You can do this by navigating to the Media tab, selecting the video files from your computer, and importing them into your project library.
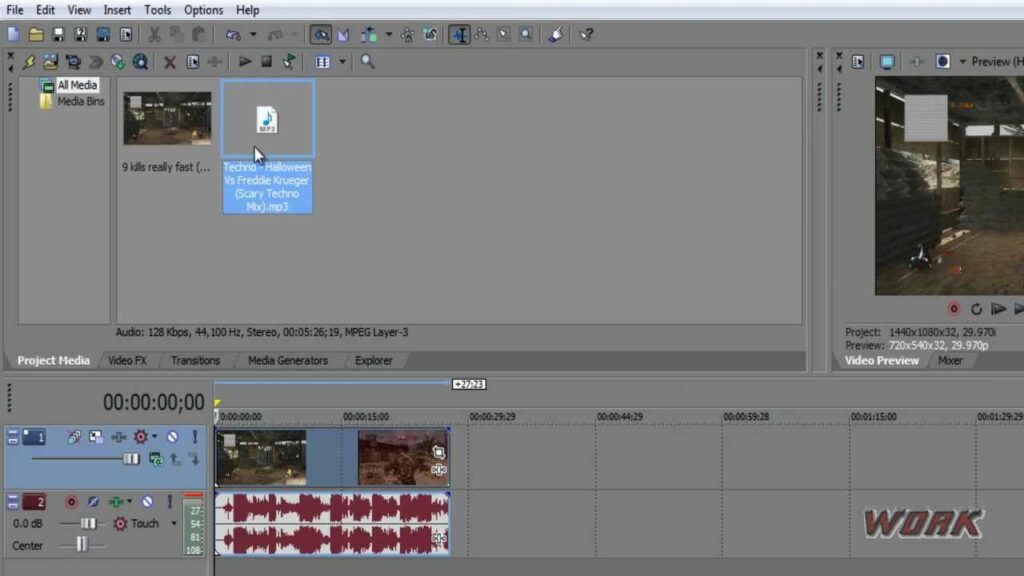
- Import Your Music: Next, import your music files into Sony Vegas Pro. Navigate to the Media tab, select the music files from your computer, and import them into your project library. Alternatively, you can drag and drop the music files directly into the timeline.
- Arrange Music Tracks in the Timeline: Once your music files are imported, arrange them in the timeline to align with the desired sections of your video footage. Use the mouse to drag and drop the music tracks to the appropriate position in the timeline.
- Trim and Edit Music Tracks: If necessary, trim and edit the music tracks to fit the duration of your video. Use the trim handles in the timeline to adjust the start and end points of the music tracks, ensuring that they synchronize smoothly with the video footage.
- Adjust Volume Levels: Use the volume controls in the timeline to adjust the volume levels of the music tracks relative to the video footage. You can adjust the overall volume level of each music track or create keyframes to automate volume changes over time.
- Apply Audio Effects (if desired): Sony Vegas Pro offers a variety of audio effects and plugins that you can apply to your music tracks to enhance their sound quality or create creative effects. Experiment with effects such as EQ, reverb, delay, or compression to achieve the desired audio aesthetic.
- Synchronize Music Cues: To synchronize music cues with specific moments in the video, use markers or visual cues in the timeline to identify key moments or transitions. Align the music cues with these markers to create a seamless and synchronized audiovisual experience.
- Preview and Fine-Tune: After arranging and editing the music tracks in the timeline, preview the video with the music to assess the timing, pacing, and overall impact of the audio integration. Make any necessary adjustments to the timing, volume levels, or effects to achieve the desired result.
- Add Transitions (if desired): To create smooth transitions between music tracks or between music and dialogue, use crossfades or audio transitions in the timeline. This helps to blend the audio seamlessly and avoid abrupt changes that may disrupt the flow of the video.
- Mix and Master (if necessary): If you’re working with multiple audio tracks or layers of music, consider mixing and mastering the audio to achieve a balanced and cohesive sound. Use audio mixing techniques to adjust levels, panning, and EQ settings to optimize the overall audio quality.
- Preview and Export: Once you’re satisfied with the audio integration, preview the final video with music to ensure that it meets your creative vision and quality standards. Then, export the video with the integrated music by selecting File > Render As and choosing the desired export settings.
Tips and Best Practices for Adding Music to a Video in Sony Vegas Pro:
- Choose Music Wisely: Select music that complements the mood, tone, and pacing of your video content. Consider factors such as genre, tempo, and instrumentation to find the perfect soundtrack for your project.
- Consider Copyright and Licensing: When selecting music for your videos, ensure that you have the necessary rights and permissions to use the music legally. Choose royalty-free music, licensed tracks, or original compositions to avoid copyright infringement issues.
- Use Music to Enhance Storytelling: Think of music as an integral part of your storytelling toolkit. Use music cues, motifs, and themes to enhance emotional moments, build tension, or convey narrative arcs in your video content.
- Pay Attention to Timing and Pacing: When adding music to your videos, pay close attention to the timing and pacing of the music relative to the visuals. Sync music cues with key moments or transitions in the video to create a harmonious and immersive viewing experience.
- Layer Music for Depth and Texture: Experiment with layering multiple music tracks or audio elements to add depth, texture, and complexity to your video soundtrack. Blend different musical elements together to create a rich and dynamic audio landscape that enhances the overall impact of your video.
- Use Sound Effects Sparingly: While sound effects can complement music and enhance the audiovisual experience, use them sparingly to avoid overwhelming the soundtrack. Incorporate sound effects judiciously to accentuate specific moments or add realism to your video content.
- Test on Different Playback Devices: Before finalizing your video with music, test the audio playback on different devices and systems to ensure compatibility and optimal sound quality. Listen to the audio through headphones, speakers, and mobile devices to identify any potential issues or discrepancies.
- Seek Feedback and Iterate: Share your video with music with colleagues, friends, or collaborators to gather feedback and insights on the audio integration. Use constructive feedback to refine your approach and make improvements to the audio soundtrack.
Conclusion: Adding music to a video is a creative and impactful process that enhances the emotional resonance, pacing, and storytelling of your content. With Sony Vegas Pro, you have the tools and capabilities to integrate music seamlessly into your videos, creating immersive and engaging viewing experiences for your audience. By following the steps outlined in this comprehensive guide and embracing best practices, you’ll be well-equipped to master the art of adding music to a video in Sony Vegas Pro. Whether you’re editing films, music videos, commercials, or vlogs, Sony Vegas Pro provides the flexibility, precision, and creativity you need to elevate the audiovisual quality of your projects. So, dive in, experiment fearlessly, and let your creativity shine as you integrate music into your videos with Sony Vegas Pro.


