Mastering Lens Flare Effects: A Comprehensive Guide to Adding Lens Flares in Adobe Premiere Pro

Introduction: Lens flares are a popular visual effect used in filmmaking to add drama, atmosphere, and visual interest to videos. They mimic the natural phenomenon of light scattering within a camera lens, creating colorful streaks or spots that enhance the overall cinematic quality of the footage. Adobe Premiere Pro, a leading video editing software, offers powerful tools and features for adding lens flare effects to your videos with ease. In this comprehensive guide, we’ll explore the intricacies of adding lens flare effects in Adobe Premiere Pro, covering techniques, workflows, and expert tips to help you master this essential aspect of visual storytelling and post-production.
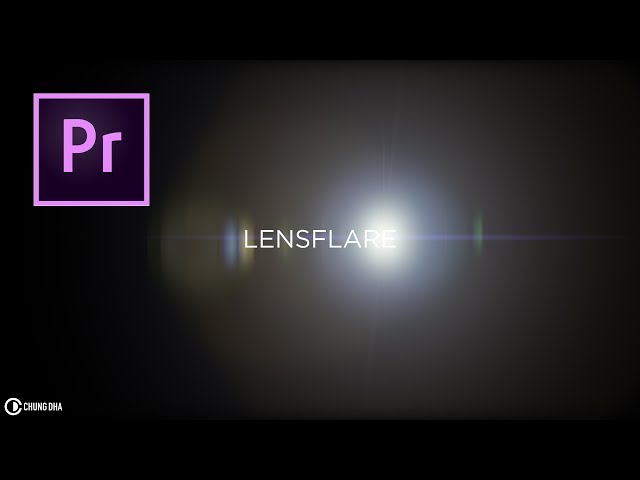
Understanding Lens Flare Effects in Adobe Premiere Pro: Lens flare effects in Adobe Premiere Pro involve overlaying digital lens flare elements onto video footage to create a stylized and cinematic look. These lens flare elements can range from subtle streaks of light to dramatic bursts of color, depending on the desired aesthetic and mood of the video. Premiere Pro provides various methods for adding lens flares, including built-in effects, third-party plugins, and manual techniques using blending modes and keyframes. By leveraging these tools and techniques, you can enhance the visual impact and professionalism of your videos with captivating lens flare effects.
Step-by-Step Guide to Adding Lens Flare Effects in Adobe Premiere Pro:
- Import Your Footage: Start by importing your video footage into Adobe Premiere Pro. You can do this by navigating to the Project panel, right-clicking, and selecting “Import” to import your video files into the project.
- Create a New Sequence: Once your footage is imported, create a new sequence by dragging and dropping the desired video clip onto the New Item button at the bottom of the Project panel. This will create a new sequence with the same settings as your video footage.
- Add a Lens Flare Effect: There are several ways to add a lens flare effect in Adobe Premiere Pro:
a. Using Built-in Effects: Premiere Pro offers built-in effects such as “Lumetri Color” and “Light Leak” that can be used to create lens flare effects. Drag and drop these effects onto an adjustment layer or directly onto your video clip in the timeline.
b. Using Third-Party Plugins: Alternatively, you can use third-party plugins such as Red Giant’s “Knoll Light Factory” or Video Copilot’s “Optical Flares” to add realistic lens flare effects to your footage. Install the plugin, apply it to your video clip, and customize the settings to achieve the desired look.
c. Manual Techniques: For more control and customization, you can create lens flare effects manually using blending modes and keyframes. Create a new solid color layer, apply the “Lens Flare” effect from the Effects panel, and adjust the position, brightness, and color of the flare using the controls in the Effect Controls panel.
- Adjust Blend Mode and Opacity: Depending on the desired intensity and blending of the lens flare effect, adjust the blend mode and opacity of the effect layer in the Effect Controls panel. Experiment with different blend modes such as Screen, Add, or Overlay to achieve the desired blending with the underlying footage.
- Position and Scale the Lens Flare: Use the Transform controls in the Effect Controls panel to adjust the position, scale, and rotation of the lens flare effect within the frame. Position the flare where it enhances the composition and visual flow of the video footage.
- Animate the Lens Flare (Optional): To create dynamic and realistic lens flare effects, animate the position, scale, or opacity of the effect layer over time using keyframes. Use the timeline and keyframe controls in the Effect Controls panel to create smooth and natural-looking animations.
- Fine-Tune the Settings: After applying the lens flare effect, fine-tune the settings such as brightness, color, saturation, and blur to achieve the desired look and feel. Experiment with different settings to create unique and visually striking lens flare effects.
- Preview and Adjust: Preview the video footage with the lens flare effect applied to assess its visual impact and quality. Make any necessary adjustments to the settings, position, or animation of the lens flare to refine the effect and ensure that it enhances the overall cinematic quality of the footage.
- Add Multiple Lens Flares (if desired): For more complex and dynamic lens flare effects, consider adding multiple lens flares to different areas of the frame. Repeat the process outlined above to add additional lens flares and customize their settings to create a visually engaging composition.
- Render and Export: Once you’re satisfied with the lens flare effects applied to your footage, render the video by selecting File > Export > Media. Choose the desired export settings, including format, resolution, and bitrate, and click Export to render the final video with the lens flare effects.
Tips and Best Practices for Adding Lens Flare Effects in Adobe Premiere Pro:
- Use Lens Flares Sparingly: While lens flare effects can add visual interest and drama to your footage, it’s essential to use them sparingly and strategically. Avoid overusing lens flares, as excessive flare effects can distract from the main content of the video.
- Consider Context and Tone: When adding lens flare effects, consider the context, mood, and tone of the video footage. Choose lens flare styles and settings that complement the overall aesthetic and storytelling of the video without overpowering or overshadowing the content.
- Experiment with Different Flare Styles: Premiere Pro offers a variety of lens flare styles and presets that you can experiment with to achieve different looks and effects. Try out different flare shapes, colors, and intensities to find the style that best suits your project.
- Blend Flares with Footage: To create a seamless integration between the lens flare effects and the underlying footage, experiment with different blend modes and opacity settings. Adjust these settings to achieve a natural and harmonious blending of the flare with the video content.
- Match Flares to Light Sources: When adding lens flare effects to your footage, consider the placement and direction of light sources within the scene. Position the flares in areas where they naturally align with the direction of light to create a more convincing and realistic effect.
- Animate Flares for Dynamic Motion: To create dynamic and engaging lens flare effects, animate the position, scale, or opacity of the flares over time. Use keyframes to animate these properties and create subtle movements that enhance the realism and dynamism of the flares.
- Use Color Grading to Enhance Flares: Experiment with color grading techniques to enhance the appearance and impact of the lens flare effects. Adjust the color temperature, tint, and saturation of the footage to create a cohesive and visually pleasing color palette that complements the flare effects.
- Seek Inspiration and Feedback: Look for inspiration from films, videos, and visual effects artists to discover creative ways of incorporating lens flare effects into your projects. Share your work with colleagues, friends, or online communities to gather feedback and insights on your lens flare compositions.
Conclusion: Adding lens flare effects in Adobe Premiere Pro is a creative and effective way to enhance the visual quality and cinematic appeal of your videos. With its powerful tools and features, Premiere Pro provides everything you need to create captivating lens flare effects that elevate the overall aesthetic and storytelling of your footage. By following the steps outlined in this comprehensive guide and embracing best practices, you’ll be well-equipped to master the art of adding lens flare effects in Adobe Premiere Pro. Whether you’re editing films, music videos, commercials, or vlogs, Premiere Pro offers the flexibility, precision, and creativity you need to create stunning lens flare compositions that captivate and inspire your audience. So, dive in, experiment fearlessly, and let your creativity shine as you add mesmerizing lens flare effects to your videos in Adobe Premiere Pro.


