Mastering Motion: An In-Depth Guide to Object Tracking in Fusion in DaVinci Resolve
Introduction:
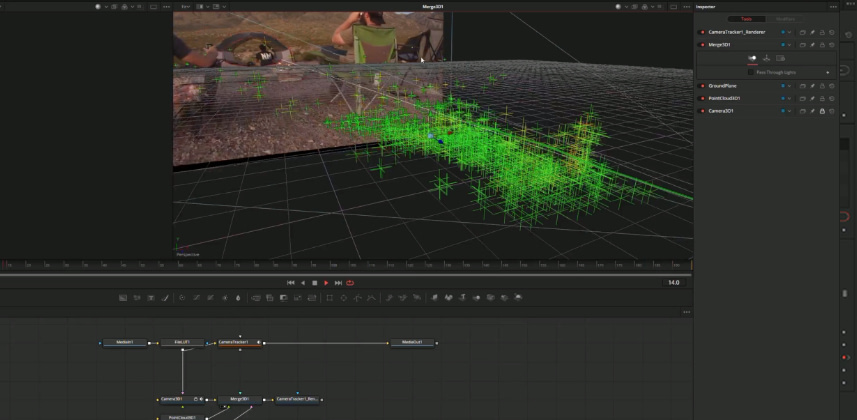
Object tracking is a crucial technique in visual effects and motion graphics, enabling filmmakers, editors, and visual artists to seamlessly integrate elements into their footage, add dynamic effects, and enhance storytelling. In DaVinci Resolve, the Fusion page provides powerful tools for object tracking, allowing users to track the movement of objects within a scene and apply effects, animations, or other adjustments based on that movement. In this comprehensive guide, we’ll delve deep into the art of object tracking in Fusion in DaVinci Resolve, providing you with the knowledge and techniques to master this essential skill and elevate your projects to new heights.
Understanding Object Tracking in Fusion:
Object tracking in Fusion involves analyzing the movement of objects within a video clip and generating tracking data that can be used to apply transformations, animations, or other effects to those objects. Fusion offers several tracking tools and techniques for both 2D and 3D tracking, allowing users to track various types of objects, including points, shapes, and planes, with precision and accuracy. Whether you’re tracking a moving subject, stabilizing shaky footage, or adding visual effects to a scene, Fusion’s object tracking capabilities provide the flexibility and control you need to achieve professional results.
Using Object Tracking in Fusion in DaVinci Resolve:
Let’s explore the step-by-step process of object tracking in Fusion in DaVinci Resolve:
- Open the Fusion Page:
- Launch DaVinci Resolve and open your project. Navigate to the Fusion page by clicking on the Fusion tab at the bottom of the interface. The Fusion page provides a node-based compositing environment where you’ll perform object tracking and apply visual effects.
- Add Tracking Nodes:
- Start by adding tracking nodes to the Fusion composition. Right-click in the node graph and select “Add Tool” > “Tracker” to add a tracker node to the composition. Fusion offers various tracker nodes for different tracking tasks, including point trackers, planar trackers, and camera trackers.
- Define Tracking Regions:
- Define the regions of interest within the video clip that you want to track. For point tracking, select specific points or features within the footage to track their movement over time. For planar tracking, define a larger region or shape that encompasses the area you want to track, such as a face, logo, or background element.
- Initiate Tracking:
- Initiate the tracking process by starting the tracker node and analyzing the movement of the defined regions within the footage. Fusion will analyze the pixel data in each frame of the video clip and generate tracking data based on the movement of the tracked regions.
- Refine Tracking Parameters:
- Fine-tune the tracking parameters to improve the accuracy and reliability of the tracking data. Adjust settings such as search area, search size, sensitivity, and keyframe interval to optimize the tracking process and ensure robust tracking results, especially in challenging or complex footage.
- Review Tracking Data:
- Review the tracking data in the tracker node to assess the accuracy and consistency of the tracking results. Scrub through the timeline to inspect the movement of the tracked regions over time and verify that the tracking data aligns with the actual motion in the footage.
- Apply Tracked Data:
- Once you’re satisfied with the tracking results, use the tracked data to drive transformations, animations, or other effects within the composition. Connect the output of the tracker node to other nodes in the composition, such as transform nodes, to apply the tracked data to other elements in the scene.
- Refine and Adjust:
- Fine-tune the applied transformations, animations, or effects based on the tracked data to achieve the desired visual result. Use the controls and parameters of the connected nodes to adjust the position, scale, rotation, opacity, or other properties of the tracked elements to seamlessly integrate them into the scene.
- Preview and Playback:
- Preview the composition in the viewer window to assess the appearance and behavior of the tracked elements within the scene. Playback the timeline to see how the tracked elements interact with the rest of the footage and evaluate the overall visual impact of the tracking and effects.
- Render Your Project:
- Once you’re satisfied with the object tracking and visual effects applied to your composition, render your project to export the final video with the tracked elements included. Navigate to the Deliver page, configure the export settings, and click “Add to Render Queue” to queue the project for rendering. Then, click “Start Render” to export the video with your desired effects.
Best Practices for Object Tracking:
To achieve accurate and reliable object tracking results in Fusion in DaVinci Resolve, consider the following best practices:
- Choose the Right Tracking Method:
- Select the appropriate tracking method based on the nature of the object and the characteristics of the footage. For simple motion tracking tasks, use point trackers to track specific features or points of interest. For more complex tracking tasks, such as tracking faces or moving objects, use planar trackers or 3D trackers to track larger regions or surfaces within the scene.
- Define Clear Tracking Regions:
- Define clear and distinct regions of interest within the footage to track. Choose high-contrast features or areas with consistent texture and detail to ensure reliable tracking results. Avoid tracking regions that are too small, blurry, or occluded by other objects in the scene, as this can lead to tracking errors or inaccuracies.
- Refine Tracking Parameters:
- Take the time to fine-tune the tracking parameters to optimize the tracking process and improve the accuracy of the tracking results. Experiment with different settings such as search area, search size, sensitivity, and keyframe interval to find the optimal balance between speed and accuracy for your specific tracking task.
- Track Multiple Points for Stability:
- If tracking a moving object or scene, consider tracking multiple points or features within the footage to improve tracking stability and reliability. Track points on different parts of the object or scene to capture its overall motion and ensure robust tracking results, especially in footage with complex motion or camera movement.
- Use Keyframes for Manual Adjustment:
- Use keyframes to manually adjust the tracked data if necessary, especially in cases where the automatic tracking process may produce inaccurate or inconsistent results. Manually adjust the position, scale, rotation, or other parameters of the tracked elements using keyframes to ensure precise alignment with the scene.
- Test and Iterate:
- Test your tracking results in different scenarios and conditions to ensure their robustness and reliability across various types of footage. Iterate on your tracking process, experiment with different techniques and approaches, and refine your tracking workflow based on feedback and experience to achieve optimal results.
Conclusion:
Object tracking in Fusion in DaVinci Resolve is a versatile and indispensable tool for filmmakers, editors, and visual artists, enabling them to seamlessly integrate elements into their footage, add dynamic effects, and enhance storytelling. By mastering the art of object tracking, you can unlock endless creative possibilities and elevate the visual impact of your projects with stunning visual effects, immersive motion graphics, and seamless composites. Whether you’re tracking moving objects, stabilizing shaky footage, or adding visual enhancements to a scene, DaVinci Resolve’s object tracking capabilities provide the flexibility, precision, and control you need to achieve professional results. Experiment with different techniques, explore creative workflows, and let your imagination soar as you push the boundaries of what’s possible with object tracking in Fusion in DaVinci Resolve.
