Mastering Electrical Audits with Autodesk Electrical: A Comprehensive Guide

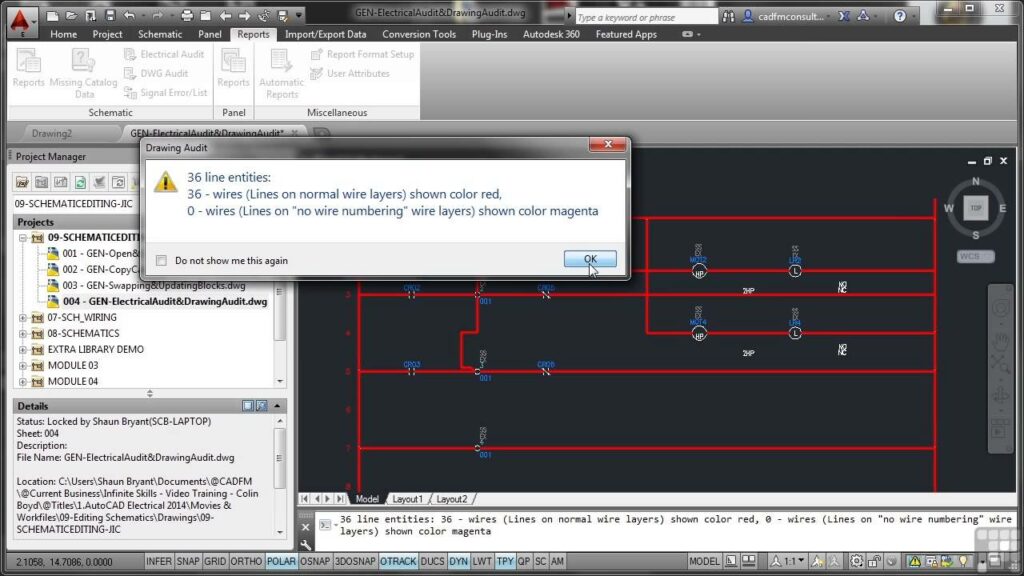
The Electrical Audit tool in Autodesk Electrical is a powerful feature designed to streamline the process of auditing electrical designs. It enables designers and engineers to conduct thorough reviews of schematic drawings, identify potential issues or inconsistencies, and ensure compliance with industry standards and project requirements. In this comprehensive guide, we will explore the intricacies of using the Electrical Audit tool in Autodesk Electrical, providing detailed instructions, best practices, and expert tips to help you master this essential aspect of electrical design auditing.
Understanding the Significance of Electrical Audits
Electrical audits play a critical role in ensuring the quality, safety, and compliance of electrical designs. Key benefits of conducting electrical audits include:
- Error Identification: Electrical audits help identify errors, omissions, and inconsistencies in schematic drawings, preventing costly mistakes and rework during the construction phase.
- Compliance Assurance: By verifying adherence to industry standards, regulatory requirements, and best practices, electrical audits ensure that designs meet safety, reliability, and performance criteria.
- Risk Mitigation: Proactive identification and resolution of design issues through electrical audits minimize the risk of electrical failures, accidents, and operational disruptions in real-world applications.
Using the Electrical Audit Tool in Autodesk Electrical
Now, let’s delve into the step-by-step process of using the Electrical Audit tool within Autodesk Electrical:
Step 1: Accessing the Electrical Audit Tool
- Menu Navigation: Navigate to the “Audit” menu or toolbar within Autodesk Electrical to access the Electrical Audit tool.
- Workspace Configuration: Set up the workspace to display the Electrical Audit interface, which typically includes options for audit parameters and criteria.
Step 2: Configuring Audit Parameters
- Audit Settings: Configure audit parameters such as checking criteria, validation rules, and tolerance thresholds to customize the audit process.
- Scope Selection: Define the scope of the audit by specifying which schematic drawings, circuits, or components to include in the audit analysis.
Step 3: Running the Audit
- Audit Execution: Initiate the audit process by selecting the appropriate command or button within the Electrical Audit interface.
- Analysis Progress: Monitor the progress of the audit analysis, which may involve scanning schematic drawings, analyzing component properties, and checking for errors or inconsistencies.
Step 4: Reviewing Audit Results
- Audit Report: Review the audit results presented in the form of a report or summary, highlighting issues, warnings, and recommendations identified during the audit.
- Error Identification: Identify and prioritize critical issues requiring immediate attention, such as wiring errors, component conflicts, or missing annotations.
Step 5: Resolving Audit Findings
- Issue Resolution: Take appropriate actions to resolve audit findings, such as correcting errors, updating component properties, or revising schematic drawings as needed.
- Documentation: Document audit findings, resolutions, and corrective actions for future reference, auditing, and knowledge transfer purposes.
Best Practices for Electrical Audits
To optimize the effectiveness of electrical audits in Autodesk Electrical, consider the following best practices:
Pre-Audit Preparation
- Document Review: Review project requirements, specifications, and design guidelines before conducting the audit to establish baseline criteria and expectations.
- Backup Creation: Create backups of schematic drawings and project files to preserve the original state and facilitate restoration in case of audit-related modifications.
Thorough Analysis
- Comprehensive Scope: Expand the audit scope to include all relevant aspects of the electrical design, such as component properties, wiring configurations, and annotation consistency.
- Multi-Disciplinary Review: Involve stakeholders from different disciplines, such as electrical engineering, mechanical engineering, and project management, in the audit process to gather diverse perspectives and insights.
Continuous Improvement
- Feedback Incorporation: Incorporate feedback from previous audits and lessons learned into future audit processes to enhance effectiveness and efficiency.
- Training and Education: Provide training and education to design team members on audit procedures, best practices, and software features to promote continuous improvement and skill development.
Conclusion
The Electrical Audit tool in Autodesk Electrical empowers designers and engineers to conduct thorough and systematic reviews of electrical designs, ensuring quality, safety, and compliance with industry standards and project requirements. By following the steps outlined in this guide and adhering to best practices, you can harness the full potential of the Electrical Audit tool to identify and resolve design issues proactively, mitigate risks, and deliver superior electrical designs. Whether you’re working on building systems, industrial automation, or power distribution networks, proficiency in using the Electrical Audit tool will enable you to optimize design quality and reliability, ultimately contributing to the success of your projects and the satisfaction of your clients.


