Mastering Disk Defragmentation: A Comprehensive Guide to Defragmenting the Hard Drive in Windows XP
In the intricate world of computer maintenance, optimizing disk performance is essential for ensuring smooth operation, enhancing system responsiveness, and prolonging hardware lifespan. Windows XP offers users a powerful built-in tool called Disk Defragmenter, designed to improve disk performance by rearranging fragmented files and optimizing disk storage. Whether you’re a casual user seeking to maintain system health or a tech-savvy individual aiming to fine-tune disk performance, knowing how to defragment the hard drive in Windows XP is essential. In this exhaustive guide, we’ll delve deep into the intricacies of disk defragmentation, empowering users to optimize their disk performance with confidence and precision.
Understanding Disk Defragmentation in Windows XP:
Before we explore the methods for defragmenting the hard drive, it’s crucial to understand the significance of disk defragmentation within the Windows XP operating system. Disk defragmentation is the process of rearranging fragmented files and data on the hard drive to improve access times, reduce disk head movement, and optimize disk performance. Over time, as files are created, modified, and deleted, they become fragmented, scattered across different physical locations on the disk. Fragmentation can lead to slower read and write speeds, increased disk wear, and decreased system performance. Disk Defragmenter analyzes the disk, identifies fragmented files, and reorganizes them into contiguous blocks, resulting in faster access times and improved system responsiveness.
Step-by-Step Guide to Defragmenting the Hard Drive:
Now, let’s explore a systematic approach to defragmenting the hard drive in Windows XP:
Step 1: Accessing Disk Defragmenter:
- Click on the “Start” button located at the bottom-left corner of the screen.
- Navigate to “All Programs,” then “Accessories,” then “System Tools,” and finally, click on “Disk Defragmenter” to launch the utility.
Step 2: Selecting the Drive to Defragment:
- In the Disk Defragmenter window, you’ll see a list of available drives.
- Select the drive you want to defragment (usually the C: drive) by clicking on it to highlight it.
- Optionally, you can analyze the selected drive before defragmenting it by clicking on the “Analyze” button. This will assess the fragmentation level of the drive and provide a report on its status.
Step 3: Initiating Defragmentation Process:
- After selecting the drive, click on the “Defragment” button to start the defragmentation process.
- Disk Defragmenter will begin analyzing the selected drive and defragmenting fragmented files and data.
- The defragmentation process may take some time to complete, depending on the size of the drive and the level of fragmentation. Be patient and allow Disk Defragmenter to finish its work.
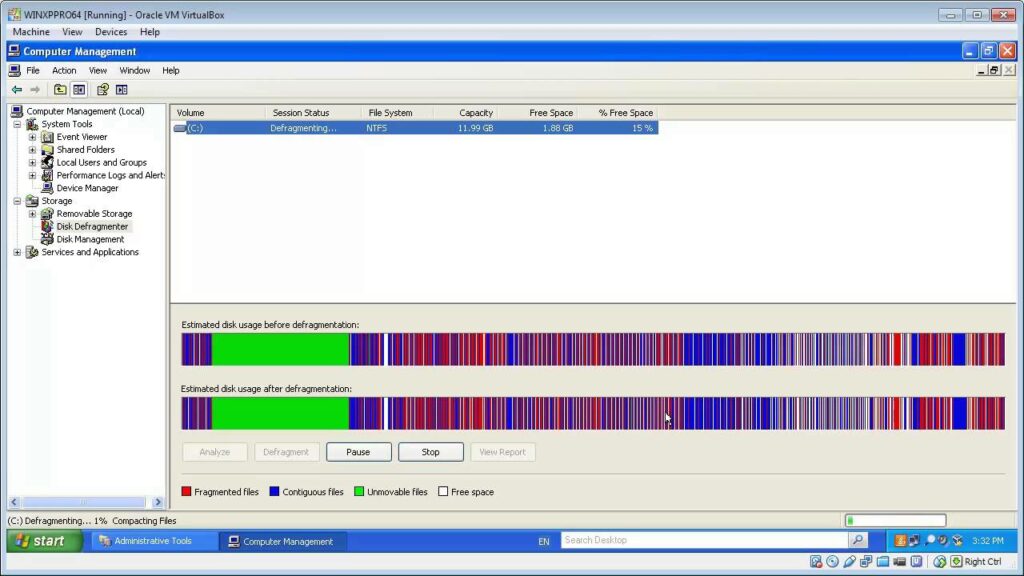
Step 4: Monitoring Defragmentation Progress:
- While Disk Defragmenter is running, you can monitor the progress of the defragmentation process in the utility’s window.
- A visual representation of the drive’s fragmentation progress will be displayed, along with a progress bar indicating the completion status.
- You can also view detailed information about the defragmentation process, including the number of fragmented files processed and the elapsed time.
Step 5: Completing Defragmentation Process:
- Once Disk Defragmenter has finished defragmenting the selected drive, it will display a completion message indicating that the process is complete.
- You can review the defragmentation report to see the results of the defragmentation process, including the percentage of fragmentation reduced and the number of files processed.
- Click “Close” to exit Disk Defragmenter.
Advanced Defragmentation Options (Optional):
For users seeking more advanced defragmentation options and customization, Disk Defragmenter offers additional features:
- Scheduling Defragmentation: Users can schedule automatic defragmentation tasks to run at specific times or intervals using the “Schedule” button in Disk Defragmenter. This allows for regular maintenance of disk performance without manual intervention.
- Analyzing Additional Drives: Disk Defragmenter allows users to analyze and defragment additional drives, including external hard drives, USB drives, and network drives, by selecting them from the list of available drives.
Conclusion:
In conclusion, defragmenting the hard drive in Windows XP offers users a powerful way to optimize disk performance, improve system responsiveness, and prolong hardware lifespan. By following the step-by-step guide outlined in this article and exploring advanced defragmentation options, users can maintain peak disk performance with confidence and precision. Whether optimizing disk performance for smoother operation, reducing disk wear, or maximizing system efficiency, mastering the use of Disk Defragmenter empowers users to optimize their Windows XP experience. So take control of disk defragmentation today and unlock the full potential of your Windows XP system!


