Mastering Default Programs: A Comprehensive Guide to Changing Default Programs in Windows 7
In the multifaceted landscape of Windows 7, default programs play a pivotal role in defining how users interact with various file types and protocols. Whether opening a document, viewing images, or browsing the web, Windows 7 relies on default programs to seamlessly handle these tasks. Understanding how to change default programs empowers users to tailor their computing experience to their preferences and workflow. In this extensive guide, we will embark on a journey to demystify the process of changing default programs in Windows 7, exploring its intricacies and providing step-by-step instructions for seamless customization.
Understanding Default Programs in Windows 7:
Before delving into the intricacies of changing default programs, let’s first grasp the concept and significance of default programs in Windows 7:
- Definition: Default programs are applications or utilities designated by the operating system to open specific file types or handle certain protocols by default. For example, a web browser is typically the default program for opening HTML files, while a media player may be the default for playing audio or video files.
- Versatility: Default programs in Windows 7 are versatile and customizable, allowing users to specify their preferred applications for handling various file types, protocols, and tasks. This flexibility enables users to tailor their computing environment to their preferences and workflow.
- Integration: Default programs are deeply integrated into the Windows 7 operating system, ensuring seamless interoperability between applications and file types. By designating default programs, users can streamline their interactions with digital content and enhance productivity.
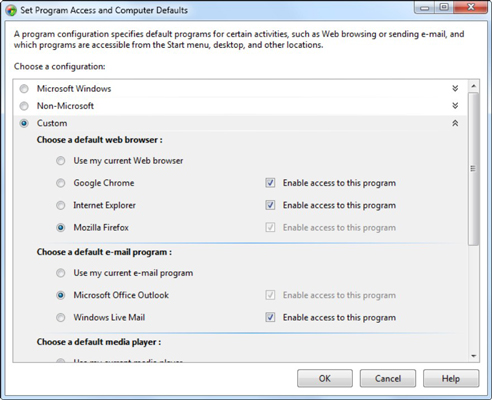
Changing Default Programs in Windows 7:
Now, let’s explore the step-by-step process of changing default programs in Windows 7:
- Accessing Default Programs Settings:
- Click on the Start button in the taskbar.
- Navigate to “Control Panel” > “Programs” > “Default Programs.”
- Choosing Default Programs by File Type:
- In the Default Programs window, select “Associate a file type or protocol with a program.”
- Scroll through the list of file extensions to find the file type you want to change the default program for, or use the search box to filter the list.
- Selecting a New Default Program:
- Once you’ve located the desired file type, click on it to select it.
- Click on the “Change program” button at the top of the window to choose a new default program for the selected file type.
- Choosing Default Programs by Protocol:
- In the Default Programs window, select “Associate a file type or protocol with a program.”
- Scroll down to the list of protocols to find the protocol you want to change the default program for, or use the search box to filter the list.
- Click on the protocol to select it, and then click on the “Change program” button to specify a new default program for the selected protocol.
- Selecting from Available Programs:
- In the “Open With” dialog box that appears, you’ll see a list of available programs that can open the selected file type or handle the selected protocol.
- Choose the desired program from the list, or click on the “Browse” button to locate an alternative program on your computer.
- Confirming Changes:
- After selecting the new default program, click on the “OK” button to confirm your selection and apply the changes.
- Windows 7 will update the default program association for the selected file type or protocol accordingly.
Advanced Features and Tips:
To make the most of default program customization in Windows 7 and optimize your computing experience, consider the following advanced features and tips:
- Customizing Program Associations: In addition to changing default programs for specific file types or protocols, you can also customize program associations for individual applications. Navigate to “Control Panel” > “Programs” > “Default Programs” > “Set associations” to customize program associations on a per-application basis.
- Resetting Default Programs: If you’ve made changes to default programs and want to revert to the original settings, you can reset default program associations to their defaults. In the Default Programs window, select “Set your default programs” and choose the option to “Reset all defaults.”
- Using Third-Party Utilities: Explore third-party utilities and software solutions designed to enhance default program management and customization in Windows 7. These utilities may offer additional features, such as bulk program association changes, advanced customization options, and integration with third-party applications.
- Experimenting with Alternative Programs: Don’t hesitate to experiment with alternative programs and applications for handling specific file types or protocols. Windows 7 provides the flexibility to choose the programs that best suit your preferences and workflow, so explore different options to find the perfect fit.
Conclusion:
Changing default programs in Windows 7 is a straightforward yet powerful way to customize your computing environment and enhance productivity. By following the comprehensive guide outlined above, users can gain a deeper understanding of default programs and leverage their versatility to tailor their Windows 7 experience to their preferences and workflow. Whether it’s designating a preferred web browser, media player, or photo viewer, default program customization empowers users to take control of their digital interactions and optimize their computing experience. So dive into the world of default program customization today, explore new possibilities, and unlock the full potential of your Windows 7 system.


