Optimizing Disk Space: A Comprehensive Guide to Using Disk Cleanup in Windows 7
In the digital ecosystem of Windows 7, managing disk space is paramount for ensuring optimal system performance and efficiency. Enter Disk Cleanup, a built-in utility designed to help users reclaim valuable disk space by removing unnecessary files and temporary data. In this extensive guide, we will embark on a journey to demystify Disk Cleanup, exploring its myriad features and functionalities to empower users with the tools and knowledge needed to optimize disk space and enhance system performance in Windows 7.
Understanding Disk Cleanup in Windows 7:
Before delving into the intricacies of using Disk Cleanup, let’s first grasp the concept and significance of this indispensable utility:
- Definition: Disk Cleanup is a system maintenance tool included in Windows 7 that helps users free up disk space by deleting unnecessary files, temporary data, and system files that are no longer needed.
- Versatility: Disk Cleanup targets various types of files that can accumulate over time and consume valuable disk space, including temporary files, system files, cached data, and more.
- Performance Enhancement: By regularly running Disk Cleanup, users can optimize system performance, reduce disk clutter, and improve overall efficiency by freeing up space on their hard drives.
Using Disk Cleanup in Windows 7:
Now, let’s explore the step-by-step process of using Disk Cleanup to reclaim disk space and enhance system performance:
- Accessing Disk Cleanup:
- Click on the Start button in the taskbar.
- Navigate to “All Programs” > “Accessories” > “System Tools” > “Disk Cleanup.”
- Selecting Disk Drive:
- In the Disk Cleanup dialog box, you’ll be prompted to select the disk drive you want to clean up.
- Choose the drive you wish to clean (typically the C: drive, which is the primary system drive) and click on the “OK” button.
- Analyzing Disk Space:
- Disk Cleanup will begin scanning the selected drive to analyze the amount of disk space that can be reclaimed by removing unnecessary files.
- This process may take some time depending on the size of the drive and the number of files to be analyzed.
- Choosing Cleanup Options:
- Once the analysis is complete, Disk Cleanup will present you with a list of file categories that can be safely deleted.
- Check the checkboxes next to the types of files you want to remove. These may include temporary files, system files, downloaded program files, and more.
- Performing Cleanup:
- After selecting the desired cleanup options, click on the “OK” button to initiate the cleanup process.
- Disk Cleanup will proceed to delete the selected files, freeing up disk space on the selected drive.
- Confirming Deletion:
- Depending on the types of files selected for deletion, Disk Cleanup may prompt you to confirm that you want to permanently delete these files.
- Review the confirmation dialog carefully and click on the “Delete Files” button to confirm and proceed with the cleanup.
Advanced Features and Tips:
To make the most of Disk Cleanup and optimize disk space management in Windows 7, consider the following advanced features and tips:
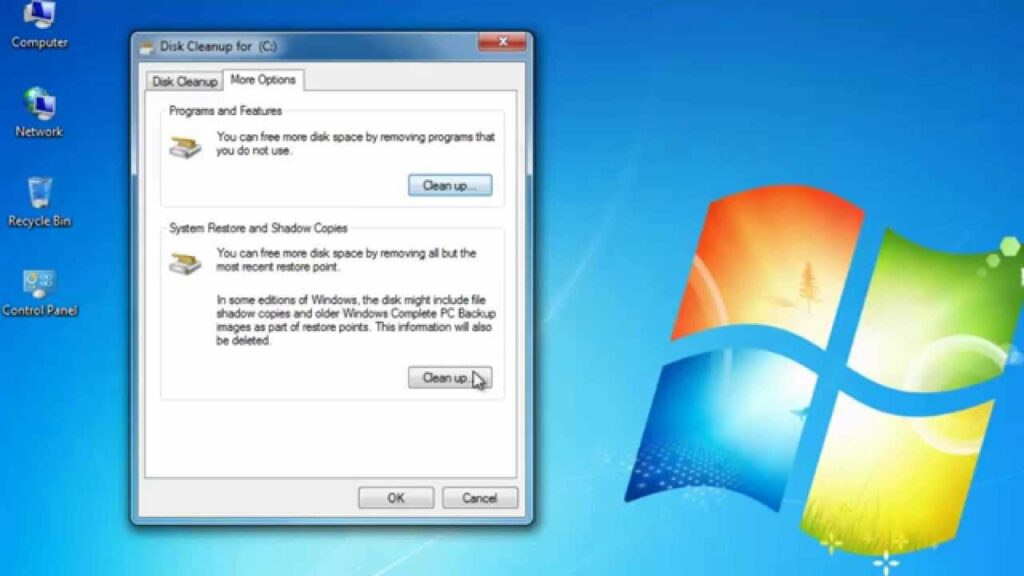
- Customizing Cleanup Options: Explore the “More Options” tab in the Disk Cleanup dialog box to access additional cleanup options, such as removing Windows components and installed programs that are no longer needed.
- Scheduling Disk Cleanup: Automate the disk cleanup process by scheduling Disk Cleanup to run at regular intervals. Use the Task Scheduler utility in Windows 7 to create a scheduled task that runs Disk Cleanup automatically according to your preferred schedule.
- Using Command-Line Options: Advanced users can utilize command-line options to customize and automate Disk Cleanup tasks. Run “cleanmgr.exe” with command-line parameters to perform specific cleanup operations without user intervention.
- Monitoring Disk Usage: Keep track of disk usage and identify areas of concern using the Disk Cleanup utility. Regularly monitor disk space usage and run Disk Cleanup as needed to prevent disk clutter and maintain optimal performance.
Conclusion:
Disk Cleanup is a powerful tool for reclaiming disk space and optimizing system performance in Windows 7. By following the comprehensive guide outlined above, users can leverage the versatility and efficiency of Disk Cleanup to streamline disk space management and enhance overall system efficiency. Whether it’s removing temporary files, deleting unnecessary system files, or automating cleanup tasks, Disk Cleanup empowers users with the tools and knowledge needed to keep their Windows 7 systems running smoothly. So dive into the world of Disk Cleanup today, reclaim valuable disk space, and enjoy a cleaner, more efficient computing experience in Windows 7.


