How to Prevent Color Cast Shifts in High-Bit-Depth RAW Exports Using Custom ICC Camera Profiles
How to Prevent Color Cast Shifts in High-Bit-Depth RAW Exports Using Custom ICC Camera Profiles
bit-high-depth Colorcast shift RAW exports can compromise the fidelity of professional photographic workflows, especially when photos demand uniform colors across editing apps, calibrated monitors, and print production systems. Photographers may see surprising green or magenta, yellow or blue tints after exporting photographs that looked neutral in RAW processing. These discrepancies can be especially visible in product photography, commercial advertising, studio portraits, and other tasks where perfect color reproduction is vital. High-bit-depth files have a lot of tonal information, but they do not guaranty good color interpretation or consistent output. The final look is affected by the camera’s white balance, the RAW conversion parameters, the choice of color space, ICC profile compatibility and the export setup. Knowing how these aspects work together allows photographers to pinpoint the source of any undesired color shifts prior to delivering the final photographs. A solid workflow is a combination of good camera profiling, consistent color management, controlled RAW development and rigorous export verification. When applied consistently, these strategies enable professionals to preserve natural colors, safeguard subtle tonal transitions, and achieve more predictable outcomes across digital and print contexts.
Decoding Color Cast Shifts in High Bit Depth Images
A color cast is an undesired overall tint that makes neutrals look warmer or colder, greener or more magenta than they should be. This problem can occur in high-bit-depth RAW workflows when demosaicing, performing white balance adjustment, interpreting the camera profile, or converting to another color space. Unlike a final image that is uniform for everyone, the RAW files contain the sensor measurements. The rendering depends on the software and settings used to interpret those measurements. A 16-bit-per-channel image is more tonal than an identical 8-bit image, which helps to minimize noticeable banding when performing heavy color correction. But more bit depth does not correct for an incorrect white balance or an inappropriate camera profile. Different color interpretations can be achieved by converting the same source file with different RAW converters, due to the different rendering methods and default profiles each use. There is also the difference between a real color cast and a valid creative color grade.” Knowing where the shift occurs—whether in the RAW creation, the export, or the viewing—provides the foundation for accurate troubleshooting and consistent color reproduction.
Choosing the right camera profile for RAW processing
Camera profiles determine how the raw information from the sensor is transformed into visible colors and tonal relationships. Most RAW-processing apps have built-in camera profiles for rich color, natural rendering, portrait photography, and other uses. Custom profiles can be more controlled starting points when a specific camera shows consistent color variances under defined lighting circumstances. But a custom ICC profile is not readily interchangeable with a camera profile built for a RAW development engine. Color management between defined input , display and output regions is often done by ICC profiles . Many RAW converters utilize their own profiling systems , e.g. DCP profiles or proprietary camera profiles . Choose a profile that matches the application and is appropriate for the anticipated process. Use a color reference target that was shot under regulated representative lighting for bespoke camera profiles. Ensure that the lighting and exposure are even and that you do not clip the highlights or create deep shadows that hide critical color information. The quality of the profile depends on the accuracy of the reference data and appropriate illumination. A well-chosen profile creates a dependable rendering baseline and avoids the need for excessive corrective modifications later on.
Set the white balance correctly before exporting
White Balance is one of the most critical variables in RAW photography to avoid undesirable color casts. It corrects for the color temperature and tint of illumination by varying the relative contribution of color channels. If the initial capture was made with an incorrect white balance, then neutral surfaces could seem yellow, blue, green, or magenta when developed from the RAW data. RAW images can be heavily adjusted for white balance after the fact, but when they were taken with a bad setting this can be a hindrance for editing, and make comparisons between photographs less credible. If you can, shoot a neutral gray reference card in the same light as your subject. Use that reference to set a starting white balance in the RAW converter, then check skin tones, neutral objects and other known colors. Mixed lighting takes extra caution, since a single global white balance may not neutralize all areas of the scene. Local corrections may be required if daylight, tungsten lighting or colored artificial sources illuminate various areas of the image. After setting white balance, do fine saturation and hue adjustments. This arrangement decreases the possibility that subsequent tweaks will make up for a fundamental color imbalance, causing variable outcomes throughout a photo shoot.
Restrictions and High-Bit-Depth Settings
Working with high bit depth helps to maintain small tonal changes during RAW conversion, retouching, and color correction. This is why a 16-bits-per-channel document in Photoshop offers more editing precision than an 8-bits-per-channel document, especially for large tone alterations or gradient repairs. But bit depth and color accuracy are two different animals. If the white balance is wrong, the camera rendering is not sufficient or the embedded profile is missing or incorrectly read, a 16bit image can be badly color casted. Before exporting, check the document’s bit depth and ensure the target file type provides the precision you need. TIFF is generally ideal for high-quality high-bit-depth picture distribution, while certain JPEG procedures reduce images to 8 bits per channel and apply lossy compression. The right decision depends on the capabilities of the receiving application and the production specification. Don’t convert between bit depths unnecessarily in editing, because if you reduce precision too early you can limit the flexibility of corrections later on. If possible, always keep a high bit-depth master and make distribution copies in the bit depth and format needed by the destination. This approach maintains editing freedom without presuming that more bits of color depth will equal neutral or uniform colors.
ICC Profile Settings and Color Space Transformation
ICC profiles specify how numeric color values translate to colors in a particular color management system. They enable compatible apps to interpret images uniformly across supported color spaces and output devices. For example, a photo destined for wide distribution on the web might use sRGB, while some professional editing operations might benefit from a wider-gamut working space. Which one is right relies on where you want to go and what the whole workflow is capable of. Know the difference between assigning a profile and converting into a profile when exporting. Changing a profile affects the interpretation of existing numerical values without recalculating those numbers, which may cause a considerable visual change. Converting to a profile re-calculates the color values to best match how it looked in the destination gamut. Use Photoshop’s appropriate color conversion parameters and keep the intended embedded profile if required by the delivery specification. The colors may look different if the target program does not recognize the profile, even if the exported pixel values did not change. Do not choose an output profile only because you know its name. You must manage your profiles consistently and deliberately to cut down the color cast changes as you edit, export, and view.
Building and validating custom camera profiles
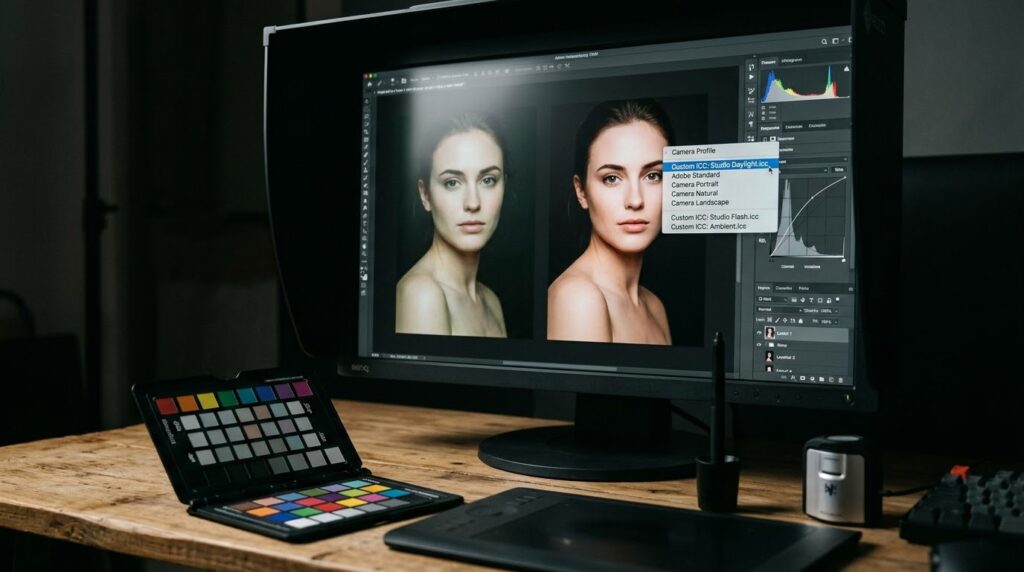
Custom camera profiling can improve color consistency when camera, illumination and photographic workflow are under sufficient control. Typically the process entails capturing a known color target, processing the image to the specifications of the profiling software, and producing a profile that can be used by the target RAW development tool. Use stable illumination, and follow the recommendations of the target maker for exposure and capture. Avoid reflected glare, uneven lighting, and clipping as they can affect the reference measurements used in creating the profile. If the profile is for studio product photography, do it under representative studio lighting, rather than presuming that a profile produced for one illuminant will work the same under all lighting conditions. Some camera profiling systems use various profiles for different types of illumination or use methods that modify rendering across situations. When the profile is installed, apply it to a test RAW image that includes the color target and familiar neutral surfaces. Compare the result with an appropriate reference workflow and see if the important colors improve without introducing new imbalances. A custom profile must be scientifically tested and not simply regarded as a custom profile. Re-validate profiles when there is a major change in lighting conditions, camera configuration, or profiling process.
Keep the display calibrated and your editing conditions consistent.
The accuracy of the export workflow is dependent on the accuracy of the display used to judge color. For a display with a significant color bias, the photos may be modified to compensate for an inaccurate preview, introducing undesired shifts into otherwise correctly processed files. Hardware calibration and characterisation can assist provide a more predictable viewing environment. A suitable calibration device evaluates the display’s behavior and develops a monitor profile that color-managed apps can use to display images more correctly. Select an appropriate white point, brightness level and gamma based on the editing environment and the output. Don’t judge critical colors by comparing images on uncalibrated monitors or on different display technologies and brightness levels. Ambient lighting can also influence visual perception, particularly when you are retouching photos for print. Use constant viewing circumstances; enable the monitor to stabilize before doing essential color work. Remember that a monitor profile specifies the display, not a substitute for the image’s internal color space or the camera profile used for RAW development. Splitting these profile roles minimizes misdirected troubleshooting and results in more consistent decisions during the editing process.
Export Settings and Color Consistency Testing
Lastly, when you want to export a final image, make sure to check the options that regulate color space, profile embedding, bit depth, and file format. Choose an output color space that fits the delivery criteria and check that the export process is actually converting the image and not just assigning a profile. If you want to preserve a high-bit-depth master, use a format that supports the channel precision necessary and save the embedded profile that corresponds. Reopen the exported file in a color managed application and compare to the changed master under controlled viewing settings. Observe for any strange anomalies in neutral grays, white surfaces, skin tones, vivid colors, and shadow detail. If a cast occurs only after export, play with a different file format or export preset, changing nothing else. Instead, look at white balance, camera profile choice, and local color tweaks, if it is already evident in the RAW converter. When you are producing the final output for printing, remember the destination printer profile and the expected rendering conditions. By controlling the test export you may isolate issues and avoid making unnecessary modifications to a master that is processing correctly. Plus, it helps with repeatability in future projects as well to document what worked.
Troubleshooting Persistent Color Casts in a RAW Workflow
If color changes continue even with good profiling and export setup, troubleshoot the workflow in a controlled sequence. Start with the original RAW file and undo any creative tweaks you don’t need so you can assess white balance and camera rendering on their own. Export a test image using the required camera profile, a neutral white balance, and a known color space in a compatible file format. Compare the outcome in at least two color management applications. If the difference is in the file or in the viewing environment. Verify the embedded profile and make sure the destination application can interpret it properly. If just one application shows the image differently, check its color management choices and rendering settings before changing the photo. If the cast is used in more than one application, compare the exported values and processing settings to the original master. Look at the custom profile again only if the evidence points to the camera rendering as the culprit. Don’t pile on several correction profiles or keep converting between color spaces without good justification. A methodical workflow dissects camera rendering, white balance, display behavior and export setup into manageable factors. By properly adjusting these parameters, photographers can prevent undesired shifts in color and achieve consistent color reproduction on high-bit-depth RAW exports.