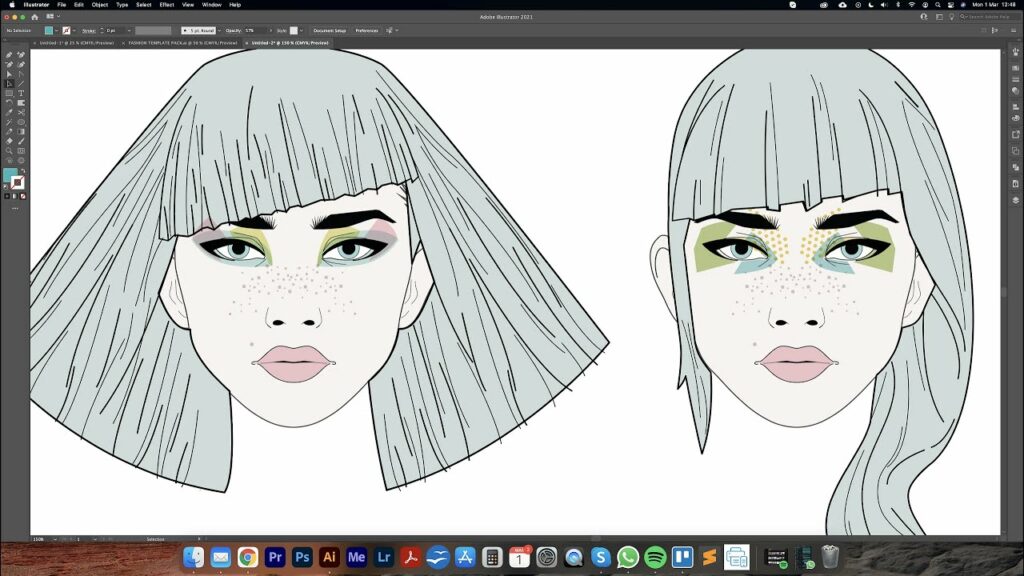
Elevating Style: A Comprehensive Guide to Crafting Vector Fashion Illustrations in Adobe Illustrator

Introduction:
In the ever-evolving world of fashion design, Adobe Illustrator stands as an indispensable tool, offering a wealth of features to empower designers to bring their creative visions to life with precision and flair. Among its array of capabilities, the ability to create vector fashion illustrations emerges as a dynamic feature, providing designers with the tools needed to depict garments, accessories, and fashion concepts with style and sophistication. Whether you’re a seasoned fashion illustrator, a budding designer, or an aspiring artist, understanding how to harness the power of Adobe Illustrator for fashion illustration is essential for expressing your unique aesthetic and vision. In this comprehensive guide, we’ll embark on a journey to explore the techniques and tools needed to create stunning vector fashion illustrations that captivate and inspire.
Chapter 1: Planning Your Fashion Illustration
Before diving into the creation process, it’s essential to plan your vector fashion illustration meticulously. Consider the theme, mood, and concept you want to convey, as well as the target audience and purpose of the illustration. Research fashion trends, silhouettes, and design elements to inform your creative direction. Sketch out rough ideas to explore poses, proportions, and compositions, ensuring that your illustration captures the essence of your vision and communicates it effectively to the viewer.
Chapter 2: Setting Up Your Illustrator Document
Once you’ve finalized your fashion illustration concept, it’s time to set up your Adobe Illustrator document. Create a new document with dimensions that suit your intended illustration size and resolution. Consider whether you’ll be creating a print or web-based illustration and adjust the document settings accordingly. Organize your workspace by creating layers for different elements of your illustration, such as the figure, garments, accessories, and details, to facilitate easy editing and manipulation.
Chapter 3: Sketching the Fashion Figure
Start by sketching out the fashion figure using the pen tool or shape tools in Adobe Illustrator. Focus on capturing the proportions, poses, and gestures that convey the desired mood and attitude of your illustration. Experiment with different poses, poses, and expressions to create dynamic and expressive figures. Pay attention to details such as anatomy, movement, and posture to create lifelike and engaging illustrations.
Chapter 4: Designing Garments and Accessories
Once you’ve sketched the fashion figure, it’s time to design the garments and accessories that will adorn your illustration. Use the pen tool and shape tools to create the basic shapes and outlines of the garments, such as dresses, tops, bottoms, and outerwear. Experiment with adding details such as seams, folds, pleats, and embellishments to add depth and realism to your designs. Consider the fabric, texture, and color of the garments to evoke the desired look and feel.
Chapter 5: Adding Color and Texture
After designing the garments and accessories, it’s time to add color and texture to bring your fashion illustration to life. Use the color picker tool to select vibrant and complementary colors for the garments and accessories, paying attention to trends and personal preferences. Experiment with applying gradients, patterns, and textures to add depth and dimension to your designs. Consider using shading and highlights to create realistic lighting effects and enhance the three-dimensional quality of your illustration.
Chapter 6: Detailing and Embellishing
To add the finishing touches to your vector fashion illustration, take time to add details and embellishments that enhance the overall look and feel of your designs. Experiment with adding decorative elements such as buttons, zippers, bows, and lace to add visual interest and personality to your garments and accessories. Use the pen tool and shape tools to create intricate patterns, prints, and motifs that complement your designs and enhance their aesthetic appeal.
Chapter 7: Styling and Presentation
Once you’ve completed your vector fashion illustration, it’s important to style and present it in a way that enhances its impact and visual appeal. Experiment with arranging multiple illustrations into a cohesive fashion collection or storyboard to tell a compelling visual story. Use typography, layout, and graphic elements to create a visually striking presentation that complements your illustrations and enhances their narrative. Pay attention to details such as composition, balance, and pacing to create a cohesive and visually engaging presentation.
Chapter 8: Saving and Sharing Your Illustration
Once you’re satisfied with your vector fashion illustration in Adobe Illustrator, it’s important to save and share your artwork for sharing or distribution. Save your Illustrator document in a compatible file format, such as AI or PDF, to preserve the vector properties of your illustration. If you’re creating artwork for web or screen-based applications, consider exporting your illustration as an SVG file for scalability and compatibility with web browsers. For print-based projects, export your illustration as a high-resolution raster image in formats such as JPEG or PNG.
Conclusion:
Creating vector fashion illustrations in Adobe Illustrator is a journey of creativity and imagination, offering endless possibilities for expressing style, elegance, and personality. By understanding the techniques and tools needed to sketch fashion figures, design garments and accessories, add color and texture, detail and embellish, style and present, and save and share your illustrations, you’ll be able to create stunning fashion illustrations that captivate and inspire. So grab your stylus, set your sights on the canvas, and let Adobe Illustrator become your trusted ally for crafting fashion illustrations that elevate style and evoke emotion.


