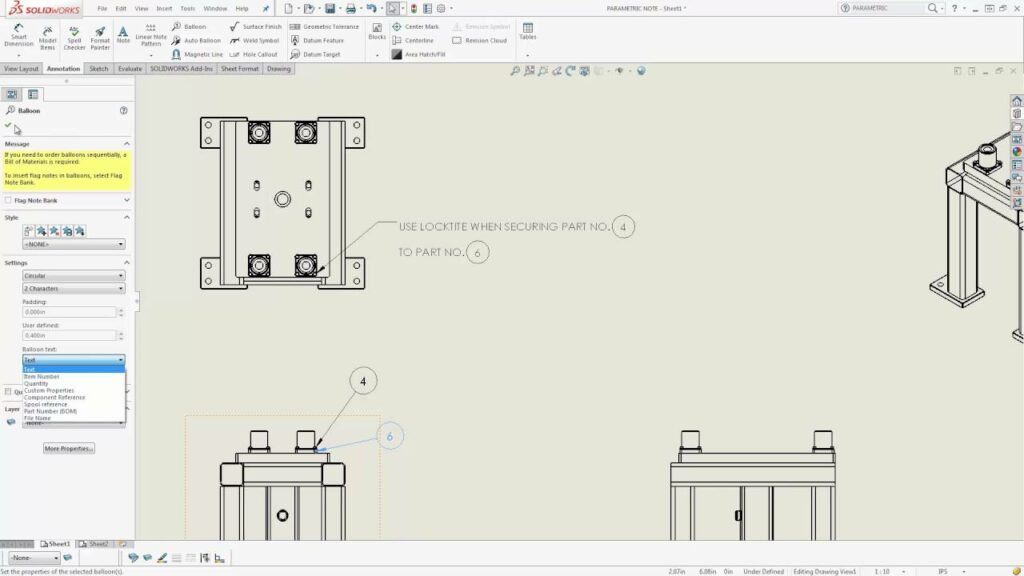
Comprehensive Guide to Adding Annotations in SolidWorks Drawings

Introduction: SolidWorks, a premier computer-aided design (CAD) software, empowers engineers and designers to create detailed technical drawings that convey essential information about a design. Annotations play a critical role in SolidWorks drawings, providing supplementary details, notes, and symbols to enhance understanding and facilitate communication between stakeholders. In this comprehensive guide, we will explore the intricacies of adding annotations to drawings in SolidWorks, covering fundamental concepts, essential techniques, and advanced strategies to help you master this vital aspect of CAD documentation.
Understanding Annotations in SolidWorks: Annotations in SolidWorks drawings encompass a wide range of elements, including text, symbols, geometric tolerances, notes, and surface finish symbols. These annotations serve to clarify design intent, specify manufacturing requirements, and provide instructions for assembly, inspection, and quality control. Before diving into the specifics of adding annotations, it’s essential to grasp some foundational concepts:
- Types of Annotations:
- SolidWorks supports various types of annotations, including general notes, surface finish symbols, geometric dimensioning and tolerancing (GD&T) symbols, weld symbols, datum feature symbols, and inspection balloons. Each type of annotation serves a specific purpose in conveying critical information about the design.
- Annotation Tools:
- SolidWorks provides a comprehensive set of annotation tools, such as Note, Surface Finish Symbol, Datum Feature Symbol, Weld Symbol, and Inspection Balloon, to add annotations to drawing views accurately and efficiently. These tools offer customization options for text style, symbol properties, and placement preferences.
- Annotation Standards:
- Adhering to industry standards such as ASME Y14.5, ISO 1101, and company-specific guidelines is essential when adding annotations to drawings. Consistent annotation styles, formats, and conventions ensure clarity, readability, and interoperability across design documentation.
Adding Annotations to Drawings in SolidWorks: SolidWorks offers intuitive tools for adding annotations to drawings, allowing users to communicate design intent and manufacturing requirements effectively. Let’s explore the essential steps for adding annotations:
- Activate Annotation Tool:
- Begin by activating the desired annotation tool from the Annotation tab in the SolidWorks drawing environment. Select the appropriate tool based on the type of annotation you wish to add, such as Note, Surface Finish Symbol, or Datum Feature Symbol.
- Place Annotation:
- Use the mouse cursor to position the annotation in the drawing view where it conveys the intended information effectively. SolidWorks provides visual feedback, such as snap points and alignment guides, to assist in precise placement of annotations.
- Customize Annotation Properties:
- Customize the properties of the annotation, such as text style, font size, arrow type, and symbol properties, to meet specific design requirements and adhere to annotation standards. SolidWorks offers PropertyManager interfaces for editing annotation properties efficiently.
- Add Text and Symbols:
- Enter text and symbols into the annotation using the keyboard or by selecting predefined options from drop-down menus or symbol libraries. SolidWorks provides tools for formatting text, adding special characters, and inserting predefined symbols to annotations.
- Attach Annotations to Entities:
- Attach annotations to specific entities or features within the drawing view to establish clear associations and convey relevant information effectively. Use leaders, arrows, and callout lines to connect annotations to the corresponding features or dimensions in the drawing.
Advanced Annotation Techniques: In addition to basic annotation tools, SolidWorks offers advanced techniques to enhance annotation workflows and achieve precise documentation objectives:
- Annotation Styles and Libraries:
- Create annotation styles and libraries to standardize annotation practices across drawings and projects. Define custom annotation styles for text, symbols, and geometric tolerances to comply with company standards and industry conventions.
- Annotation Templates and Formats:
- Develop annotation templates and formats for common annotation types, such as general notes, surface finish symbols, and GD&T callouts. Save annotation templates as reusable resources to streamline annotation creation and ensure consistency across drawings.
- Intelligent Annotation Tools:
- Leverage intelligent annotation tools, such as Smart Notes and Smart Dimensions, to automate annotation creation and maintain associativity with model dimensions and features. Intelligent annotation tools dynamically update annotations based on changes to the underlying model geometry.
Best Practices for Annotation: To maximize clarity, accuracy, and efficiency when adding annotations to drawings in SolidWorks, it’s essential to adhere to best practices:
- Prioritize Essential Information:
- Prioritize essential information in annotations to convey critical design intent, specifications, and requirements effectively. Include dimensions, tolerances, notes, and symbols that impact manufacturing, assembly, or inspection processes prominently in the drawing.
- Maintain Clarity and Readability:
- Maintain clarity and readability by organizing annotations logically, aligning text and symbols neatly, and avoiding overcrowding or cluttering the drawing view. Use appropriate text size, font style, and symbol scale to ensure that annotations are legible at the intended viewing scale.
- Review and Validation:
- Review annotations regularly to verify accuracy, completeness, and compliance with design requirements and annotation standards. Validate annotations by cross-referencing with design specifications, model dimensions, and industry standards to ensure consistency and correctness.
- Collaborate and Communicate:
- Collaborate with design team members, manufacturing engineers, and stakeholders to review and validate annotations for clarity, accuracy, and relevance. Use annotations to communicate design intent, manufacturing requirements, and quality control criteria effectively across design documentation.
Conclusion: Annotations are essential elements of technical drawings in SolidWorks, providing supplementary details, notes, and symbols to enhance understanding and facilitate communication between stakeholders. By mastering the tools and techniques for adding annotations, you can enhance your documentation proficiency, streamline your drawing workflow, and produce high-quality drawings that meet design requirements and manufacturing standards. Whether you’re a novice or an experienced SolidWorks user, understanding the principles of annotation and adhering to best practices will elevate your CAD skills and enable you to create clear, accurate, and informative technical documentation efficiently.


