Unveiling the Secrets of the Stretch Effect in Adobe Photoshop: A Comprehensive Guide
Introduction:
In the realm of digital design and visual manipulation, the stretch effect stands as a captivating technique that adds dynamism, distortion, and a touch of surrealism to images and compositions. Inspired by the fluidity of motion and the elasticity of form, this effect transforms ordinary photographs into mesmerizing works of art that challenge perception and evoke a sense of wonder. Whether used in digital art, photo manipulation, or graphic design, mastering the stretch effect in Adobe Photoshop offers designers and artists a versatile tool for unleashing their creativity and pushing the boundaries of visual expression. In this comprehensive guide, we will embark on a journey through step-by-step techniques, expert tips, and creative strategies to master the art of the stretch effect in Adobe Photoshop.
Understanding the Stretch Effect:
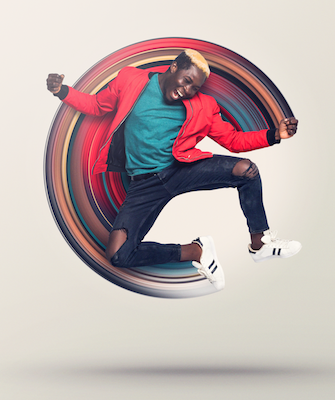
The stretch effect is characterized by the distortion and elongation of elements within an image, creating the illusion of movement, transformation, or surrealism. This effect can range from subtle distortions to dramatic stretching, depending on the desired aesthetic and intent of the design. By leveraging techniques such as selection tools, warp transformations, and layer blending modes, designers can achieve stunning results that captivate viewers and invite them to explore the boundaries of reality and imagination.
Now, let’s delve into the step-by-step process of creating the stretch effect in Adobe Photoshop:
Step 1: Selecting the Base Image:
Begin by opening Adobe Photoshop and importing the image you wish to apply the stretch effect to. Choose an image with elements that you want to distort or elongate, such as a portrait, landscape, or still life photograph.
Step 2: Duplicating the Image Layer:
With the base image selected, duplicate the layer by pressing Ctrl/Cmd + J or by right-clicking on the layer and selecting “Duplicate Layer.” This duplicate layer will serve as the base for applying the stretch effect, preserving the original image layer for reference.
Step 3: Selecting the Stretch Area:
Use the selection tools in Photoshop, such as the Rectangular Marquee tool (M) or the Lasso tool (L), to outline the area of the image that you want to stretch. This could be a specific object, person, or element within the composition that you want to distort or elongate.
Step 4: Applying Warp Transformation:
With the selection active, go to Edit > Transform > Warp from the top menu. This will bring up the Warp transformation tool, allowing you to manipulate the selected area by dragging the control points and handles to stretch, bend, or warp the image.
Step 5: Experimenting with Warp Options:
Experiment with different warp options, such as Arch, Bulge, Twist, or Flag, to achieve the desired stretch effect. Drag the control points and handles to adjust the intensity and direction of the warp, creating dynamic and surreal distortions that add visual interest to the composition.
Step 6: Blending the Stretch Effect:
To seamlessly blend the stretch effect with the rest of the image, experiment with layer blending modes and opacity adjustments. Overlay, Soft Light, and Screen blending modes often work well for blending the stretched area with the underlying layers while preserving the integrity of the effect.
Step 7: Adding Depth and Dimension:
To enhance the realism and impact of the stretch effect, consider adding depth and dimension to the composition. Use techniques such as layer masking, shadow effects, and highlights to create the illusion of three-dimensional space and depth within the stretched area.
Step 8: Fine-Tuning and Refining:
Take the time to fine-tune and refine the stretch effect to achieve the desired look and feel. Experiment with adjusting the intensity, direction, and shape of the warp, as well as the blending modes and opacity levels, to create a balanced and visually appealing composition.
Step 9: Adding Additional Elements:
To further enhance the surrealism and creativity of the composition, consider adding additional elements such as textures, patterns, or graphics. Experiment with layer blending modes, opacity adjustments, and placement to integrate these elements seamlessly with the stretch effect.
Step 10: Final Touches and Exporting:
Once you’re satisfied with the stretch effect and overall composition, take the time to make any final adjustments or refinements to the design. Fine-tune the colors, contrast, and overall atmosphere to ensure that the effect enhances the mood and aesthetic of the artwork. When you’re happy with the final result, save your work and export the design in a high-quality format suitable for your intended use.
Advanced Techniques and Tips:
In addition to the basic steps outlined above, consider exploring advanced techniques and tips to further enhance the stretch effect:
- Selective Stretching: Experiment with selectively stretching specific areas or elements within the image to create focal points or visual interest. Use layer masking and selective editing to isolate and manipulate individual elements while preserving the integrity of the rest of the composition.
- Layer Blending Effects: Combine multiple stretch effects with layer blending effects to create complex and dynamic compositions. Experiment with layer styles, gradients, and textures to add depth, dimension, and visual interest to the stretched areas.
- Creative Distortion: Think outside the box and experiment with creative distortion techniques to push the boundaries of the stretch effect. Use liquify filters, displacement maps, and custom brushes to create unique and surreal distortions that defy reality and challenge perception.
- Animation Effects: For multimedia projects or digital artworks, consider adding animation effects to the stretch effect to create dynamic and interactive visuals. Use keyframes and animation tools in Photoshop or export the design to a video editing software for further customization.
Conclusion:
In conclusion, mastering the stretch effect in Adobe Photoshop offers designers and artists a powerful and versatile tool for creating dynamic, surreal, and visually captivating compositions. By following the step-by-step techniques outlined in this tutorial and exploring advanced techniques and tips, you can unleash your creativity and produce stunning artworks that captivate viewers and evoke emotions. Whether used in digital art, photo manipulation, or graphic design, the stretch effect offers endless possibilities for expression and experimentation. Embrace the fluidity of form and the elasticity of imagination, and let your creativity soar as you create mesmerizing designs that stretch the boundaries of visual storytelling.


