Unveiling the Secrets of Creating a Realistic Glass Effect in Photoshop: A Comprehensive Guide

Introduction:
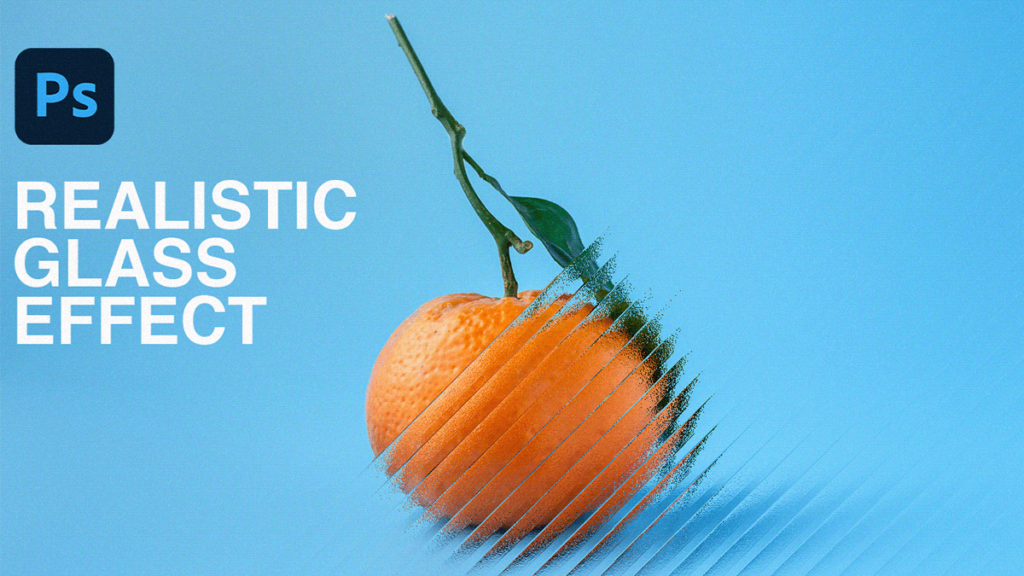
In the realm of digital design and visual artistry, the creation of a realistic glass effect stands as a captivating technique that adds depth, sophistication, and a touch of elegance to images and compositions. Inspired by the transparency, reflection, and refraction of actual glass surfaces, this effect transforms ordinary elements into stunning visual focal points that evoke a sense of realism and refinement. Whether used in web design, digital art, or graphic design, mastering the creation of a realistic glass effect in Adobe Photoshop offers designers and artists a versatile tool for unleashing their creativity and elevating the impact of their artwork. In this comprehensive guide, we will embark on a journey through step-by-step techniques, expert tips, and creative strategies to master the art of creating a realistic glass effect in Photoshop.
Understanding the Realistic Glass Effect:
The realistic glass effect aims to replicate the appearance of glass surfaces, complete with transparency, reflections, and refractions. This effect can be applied to various elements within a composition, such as buttons, icons, text, or entire images, to create a sense of depth and realism. By leveraging techniques such as layer styles, blending modes, and filters, designers can achieve stunning results that captivate viewers and add a touch of sophistication to their designs.
Now, let’s delve into the step-by-step process of creating a realistic glass effect in Adobe Photoshop:
Step 1: Setting Up the Document:
Begin by opening Adobe Photoshop and creating a new document with dimensions suitable for your design project. Choose a resolution and color mode appropriate for your intended output, such as print or digital display.
Step 2: Creating the Base Shape:
Select the shape or element to which you want to apply the glass effect. This could be text, a button, an icon, or any other element that you want to make appear as if it’s made of glass. Use the shape tools in Photoshop, such as the Rectangle tool or Ellipse tool, to create the base shape.
Step 3: Applying Layer Styles:
With the base shape selected, apply layer styles to create the appearance of glass. Double-click on the layer to open the Layer Style dialog box, then apply the following layer styles:
- Bevel and Emboss: Use the Bevel and Emboss effect to create the illusion of depth and dimensionality, mimicking the edges of a glass surface.
- Inner Glow: Apply a subtle Inner Glow to add softness and transparency to the edges of the shape, simulating the refractive qualities of glass.
- Gradient Overlay: Add a Gradient Overlay to create the appearance of light passing through the glass, with highlights and shadows that mimic the reflection and refraction of light.
Step 4: Adjusting Transparency:
To enhance the transparency of the glass effect, adjust the opacity of the layer and any layer styles applied. Experiment with different opacity levels to achieve the desired level of transparency, allowing underlying elements to show through and contribute to the overall realism of the effect.
Step 5: Adding Reflections:
To simulate reflections on the glass surface, create a new layer above the base shape layer and use the Brush tool (B) to paint white or light gray streaks along the edges of the shape. Set the layer blending mode to Overlay or Screen to blend the reflections with the underlying layers.
Step 6: Distorting the Reflections:
To add realism to the reflections, distort them slightly using the Warp transformation tool. Go to Edit > Transform > Warp from the top menu, then drag the control points to warp the reflections and conform them to the shape of the glass surface.
Step 7: Adding Highlights:
To enhance the highlights on the glass surface, create another new layer above the reflection layer and use the Brush tool (B) to paint white or light gray highlights along the edges and contours of the shape. Set the layer blending mode to Overlay or Screen to blend the highlights with the underlying layers.
Step 8: Distorting the Highlights:
Similar to the reflections, distort the highlights slightly using the Warp transformation tool to conform them to the shape of the glass surface and add a sense of realism.
Step 9: Fine-Tuning and Refining:
Take the time to fine-tune and refine the realistic glass effect to achieve the desired look and feel. Experiment with adjusting the opacity, blending modes, and layer styles to enhance the transparency, reflections, and highlights of the glass surface. Pay attention to details such as contrast, texture, and lighting to create a cohesive and visually striking effect.
Step 10: Final Touches and Exporting:
Once you’re satisfied with the realistic glass effect and overall composition, take the time to make any final adjustments or refinements to the design. Fine-tune the colors, contrast, and overall atmosphere to ensure that the effect enhances the mood and aesthetic of the artwork. When you’re happy with the final result, save your work and export the design in a high-quality format suitable for your intended use.
Advanced Techniques and Tips:
In addition to the basic steps outlined above, consider exploring advanced techniques and tips to further enhance the realistic glass effect:
- Texture Overlay: Experiment with incorporating texture overlays or pattern fills to add depth and visual interest to the glass surface. Textures such as frosted glass, cracked glass, or water droplets can enhance the realism and texture of the effect, adding to the overall impact of the design.
- Custom Brushes: Create custom brushes to add unique and personalized elements to the glass surface. Experiment with brushes that mimic scratches, smudges, or imperfections on glass surfaces to add authenticity and detail to the effect.
- Reflections and Refractions: Consider adding additional reflections and refractions to the glass surface to create a more dynamic and realistic effect. Experiment with layer styles, filters, and blending modes to simulate light passing through


