Mastering the Vertical Photo Panels Effect in Photoshop: A Comprehensive Tutorial
Introduction:
In the realm of digital design and visual artistry, the vertical photo panels effect stands as a captivating technique that adds depth, dimension, and a touch of modern elegance to images and compositions. Inspired by the minimalist aesthetics of contemporary design and the versatility of photo manipulation, this effect transforms ordinary photographs into striking visual narratives that command attention and intrigue. Whether used in digital art, photo editing, or graphic design, mastering the vertical photo panels effect in Adobe Photoshop offers designers and artists a versatile tool for unleashing their creativity and pushing the boundaries of visual expression. In this comprehensive tutorial, we will embark on a journey through step-by-step techniques, expert tips, and creative strategies to master the art of creating the vertical photo panels effect in Photoshop.
Understanding the Vertical Photo Panels Effect:
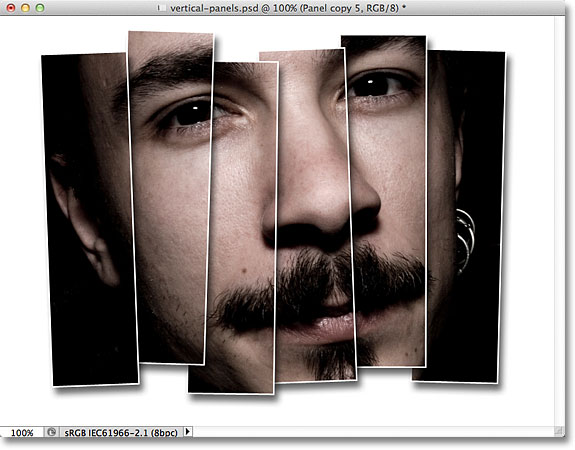
The vertical photo panels effect is characterized by the segmentation of a single image into multiple vertical panels, each containing a portion of the original image. This effect creates a sense of depth, movement, and visual interest, allowing viewers to explore different perspectives and details within the composition. By leveraging techniques such as layer masking, clipping masks, and arrangement, designers can achieve stunning results that captivate viewers and elevate the impact of their artwork.
Now, let’s delve into the step-by-step process of creating the vertical photo panels effect in Adobe Photoshop:
Step 1: Setting Up the Document:
Begin by opening Adobe Photoshop and creating a new document with dimensions suitable for your design project. Choose a resolution and color mode appropriate for your intended output, such as print or digital display.
Step 2: Importing the Base Image:
Import the base image onto which you want to apply the vertical photo panels effect. Choose an image with elements that you want to showcase within the panels, such as a landscape, portrait, or still life photograph.
Step 3: Creating Vertical Guides:
To divide the image into vertical panels, create vertical guides by going to View > New Guide > Vertical from the top menu. Position the guides evenly across the width of the image, ensuring that they divide the image into equal-sized panels.
Step 4: Creating Panel Layers:
Using the Rectangular Marquee tool (M) or the Rectangle tool (U), create rectangular selections over each panel area defined by the guides. Once selected, create a new layer for each panel by clicking on the “New Layer” icon at the bottom of the Layers panel.
Step 5: Filling Panels with Image Sections:
With each panel layer selected, use the Move tool (V) to move and position the corresponding section of the base image onto the panel layer. Align the section with the edges of the panel using the arrow keys for precise adjustments.
Step 6: Clipping Masks:
Create clipping masks for each panel layer by right-clicking on the layer and selecting “Create Clipping Mask.” This will clip the image section to the shape of the panel, ensuring that it remains confined within the boundaries of the panel.
Step 7: Arranging Panels:
Arrange the panel layers in the desired order to create a visually appealing composition. Experiment with different arrangements and configurations to find the most effective layout for showcasing the elements of the base image.
Step 8: Adding Depth and Dimension:
To enhance the depth and dimension of the vertical photo panels effect, consider adding shadow effects to create the illusion of depth between the panels. Use techniques such as layer styles, drop shadows, or gradient overlays to add subtle shading and depth to the composition.
Step 9: Fine-Tuning and Refining:
Take the time to fine-tune and refine the vertical photo panels effect to achieve the desired look and feel. Experiment with adjusting the opacity, blending modes, and layer styles to enhance the visual impact of the composition. Pay attention to details such as contrast, texture, and alignment to create a cohesive and visually striking artwork.
Step 10: Final Touches and Exporting:
Once you’re satisfied with the vertical photo panels effect and overall composition, take the time to make any final adjustments or refinements to the design. Fine-tune the colors, contrast, and overall atmosphere to ensure that the effect enhances the mood and aesthetic of the artwork. When you’re happy with the final result, save your work and export the design in a high-quality format suitable for your intended use.
Advanced Techniques and Tips:
In addition to the basic steps outlined above, consider exploring advanced techniques and tips to further enhance the vertical photo panels effect:
- Textured Panels: Experiment with adding texture overlays or pattern fills to the panel layers to add depth and visual interest to the composition. Textures such as wood grain, concrete, or fabric can enhance the realism and texture of the panels, adding to the overall impact of the effect.
- Selective Coloring: Use selective coloring techniques to highlight specific elements within the panels. Experiment with adjustment layers such as Hue/Saturation or Color Balance to manipulate the colors and tones of individual panels, creating visual focal points and enhancing the overall composition.
- Panel Transitions: Explore creative transitions between panels to add movement and flow to the composition. Experiment with techniques such as fades, blurs, or overlaps to create seamless transitions between panels, guiding the viewer’s eye through the artwork and creating a sense of continuity and connection.
- Dynamic Composition: Push the boundaries of the vertical photo panels effect by experimenting with dynamic compositions and arrangements. Incorporate elements such as diagonal lines, asymmetrical layouts, or overlapping panels to create visually engaging and dynamic compositions that command attention and intrigue.
Conclusion:
In conclusion, mastering the creation of the vertical photo panels effect in Adobe Photoshop offers designers and artists a powerful and versatile tool for creating visually striking compositions that captivate viewers and elevate the impact of their artwork. By following the step-by-step techniques outlined in this tutorial and exploring advanced techniques and tips, you can unleash your creativity and produce stunning artworks that command attention and inspire awe. Whether used in digital art, photo editing, or graphic design, the vertical photo panels effect offers endless possibilities for expression and experimentation


