Unveiling Precision: Mastering Image Sharpening with the High Pass Filter in Photoshop
Introduction:
In the intricate world of digital image editing, achieving razor-sharp images is a pursuit that requires a delicate balance of technique and precision. Among the arsenal of tools available in Adobe Photoshop, the High Pass filter stands out as a versatile and powerful ally in the quest for image sharpness. This comprehensive guide aims to unravel the intricacies of sharpening images with the High Pass filter, providing photographers, designers, and digital artists with a detailed roadmap to enhance the clarity and detail of their visual compositions.
Understanding the Basics of Image Sharpening:
- Importance of Image Sharpness: Image sharpness is a fundamental aspect of visual communication. Sharp images capture attention, convey details effectively, and contribute to the overall visual impact of photographs and graphics.
- Common Causes of Image Blurring: Blurring in images can result from factors such as camera shake, lens imperfections, or resizing. Identifying the cause of blurring is crucial for selecting the appropriate sharpening techniques.
Introduction to the High Pass Filter in Photoshop:
- Evolution of Sharpening Techniques: The High Pass filter in Photoshop represents an evolution in sharpening techniques. It provides a more refined and controlled approach to sharpening, allowing users to target specific frequencies of detail in an image.
- Principle of the High Pass Filter: The High Pass filter works by highlighting the high-frequency details in an image while suppressing lower frequencies. This enables users to emphasize edges and fine details without affecting broader areas of color and tone.
Optimal Workflow for Sharpening with High Pass Filter:
- Open Image in Photoshop: Launch Adobe Photoshop and open the image you want to sharpen. Ensure that the image is properly preprocessed, addressing basic adjustments like exposure, color balance, and noise reduction.
- Duplicate the Background Layer: Create a duplicate layer of the background by right-clicking on the background layer in the Layers panel and selecting “Duplicate Layer.” This ensures a non-destructive approach to sharpening.
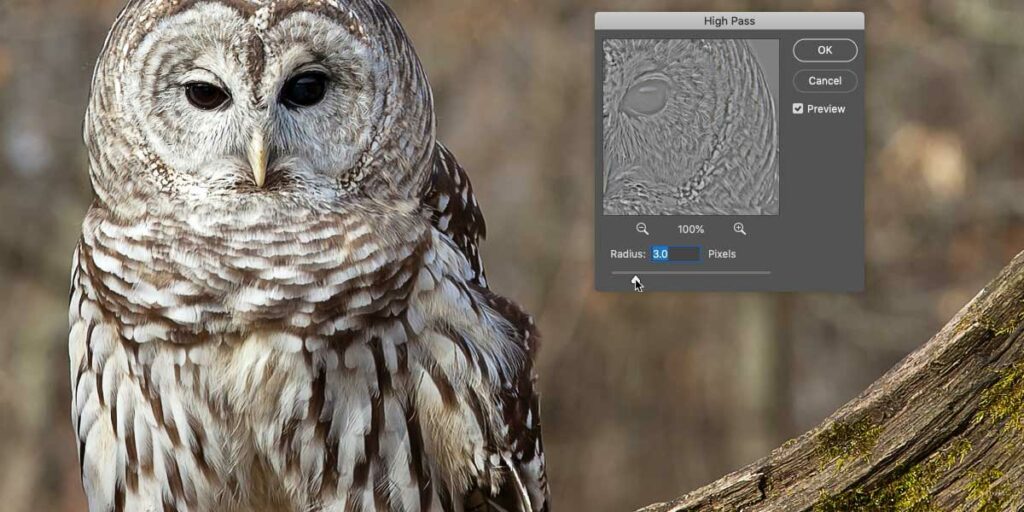
- Apply the High Pass Filter: With the duplicated layer selected, navigate to the “Filter” menu, choose “Other,” and then select “High Pass.” Adjust the radius slider to control the level of detail you want to emphasize. A lower radius targets finer details, while a higher radius includes broader edges.
- Change Blend Mode to Overlay: Set the blend mode of the High Pass layer to “Overlay” in the Layers panel. This blending mode enhances the contrast between light and dark areas, emphasizing the details identified by the High Pass filter.
- Fine-Tune Opacity and Layer Mask: Fine-tune the overall sharpening effect by adjusting the opacity of the High Pass layer. Additionally, you can create a layer mask to selectively apply or mask out the sharpening effect in specific areas of the image.
Advanced Techniques for Sharpening:
- Create Multiple High Pass Layers: For images with varying levels of detail, consider creating multiple High Pass layers with different radius settings. This allows you to selectively enhance different frequencies of detail, providing a more nuanced sharpening effect.
- Combine High Pass with Other Filters: Experiment with combining the High Pass filter with other filters or adjustment layers in Photoshop. For example, applying a subtle amount of noise reduction or a slight Gaussian blur before the High Pass filter can yield unique results.
- Utilize Smart Objects for Non-Destructive Editing: Convert the background layer or duplicated layer into a Smart Object before applying the High Pass filter. This preserves the original image data and allows for non-destructive editing, including adjustments to the High Pass settings.
Preserving Natural Appearance and Avoiding Over-Sharpening:
- Regularly Assess Image at 100% Zoom: When sharpening, regularly assess the image at 100% zoom level. This provides an accurate representation of how the sharpening effect will appear when the image is viewed at its actual size.
- Monitor for Artifacts and Halos: Be vigilant for sharpening artifacts and halos, which can occur when the sharpening effect is too aggressive. Adjust the opacity, radius, and layer mask to eliminate unwanted artifacts and maintain a natural appearance.
- Balance Sharpening with Global Adjustments: Consider using global adjustments like Levels or Curves in conjunction with the High Pass filter. Balancing overall contrast and tonality contributes to a harmonious sharpening result.
Conclusion:
The High Pass filter in Adobe Photoshop emerges as a sophisticated tool in the pursuit of image sharpness. Its ability to selectively target and enhance high-frequency details provides users with a nuanced approach to sharpening. As you navigate the intricacies of sharpening with the High Pass filter, a world of creative possibilities unfolds, allowing you to elevate your visual compositions with precision and finesse. By combining technical proficiency with artistic intuition, you can master the art of sharpening in Photoshop, ensuring your images radiate clarity, detail, and a captivating visual impact.