Unleashing Vibrancy: A Comprehensive Guide to Creating a Simple Pop Art Effect with Photoshop
Introduction:
The world of pop art, characterized by its bold colors, iconic imagery, and energetic compositions, has left an indelible mark on the realm of visual arts. While traditionally associated with renowned artists like Andy Warhol and Roy Lichtenstein, the spirit of pop art has found a new canvas in the digital realm. In this extensive guide, we will explore the step-by-step process of creating a Simple Pop Art Effect with Adobe Photoshop, inviting artists and enthusiasts to infuse their digital creations with the vibrant and dynamic essence of this iconic artistic movement.
- Understanding Pop Art Aesthetics: Pop art emerged in the mid-20th century as a reaction to the prevailing art movements of the time. Characterized by its use of popular culture imagery, vibrant colors, and bold patterns, pop art sought to blur the lines between high art and mass culture. The movement embraced everyday objects, celebrities, and advertising as legitimate subjects for artistic expression.
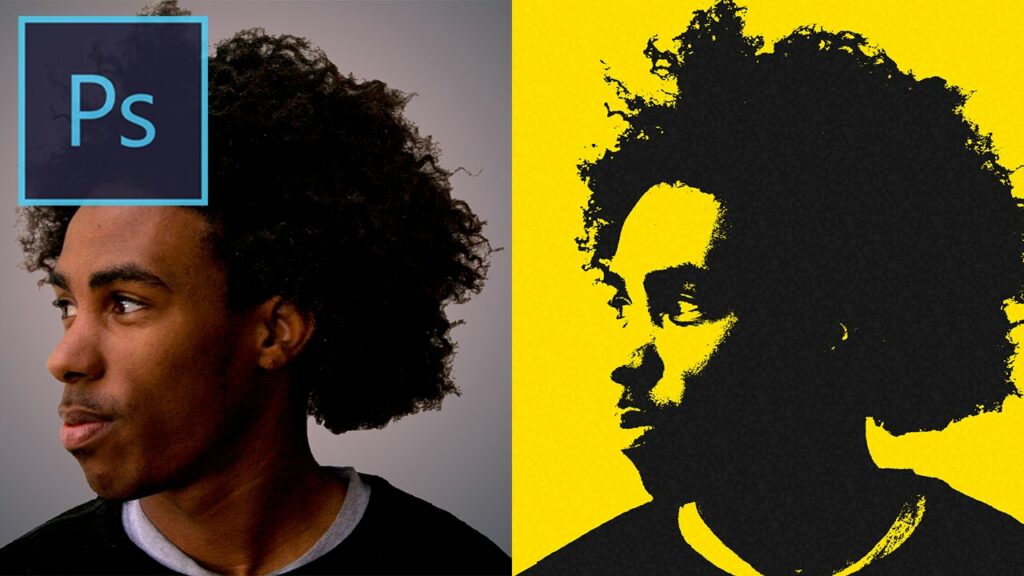
- Selecting the Right Image: The success of a pop art effect begins with selecting the right image. Opt for a photograph with a clear subject, strong contrasts, and distinct features. Portraits, iconic objects, or scenes with bold colors work particularly well. Consider the impact you want to achieve and choose an image that aligns with the energetic spirit of pop art.
- Opening the Image in Photoshop: Begin by opening your selected image in Adobe Photoshop. Ensure that you are working with a high-resolution file to maintain image quality throughout the editing process. Navigate to File > Open and select the desired image from your files.
- Creating a Duplicate Layer: To preserve the original image and maintain flexibility in editing, create a duplicate layer. Right-click on the background layer in the Layers panel and choose “Duplicate Layer.” This duplicated layer serves as the foundation for applying the pop art effect.
- Adjusting Image Saturation: Pop art is renowned for its vibrant and saturated colors. Enhance the overall saturation of the duplicated layer by navigating to Image > Adjustments > Hue/Saturation. Increase the Saturation slider to intensify the colors. Experiment with this adjustment to achieve the desired level of vibrancy.
- Applying Threshold Adjustment: To simplify the image and create distinct areas of black and white, apply a Threshold adjustment. Go to Image > Adjustments > Threshold. Move the Threshold slider to find a balance that transforms the image into high-contrast black and white areas. This step lays the foundation for the iconic pop art look.
- Creating Color Blocks: Pop art is characterized by its use of bold color blocks. To introduce these blocks, create a new layer beneath the thresholded layer. Use the Lasso tool to select areas of the image, then fill the selections with solid colors using the Paint Bucket tool. Choose vibrant and contrasting colors to mimic the characteristic pop art aesthetic.
- Adding Halftone Patterns (Optional): For an authentic pop art touch, consider adding halftone patterns to the color blocks. Create a new layer above the color blocks and fill it with a neutral color such as gray. Then, go to Filter > Pixelate > Color Halftone. Adjust the settings to control the size and placement of the halftone dots.
- Duplicating and Experimenting: Experiment with the arrangement and combination of color blocks. Duplicate layers, adjust their positions, and play with opacity settings to create a visually dynamic composition. The versatility of pop art allows for creative exploration, so don’t hesitate to try different arrangements until you achieve the desired impact.
- Introducing Comic Book Elements (Optional): To evoke the comic book aesthetic often associated with pop art, consider adding elements like speech bubbles or onomatopoeic words. Create new layers for these elements and use the Text tool to add bold, stylized text. Experiment with fonts and colors to enhance the playful and dynamic nature of pop art.
- Fine-Tuning and Refining: Step back and assess the overall composition. Fine-tune any aspects that require adjustment, ensuring that the pop art effect complements the original image and achieves the desired visual impact. Consider making global adjustments, such as contrast or brightness, to harmonize the entire composition.
- Saving and Exporting: Once satisfied with the pop art effect, save your work in Photoshop format (.psd) to retain layers and editing capabilities. For sharing or printing, export the final image in a suitable format, such as JPEG or PNG, ensuring that the resolution meets your intended use.
Conclusion:
Creating a Simple Pop Art Effect with Photoshop is a captivating journey into the vibrant and energetic world of this iconic artistic movement. By infusing everyday images with bold colors, high contrasts, and dynamic compositions, artists can pay homage to the spirit of pop art in the digital realm. The versatility of pop art allows for endless experimentation and personalization, making it a timeless and accessible style for artists of all levels.
As you embark on your pop art adventure, embrace the freedom to reinterpret and reimagine the world around you. Pop art, with its celebration of popular culture and its rejection of artistic norms, invites artists to break free from conventions and explore the boundless realm of creative expression. Through the transformative power of Photoshop, anyone can channel the spirit of Warhol and Lichtenstein, turning ordinary images into vibrant masterpieces that captivate and energize the viewer.


