Illuminating Vision: A Comprehensive Guide to Crafting the “Focus With Light” Photoshop Effect
Introduction:
In the realm of digital photography and graphic design, the interplay of light and focus is a key element that defines the visual impact of an image. The “Focus With Light” Photoshop effect is a captivating technique that directs attention, enhances depth, and adds a touch of cinematic flair to photographs. This extensive guide will explore the step-by-step process of creating the “Focus With Light” effect in Adobe Photoshop, offering a toolkit for artists and photographers to elevate their visual storytelling through the strategic use of light and focus.
- Understanding the “Focus With Light” Concept: The “Focus With Light” effect centers around selectively enhancing specific areas of an image with light, drawing attention to the focal point while gently blurring the surrounding elements. This technique mimics the cinematic depth of field, guiding the viewer’s gaze to the intended subject and creating a visually compelling composition.
- Selecting the Right Image: The success of the “Focus With Light” effect hinges on choosing an image with a clear subject or focal point. Portraits, still life, or scenes with a distinct foreground and background separation work well. Ensure that the chosen image aligns with the narrative or visual story you aim to convey through the enhanced focus.
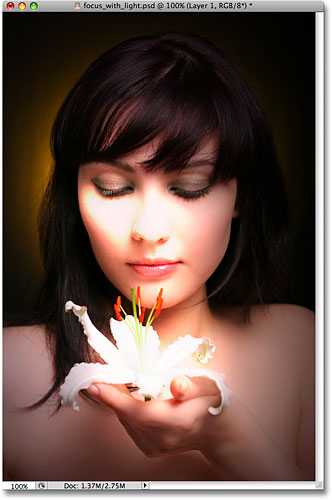
- Opening the Image in Photoshop: Begin by opening your selected image in Adobe Photoshop. Ensure that you are working with a high-resolution file to maintain image quality throughout the editing process. Navigate to File > Open and select the desired image from your files.
- Creating Duplicate Background Layer: To preserve the original image and facilitate non-destructive editing, create a duplicate of the background layer. Right-click on the background layer in the Layers panel and choose “Duplicate Layer.” This duplicated layer will serve as the starting point for applying the “Focus With Light” effect.
- Applying Gaussian Blur to Duplicated Layer: The essence of the effect lies in selectively blurring parts of the image to create a simulated depth of field. Apply a Gaussian Blur to the duplicated layer by navigating to Filter > Blur > Gaussian Blur. Adjust the radius to achieve a subtle blur that softens the background while keeping the primary subject intact.
- Adding a Layer Mask to Control Blur: To exert precise control over where the blur is applied, add a layer mask to the duplicated layer. Select the layer mask icon at the bottom of the Layers panel. Use a soft brush to paint on the mask, revealing the sharp details in the areas you want to emphasize. This step introduces the desired focus on specific elements within the image.
- Introducing Radial Gradient for Light: To simulate the effect of light emanating from the focal point, create a new layer above the duplicated layer. Use the Radial Gradient tool, choosing a white-to-transparent gradient, and apply it from the center of the focal point outward. Adjust the opacity of the gradient layer to control the intensity of the light effect.
- Adjusting Blend Modes for Realism: Experiment with different blend modes for the gradient layer to achieve a realistic interaction between light and the underlying layers. Overlay, Soft Light, or Screen are often effective choices. Adjust the layer opacity to strike a balance that enhances the luminosity without overpowering the image.
- Fine-Tuning Light Intensity and Color: To further refine the light effect, use adjustment layers such as Levels or Curves to control brightness and contrast. Additionally, experiment with Hue/Saturation adjustment layers to introduce subtle color shifts that complement the overall mood of the image. These adjustments contribute to a cohesive and harmonious visual impact.
- Creating Light Rays (Optional): For added drama and emphasis on the light source, consider creating light rays. Create a new layer, set the foreground color to white, and use a soft brush to paint streaks of light emanating from the focal point. Adjust the layer opacity and use a layer mask to refine the placement and intensity of the rays.
- Enhancing Details in the Focal Point: To ensure that the focal point remains sharp and detailed, use additional adjustment layers or tools to enhance specific elements. Sharpening filters, such as Unsharp Mask, or targeted adjustments with the Dodge and Burn tools can be employed to fine-tune details and draw further attention to the focal area.
- Adding Vignette for Depth (Optional): Introduce a subtle vignette to enhance the depth and focus of the image. Create a new layer, use the Elliptical Marquee tool to draw a selection around the center, invert the selection, and apply a black-to-transparent gradient. Adjust the opacity to control the intensity of the vignette, emphasizing the central focus.
- Grouping Layers for Organization: Keep your workspace organized by grouping relevant layers together. Right-click on the layers and choose “Group from Layers.” This step simplifies navigation and makes it easier to revisit and adjust specific components of the “Focus With Light” effect.
- Saving and Exporting: Once satisfied with the “Focus With Light” effect, save your work in Photoshop format (.psd) to retain layers and editing capabilities. For sharing or printing, export the final image in a suitable format, such as JPEG or PNG, ensuring that the resolution meets your intended use.
Conclusion:
The “Focus With Light” Photoshop effect is a powerful tool for photographers and digital artists seeking to convey depth, emphasis, and a cinematic quality in their compositions. By strategically manipulating blur, light, and focus, this technique transforms images into visually compelling narratives that guide the viewer’s gaze and evoke a heightened sense of storytelling.
As you embark on the journey of creating the “Focus With Light” effect, embrace the creative possibilities that arise from selectively enhancing elements within an image. Experiment with different images, refine your understanding of layer masks and blending modes, and let your artistic intuition guide you in crafting captivating visuals. The “Focus With Light” effect stands as a testament to the transformative capabilities of Photoshop, offering a dynamic approach to image editing that transcends traditional boundaries and invites artists to illuminate their vision with a touch of digital magic.


