Typography Unleashed: A Comprehensive Guide to Using Text as a Container for More Text in Photoshop
Introduction:
In the expansive realm of graphic design, the manipulation of text extends beyond mere words on a canvas. One intriguing technique that combines functionality and creativity is using text as a container for more text in Adobe Photoshop. This technique transforms text into a versatile design element, allowing designers to convey complex information or create visually engaging compositions. This extensive guide will walk you through the step-by-step process of using text as a container for more text in Photoshop, providing insights into various methods, customization options, and creative applications. Whether you’re a seasoned designer seeking to push the boundaries of typographic design or a novice eager to experiment with advanced Photoshop techniques, mastering this art opens a realm of possibilities for dynamic and visually striking typography.
Understanding the Significance of Text as a Container:
Using text as a container introduces a unique and functional dimension to typography. Instead of confining text to a static role, it becomes a dynamic vessel capable of holding additional information or shaping the overall design. This technique is particularly valuable when designers aim to create innovative layouts for posters, advertisements, infographics, or any design where text serves both an informational and aesthetic purpose. The use of text containers adds depth, visual interest, and an element of surprise to typographic compositions.
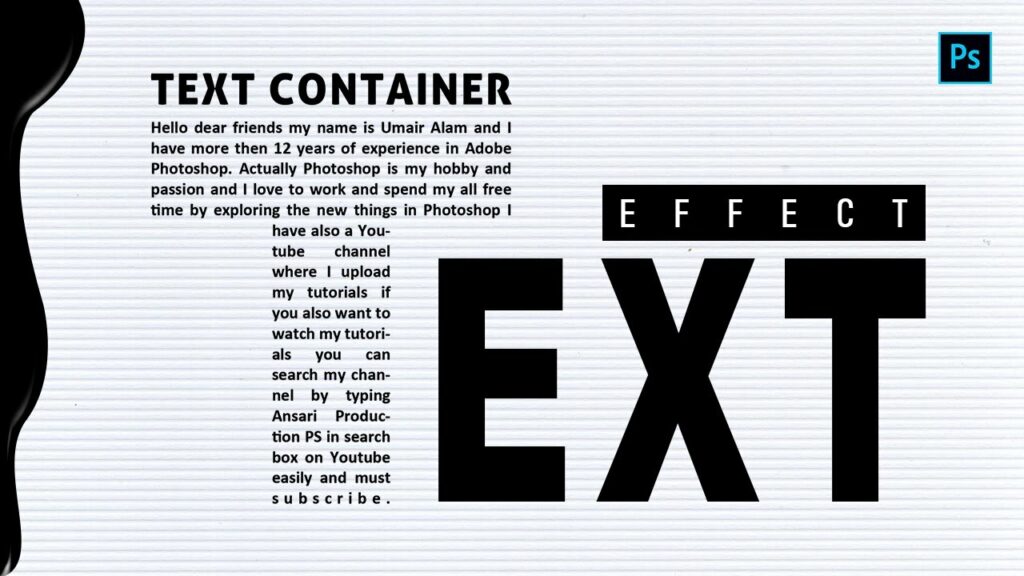
Step-by-Step Guide to Using Text as a Container for More Text in Photoshop:
- Open Photoshop and Create a New Document: Launch Adobe Photoshop on your computer and create a new document by selecting File > New. Choose the dimensions and resolution that suit your design requirements. Click “OK” to create the new canvas.
- Create a Text Layer: Select the Text tool (T) from the toolbar and click on the canvas to create a text layer. Type the initial text that will serve as the container. Choose the font, size, and color from the options in the toolbar or Character panel. Position the text at the desired location on the canvas.
- Adjust Text Size and Shape: Resize and reshape the text layer to create the desired container shape. You can use the Transform tool (Ctrl+T or Command+T) to adjust the dimensions and proportions. Experiment with different shapes, such as rectangles, circles, or custom shapes, to tailor the container to your design vision.
- Duplicate the Text Layer: Right-click on the text layer in the Layers panel and choose “Duplicate Layer.” This creates a copy of the text layer, which will be used for the additional text inside the container.
- Type Additional Text Inside the Container: Double-click on the duplicated text layer to edit the text content. Type the additional text that you want to include inside the container. Adjust the font, size, and color as needed to complement the overall design.
- Create Clipping Mask (Optional): To ensure that the additional text stays within the boundaries of the container, you can create a clipping mask. Position the duplicated text layer directly above the original text layer in the Layers panel, right-click on the duplicated text layer, and choose “Create Clipping Mask.”
- Fine-Tune Text Positioning: Use the Move tool (V) to fine-tune the positioning of both the container text and the additional text. Experiment with the placement to achieve the desired visual balance and harmony.
- Experiment with Layer Styles: Double-click on the text layers to access the Layer Style options. Experiment with effects such as Drop Shadow, Bevel and Emboss, or Stroke to add depth and dimension to both the container and the additional text. Adjust settings to achieve the desired stylistic elements.
- Apply Color and Texture (Optional): Enhance the visual appeal by applying color or texture to the text layers. Experiment with gradients, patterns, or textures to add a dynamic and creative touch to the overall design.
- Duplicate and Experiment: If your design calls for multiple text containers with additional text, repeat the process by duplicating the layers and experimenting with different shapes and sizes. This step allows for the creation of complex and visually engaging compositions.
- Group Layers for Organization: Keep your workspace organized by grouping related layers. Select the text layers associated with each container and press Ctrl+G (Windows) or Command+G (Mac) to create a group. This simplifies navigation and editing, especially in designs with multiple text containers.
- Add Visual Elements or Images (Optional): Enhance the overall composition by incorporating visual elements, images, or illustrations that complement the text containers. This step adds context and reinforces the overall design concept.
- Fine-Tune and Preview: Regularly toggle the visibility of layers, experiment with different effects, and fine-tune settings to achieve the desired appearance of text as a container for more text. Preview the design in different contexts to ensure it remains visually impactful.
- Save and Export: Once satisfied with the design, save your work in the desired format. For web or print use, consider exporting the image in common formats like JPEG or PNG. Preserve the layered Photoshop file (PSD) to retain the flexibility for future edits.
Examples of Creative Applications for Text as a Container:
- Infographics and Data Visualization: Create engaging infographics by using text containers to organize and present complex information. This technique allows for a structured and visually appealing representation of data.
- Editorial Layouts and Magazine Design: Design innovative editorial layouts by incorporating text containers in magazine spreads. Use them to frame additional text, quotes, or captions, adding visual interest to the publication.
- Poster Designs with Dynamic Text: Elevate poster designs by featuring dynamic text containers that hold additional information or messages. This approach ensures that textual elements become an integral part of the visual narrative.
- Interactive Web Design: Explore interactive web design by using text containers to present interactive or clickable elements. This technique is effective for creating engaging and user-friendly website layouts.
- Branding and Logo Design: Reinvent branding materials by incorporating text containers into logos or brand messaging. This technique adds a layer of creativity and uniqueness to brand visuals.
Conclusion:
The use of text as a container for more text in Photoshop is a versatile and innovative technique that transforms typographic elements into dynamic and functional design components. By following the comprehensive steps outlined in this guide, you gain valuable insights into the process of creating visually compelling designs that combine form and function. Whether you’re working on infographics, editorial layouts, posters, web designs, or personal projects, this technique provides a dynamic and flexible approach to typography.
As you explore the possibilities of text containers, let your creativity flourish. Experiment with different shapes, sizes, layer styles, and additional design elements to tailor the composition to the unique requirements of each project. The fusion of text as a container adds a layer of sophistication and creativity to typographic design, making your designs stand out in the ever-evolving landscape of graphic design. So, dive into the world of using text as a container for more text in Photoshop, and let your designs speak with functionality, innovation, and a touch of artistic flair.


