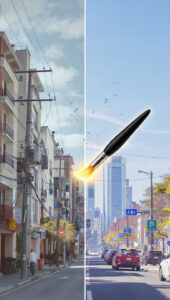
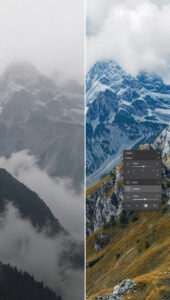
Transforming Realism: A Comprehensive Guide on How to Turn a Photo into a Pencil Sketch in Photoshop

Introduction:
In the realm of digital artistry, the fusion of photography and traditional sketching techniques has given rise to captivating and nostalgic creations. One popular and versatile method is turning a photo into a pencil sketch using Adobe Photoshop. This comprehensive guide will take you through a step-by-step journey, unlocking the artistic potential within your photographs and transforming them into timeless pencil sketches.
Section 1: Understanding the Artistic Appeal of Pencil Sketches
1.1 The Charm of Pencil Sketches:
- Pencil sketches convey a sense of simplicity, elegance, and nostalgia.
- They often highlight the essence of the subject by emphasizing contours and textures.
1.2 Bringing Photos to Life:
- Transforming a photo into a pencil sketch adds a hand-drawn touch, infusing life and emotion into the image.
- It allows photographers and artists to reinterpret their visuals in a unique and artistic way.
Section 2: Importing and Opening Your Photo in Photoshop
2.1 Launching Adobe Photoshop:
- Open Adobe Photoshop on your computer.
2.2 Importing Your Photo:
- Begin by importing the photo you want to convert into a pencil sketch.
- Go to “File” > “Open” and select your image.
Section 3: Duplicating the Background Layer
3.1 Creating a Duplicate Layer:
- Ensure that the Layers panel is visible.
- Right-click on the Background layer and choose “Duplicate Layer” to create a copy.
Section 4: Adjusting Image Levels
4.1 Accessing the Levels Adjustment:
- Navigate to “Image” > “Adjustments” > “Levels” to open the Levels adjustment dialog box.
4.2 Enhancing Contrast:
- Adjust the levels sliders to enhance the contrast of the image.
- Move the black and white sliders to the edges of the histogram for a pronounced effect.
Section 5: Applying a Gaussian Blur
5.1 Accessing the Gaussian Blur Filter:
- Navigate to “Filter” > “Blur” > “Gaussian Blur.”
5.2 Adjusting Blur Radius:
- Experiment with the blur radius to achieve a balance between maintaining details and creating a softened appearance.
- The goal is to reduce fine details while preserving larger shapes.
Section 6: Changing Image Mode to Grayscale
6.1 Converting to Grayscale:
- Go to “Image” > “Mode” > “Grayscale” to convert the image to grayscale.
- Discard color information to focus on the tonal values.
Section 7: Applying the Sketch Effect with Filters
7.1 Accessing the Filter Gallery:
- Navigate to “Filter” > “Filter Gallery.”
7.2 Selecting the Graphic Pen Filter:
- In the Filter Gallery, choose the “Sketch” category and then select the “Graphic Pen” filter.
- Adjust the Stroke Length, Light/Dark Balance, and Stroke Direction to tailor the effect.
Section 8: Enhancing Sketch Details with Levels
8.1 Adding a Levels Adjustment Layer:
- Click on the “Adjustments” panel and select “Levels.”
8.2 Adjusting Levels:
- In the Levels dialog box, fine-tune the sliders to enhance the overall contrast and details of the pencil sketch.
Section 9: Adding Texture for Realism
9.1 Importing a Texture:
- To introduce texture to the pencil sketch, import a texture image.
- Place the texture image above your sketch layer in the Layers panel.
9.2 Blending Modes and Opacity:
- Experiment with blending modes such as Overlay or Soft Light for the texture layer.
- Adjust the layer opacity to control the impact of the texture on the pencil sketch.
Section 10: Fine-Tuning with Additional Adjustments
10.1 Utilizing Additional Filters: – Explore additional filters and adjustments to refine the pencil sketch. – Filters like Sharpen or Smart Sharpen can enhance details, while Noise can add a subtle grain.
10.2 Masking for Selective Detail: – Use layer masks to selectively apply or remove the pencil sketch effect from specific areas. – Paint on the mask with a soft brush to control where the sketch effect is prominent.
Section 11: Exploring Variations and Styles
11.1 Experimenting with Different Filters: – Delve into Photoshop’s diverse range of filters to explore alternative sketch styles. – Filters like Conte Crayon or Charcoal can provide distinct visual effects.
11.2 Combining Sketch with Color: – For a unique aesthetic, experiment with combining the pencil sketch with subtle color elements. – Add a new layer with a low-opacity color wash and experiment with blending modes.
11.3 Creating a Vintage Look: – Achieve a vintage vibe by adding sepia tones or adjusting the color balance. – Experiment with gradient maps or color adjustments for a personalized touch.
Section 12: Saving Your Pencil Sketch Masterpiece
12.1 Choosing File Format: – Once satisfied with your pencil sketch, save your work. – Consider saving a copy in the Photoshop (PSD) format to preserve layers for future editing.
12.2 Exporting for Sharing: – When ready to share or use the sketch, export it in a suitable format such as JPEG or PNG. – Choose the export option based on your intended use and platform.
Conclusion:
Transforming a photo into a pencil sketch in Photoshop is a journey of creative exploration, merging traditional artistry with digital capabilities. This comprehensive guide has equipped you with the step-by-step process, from importing the photo to applying filters and fine-tuning details. Whether you’re aiming for a classic pencil sketch or experimenting with variations and styles, the tools and techniques within Photoshop empower you to bring your artistic vision to life. So, embark on your creative journey, infuse your photographs with the timeless allure of pencil sketches, and watch as your digital images transform into captivating works of art.


