Crafting Symmetry: A Comprehensive Guide on How to Draw a Perfect 5-Point Star in Photoshop
Introduction:
Adobe Photoshop, a digital canvas for creative expression, empowers users to bring their artistic visions to life. Among the myriad design elements, drawing a perfect 5-point star stands out as a timeless and versatile symbol. In this comprehensive guide, we will explore the step-by-step process of drawing a flawless 5-point star in Photoshop, unveiling techniques and tools that ensure precision and symmetry in your digital artwork.
Section 1: Setting Up Your Photoshop Canvas
- Creating a New Document:
- Open Adobe Photoshop and create a new document. Choose dimensions that suit your project, ensuring ample space for the star to be prominently featured.
- Choosing a Background:
- Decide on the background color or pattern for your canvas. A contrasting background can help the star stand out, while a neutral background provides a versatile base.
Section 2: Utilizing Photoshop’s Shape Tools
- Accessing the Polygon Tool:
- The Polygon Tool in Photoshop simplifies the creation of geometric shapes, including stars. Find the Polygon Tool in the toolbar, often nested with the Rectangle and Ellipse Tools.
- Configuring Tool Options:
- Configure the options for the Polygon Tool by selecting it and checking the settings in the Options Bar. Set the sides of the polygon to 5 to create a star.
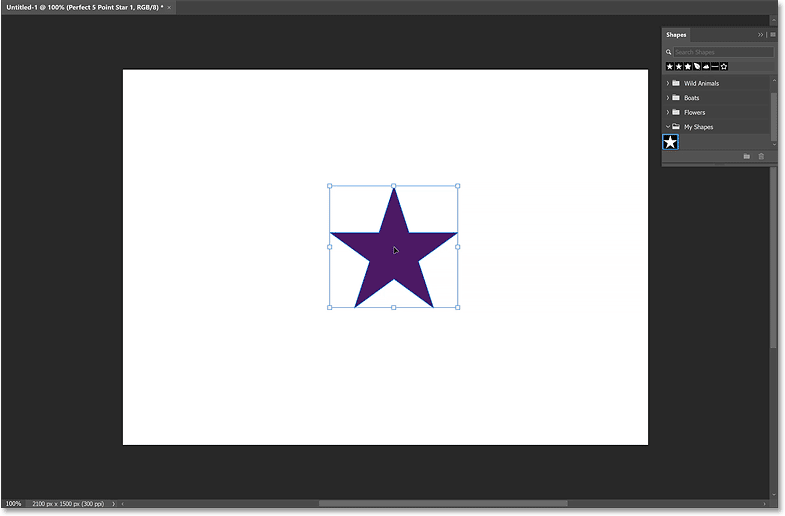
- Drawing the Base Polygon:
- Click and drag on the canvas to draw the base polygon. Hold down the Shift key while dragging to maintain symmetry and ensure that your polygon has five equal sides.
Section 3: Transforming the Polygon into a Star
- Accessing the Transform Controls:
- With the polygon selected, go to the Edit menu and choose “Free Transform” or use the shortcut Ctrl+T (Windows) or Command+T (Mac). This will activate the transform controls around the polygon.
- Adjusting the Corners:
- Hover your cursor over one of the corner handles while holding down the Shift key. Drag the corner handle inward to create concave indentations, transforming the polygon into a star shape.
- Fine-Tuning with Control Points:
- To achieve a more refined star shape, locate the control points on the bounding box. These control points allow you to adjust the shape further, refining the proportions and angles of the star.
Section 4: Applying Stylistic Enhancements
- Styling the Star:
- Enhance the visual appeal of your star by experimenting with layer styles. Apply effects like gradients, strokes, or drop shadows to add depth and dimension to your digital creation.
- Adding Color and Texture:
- Fill the star with colors or textures to suit your design. Utilize the Fill tool or apply gradients to infuse vibrancy into your star, making it visually captivating.
Section 5: Using the Pen Tool for Customization
- Accessing the Pen Tool:
- For users seeking more customization, the Pen Tool offers precision and flexibility. Select the Pen Tool from the toolbar and set it to “Shape” in the Options Bar.
- Creating Custom Paths:
- Use the Pen Tool to create custom paths for the star. By plotting points and adjusting curves, you have complete control over the shape and symmetry of each arm of the star.
- Stroking the Path:
- Once your custom path is complete, right-click and choose “Stroke Path” to apply the stroke. Customize the stroke options to achieve the desired thickness and style.
Section 6: Tips for Symmetry and Precision
- Using Guides:
- Activate guides on your Photoshop canvas to assist in maintaining symmetry. Drag guides from the ruler to create reference lines that guide your drawing process.
- Snapping to Grid:
- Enable the “Snap” feature in Photoshop, particularly the “Snap to Grid” option. This ensures that your cursor adheres to a grid, aiding in precise alignment and symmetry.
- Rotating Copies:
- For intricate designs requiring multiple stars, draw one star, duplicate it, and rotate the copies to create a cohesive and symmetrical pattern. Use the Move Tool (V) to copy and rotate.
Section 7: Troubleshooting and Common Challenges
- Dealing with Uneven Arms:
- If the arms of your star appear uneven, revisit the Transform controls or the Pen Tool to fine-tune the shape. Ensure that the angles and lengths of each arm match for a symmetrical result.
- Adjusting Control Points:
- When using the Transform controls, pay attention to the control points for precision. Adjust the control points individually to refine the shape and maintain balance.
- Experimenting with Layer Styles:
- If layer styles are not producing the desired effect, experiment with different combinations and settings. Adjusting parameters like opacity, blending modes, and gradients can yield diverse results.
Section 8: Exporting and Showcasing Your Star
- Saving Your Project:
- Save your Photoshop project in the native PSD format to retain layers and editability. Additionally, save a copy in a standard image format (JPEG or PNG) for easy sharing and showcasing.
- Showcasing Your Star Design:
- Display your star design on social media, design portfolios, or use it as a decorative element in other projects. Share your creative process to inspire fellow designers and enthusiasts.
Conclusion:
Drawing a perfect 5-point star in Photoshop is a gratifying endeavor that combines precision with creativity. This comprehensive guide has equipped you with the tools, techniques, and tips needed to effortlessly create symmetrical and visually appealing stars in the digital realm. As you embark on your design journey, let your creativity soar, experiment with different styles and embellishments, and enjoy the process of transforming a blank canvas into a stellar masterpiece within the versatile landscape of Adobe Photoshop.


