Shaping Realities: A Comprehensive Guide to Applying Perspective in CorelDRAW
Introduction:
CorelDRAW, a leading vector graphics software, empowers designers with a diverse array of tools to bring their creative visions to life. Among these tools, the application of perspective stands out as a powerful feature, enabling artists to infuse their designs with depth, realism, and dynamic visual impact. This comprehensive guide delves into the nuances of applying perspective in CorelDRAW, exploring the techniques, creative possibilities, and practical applications that elevate designs to new heights of sophistication.
I. Understanding Perspective in Design:
- Definition and Purpose:
- Perspective in design refers to the technique of creating the illusion of three-dimensional space on a two-dimensional surface.
- The purpose of applying perspective is to simulate depth, distance, and spatial relationships within a design, enhancing its realism and visual appeal.
- Types of Perspective:
- CorelDRAW offers various types of perspective, including one-point, two-point, and three-point perspectives.
- Each type of perspective influences the way objects appear in relation to the viewer, providing flexibility and creative control.
II. Tools for Applying Perspective in CorelDRAW:
- Perspective Tools:
- CorelDRAW features dedicated perspective tools that streamline the application of perspective effects.
- These tools include the One-Point Perspective, Two-Point Perspective, and Three-Point Perspective tools, each tailored to specific design scenarios.
- Envelope and Transformation Tools:
- While perspective tools are specialized for creating realistic spatial effects, CorelDRAW’s envelope and transformation tools offer additional flexibility.
- Envelope tools enable designers to warp and distort objects, providing an alternative method for achieving perspective effects.
III. Applying One-Point Perspective:
- Selecting the One-Point Perspective Tool:
- The One-Point Perspective tool in CorelDRAW allows designers to apply depth and distance with a single vanishing point.
- Select the tool from the toolbox to activate the perspective control handles.
- Adjusting Perspective Handles:
- Manipulate the perspective control handles to define the direction and intensity of the perspective effect.
- Objects within the perspective grid will automatically conform to the chosen vanishing point, creating a convincing illusion of depth.
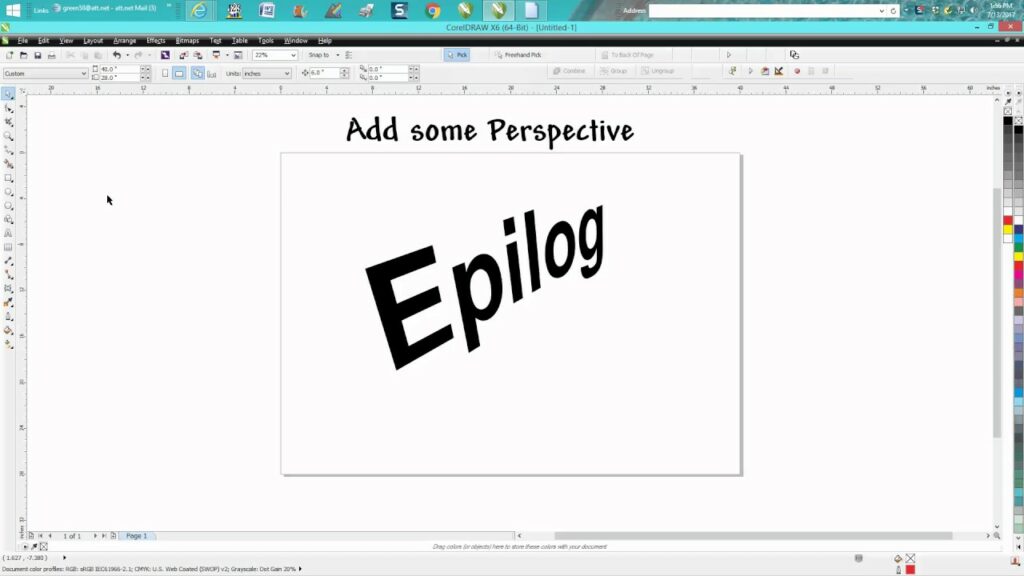
- Using the One-Point Perspective for Text:
- Apply the One-Point Perspective tool to text elements for dynamic and visually striking effects.
- Experiment with different perspectives to achieve desired results, whether it’s a flat surface receding into the distance or text wrapping around a central point.
IV. Applying Two-Point Perspective:
- Selecting the Two-Point Perspective Tool:
- The Two-Point Perspective tool introduces two vanishing points, providing a more dynamic sense of depth and space.
- Activate the tool and position the control handles to establish the two vanishing points.
- Perspective Effects on Objects:
- Objects manipulated with the Two-Point Perspective tool align with the chosen vanishing points, creating the illusion of depth.
- This perspective is often used for scenes with architectural elements or compositions requiring a strong sense of directionality.
- Enhancing Realism with Shadows:
- To enhance realism, consider adding shadows to objects within the perspective grid.
- Shadows should follow the perspective lines, contributing to the overall coherence of the design.
V. Applying Three-Point Perspective:
- Selecting the Three-Point Perspective Tool:
- The Three-Point Perspective tool adds an additional vanishing point, enabling designers to create complex spatial effects.
- Activate the tool and position the control handles to define the three vanishing points.
- Creating Dynamic Compositions:
- Three-Point Perspective is particularly useful for creating dynamic compositions with extreme angles and orientations.
- Use this perspective for dramatic scenes, unusual viewpoints, or compositions requiring a heightened sense of drama.
VI. Using Envelope and Transformation Tools:
- Envelope Perspectives:
- CorelDRAW’s envelope tools provide an alternative approach to creating perspective effects.
- Warp and distort objects using envelope handles to simulate perspective without relying on vanishing points.
- Custom Transformation:
- CorelDRAW’s transformation tools, including rotation, scaling, and skewing, can be combined to achieve customized perspective effects.
- Experiment with these tools to manipulate objects in unique ways and create unconventional perspectives.
VII. Creative Possibilities with Perspective:
- Architectural Rendering:
- Perspective tools are invaluable for architectural rendering, allowing designers to showcase buildings, interiors, and urban landscapes realistically.
- Use one-point or two-point perspective for structured compositions, while three-point perspective adds drama to unconventional scenes.
- Product Design and Packaging:
- Applying perspective in CorelDRAW is crucial for product designers and packaging professionals.
- Realistic rendering of products within their environments enhances the visual impact and marketability of designs.
- Illustrative Storytelling:
- Perspective tools contribute to illustrative storytelling by creating immersive scenes and dynamic compositions.
- Designers can use perspective to guide the viewer’s focus, emphasize key elements, and evoke specific emotions within a visual narrative.
- Logo and Branding:
- Incorporating perspective in logo design and branding adds a modern and dynamic touch.
- The controlled use of perspective can convey depth, stability, and forward motion, aligning with brand values and aspirations.
VIII. Best Practices for Applying Perspective:
- Consistency Across Elements:
- Maintain consistency when applying perspective to multiple elements within a design.
- All objects sharing the same perspective should adhere to the same vanishing points or spatial relationships.
- Test Different Perspectives:
- Experiment with different types of perspective and variations to find the most suitable effect for your design.
- Testing different perspectives helps determine the visual impact and coherence of the composition.
IX. Troubleshooting and Tips:
- Grids and Guides:
- Use grids and guides to assist in aligning objects and maintaining perspective accuracy.
- Grids help establish a consistent spatial context, ensuring that objects align with the intended perspective.
- Practice Layer Management:
- Utilize layers to organize objects within the perspective grid.
- Layer management ensures that objects can be edited independently and that changes don’t inadvertently disrupt the overall perspective.
X. Continuous Learning and Mastery:
- Explore Advanced Features:
- CorelDRAW’s perspective tools offer advanced features such as vanishing point locking and custom grid creation.
- Delve into these features to enhance your proficiency and unlock new possibilities in perspective design.
- Community Engagement:
- Join design communities, forums, and social media groups to connect with other CorelDRAW users.