Maximizing Creativity: A Comprehensive Guide to Working with External Libraries in Adobe Dreamweaver

Introduction: External libraries play a pivotal role in modern web development, offering a wealth of pre-built components, frameworks, and resources to streamline the development process and enhance website functionality. Adobe Dreamweaver, a leading web design and development tool, provides robust support for integrating and working with external libraries, empowering developers to leverage the latest technologies and tools to create dynamic and interactive web experiences. In this extensive guide, we’ll explore the process of working with external libraries in Adobe Dreamweaver, covering various techniques, best practices, and customization options to help you harness the full potential of external resources in your web projects.
Understanding the Importance of External Libraries: External libraries offer several advantages for web developers, including:
- Time-Saving: External libraries provide pre-built components and functionalities that developers can integrate into their projects, saving time and effort in coding from scratch.
- Consistency: Libraries ensure consistency in design and functionality across web projects by providing standardized solutions for common tasks and challenges.
- Efficiency: Libraries are optimized for performance and scalability, allowing developers to create fast and responsive web applications with minimal overhead.
- Innovation: Libraries often incorporate cutting-edge technologies and best practices, enabling developers to stay up-to-date with the latest trends and advancements in web development.
Step 1: Researching and Selecting External Libraries Before integrating external libraries into your Adobe Dreamweaver project, it’s essential to research and evaluate available options to choose the most suitable libraries for your specific requirements. Consider the following factors when selecting external libraries:
- Functionality: Identify the specific features and functionalities you need for your web project, such as UI components, animations, data visualization, or client-side frameworks.
- Compatibility: Ensure that the chosen libraries are compatible with Adobe Dreamweaver and the technologies used in your project, such as HTML, CSS, and JavaScript.
- Performance: Evaluate the performance characteristics of the libraries, including file size, loading times, and resource usage, to minimize impact on page load times and user experience.
- Community Support: Consider the level of community support and documentation available for the libraries, including forums, tutorials, and online resources, to troubleshoot issues and get help when needed.
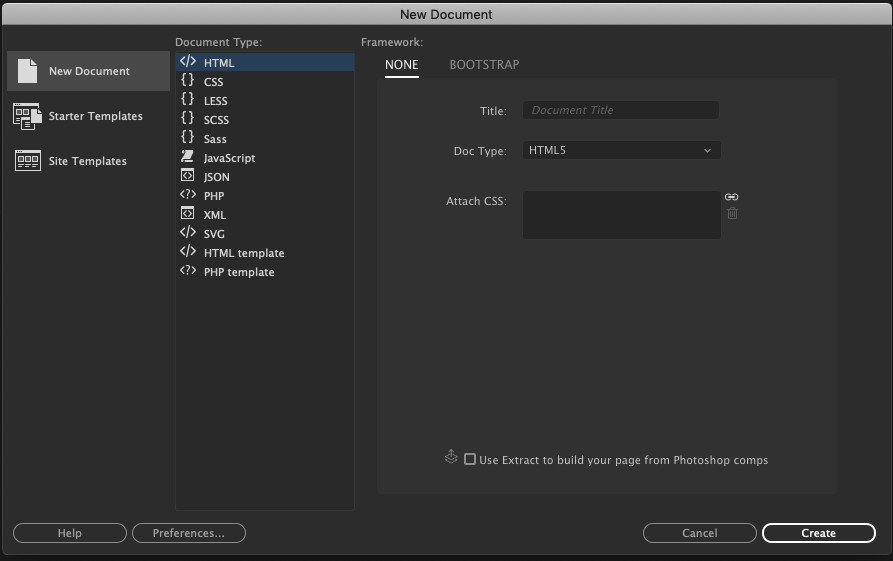
Step 2: Integrating External Libraries into Dreamweaver Adobe Dreamweaver provides several methods for integrating external libraries into web projects, including manual file inclusion, CDN links, package managers, and Dreamweaver extensions. Here’s how to integrate external libraries into Dreamweaver:
- Manual File Inclusion: Download the library files from the official website or repository and add them to your Dreamweaver project directory. Link to the library files in your HTML documents using <script> and <link> tags, specifying the relative file paths or URLs as needed.
- CDN Links: Use Content Delivery Network (CDN) links to include external library files directly from third-party servers without downloading them to your local project. Copy the CDN links provided by the library documentation and paste them into your HTML documents, ensuring reliable and fast access to the library files.
- Package Managers: Use package managers such as npm (Node Package Manager) or Bower to install and manage external libraries and dependencies in your Dreamweaver project. Use the command-line interface to install packages, and then reference them in your HTML documents as needed.
- Dreamweaver Extensions: Explore Dreamweaver extensions or add-ons that provide integration with popular external libraries and frameworks. Install and configure extensions within Dreamweaver to add library features and functionalities to your projects seamlessly.
Step 3: Customizing and Configuring External Libraries Once you’ve integrated external libraries into your Adobe Dreamweaver project, you can customize and configure them to suit your specific design and functionality requirements. Consider the following customization options:
- Configuration Options: Explore the documentation and configuration options provided by the external libraries to customize their behavior, appearance, and functionality. Modify configuration settings, such as theme colors, animation speeds, and feature toggles, to align with your design preferences and branding.
- Styling and Theming: Customize the styling and theming of external library components using CSS to match your website’s design aesthetics and visual identity. Override default styles, apply custom classes, and use CSS preprocessors such as Sass or Less to streamline the styling process and maintain consistency.
- Localization: Localize external libraries to support multiple languages and regions by translating text strings, labels, and messages into different languages. Use localization files or plugins provided by the libraries to implement multilingual support and ensure accessibility for diverse audiences.
- Feature Extensions: Extend the functionality of external libraries by integrating additional plugins, extensions, or modules that enhance their capabilities. Explore third-party plugins or create custom extensions to add new features, integrations, or optimizations tailored to your project’s requirements.
Step 4: Testing and Optimization After customizing and configuring external libraries in Adobe Dreamweaver, it’s essential to test their functionality and performance across different browsers, devices, and screen sizes. Conduct thorough testing to ensure that the integrated libraries work correctly, display as expected, and provide a consistent user experience across various environments. Monitor performance metrics such as page load times, resource usage, and user interactions to identify any issues or optimization opportunities and make necessary adjustments to improve the overall effectiveness of the libraries.
Step 5: Deployment and Maintenance Once you’re satisfied with the integration of external libraries in your Dreamweaver project, deploy your website to a live server to make the libraries accessible to users. Regularly monitor and maintain the libraries to ensure they remain up-to-date, compatible, and secure. Update library versions, configurations, and dependencies as needed to address security vulnerabilities, compatibility issues, and evolving requirements. Stay informed about library updates and releases to take advantage of new features, bug fixes, and performance improvements over time.
Conclusion: Working with external libraries in Adobe Dreamweaver allows web developers to leverage a vast ecosystem of pre-built components, frameworks, and resources to enhance their web projects’ functionality and user experience. By following the steps outlined in this guide and leveraging Dreamweaver’s features and tools, you can seamlessly integrate external libraries into your projects and unlock new possibilities for creativity and innovation. Whether you’re a beginner or experienced web developer, mastering the art of working with external libraries in Dreamweaver empowers you to create dynamic, interactive, and visually stunning web experiences that captivate audiences and achieve your design objectives.


