Crafting Seamless User Interactions: A Comprehensive Guide to Creating Web Forms with Validation in Adobe Dreamweaver
Introduction: Web forms are essential components of modern websites, facilitating communication, data collection, and user interaction. Adobe Dreamweaver provides powerful tools for designing and implementing web forms with validation, ensuring that user input is accurate, complete, and formatted correctly. In this extensive guide, we’ll explore the process of creating web forms with validation in Adobe Dreamweaver, covering various techniques, best practices, and customization options to help you create seamless and user-friendly form experiences for your website visitors.
Understanding the Importance of Web Forms with Validation: Web forms with validation offer several benefits for websites, including:
- Data Accuracy: Validation helps ensure that user input meets specified criteria and is accurate, reducing errors and inconsistencies in data collection.
- Improved User Experience: Validation provides real-time feedback to users, guiding them to correct any errors or omissions before submitting the form, enhancing the overall user experience.
- Security: Validation helps prevent malicious attacks such as SQL injection, cross-site scripting (XSS), and form spamming by filtering out invalid or suspicious input.
- Compliance: Validation ensures that user input complies with regulatory requirements, industry standards, and business rules, reducing legal risks and liabilities associated with data privacy and security.
Step 1: Planning Your Web Form Before creating a web form with validation in Adobe Dreamweaver, it’s essential to plan its structure, fields, and validation rules. Consider the following factors when planning your web form:
- Form Fields: Determine which fields are necessary for collecting the required information from users, considering factors such as relevance, usability, and data integrity.
- Validation Rules: Define validation rules for each form field to ensure that user input meets specific criteria, such as required fields, data formats (e.g., email address, phone number), minimum and maximum lengths, and pattern matching (e.g., alphanumeric characters).
- Error Handling: Plan how to handle validation errors and provide feedback to users when their input fails validation. Consider using descriptive error messages, visual indicators, and inline validation techniques to help users correct errors easily.
- Accessibility: Ensure that your web form is accessible to users with disabilities by following best practices for form design, including proper labeling, keyboard navigation, and ARIA roles and attributes.
Step 2: Creating the Web Form Markup Adobe Dreamweaver offers several methods for creating web form markup, including manual HTML coding, visual design tools, and pre-built form templates. Here’s how to create the web form markup in Dreamweaver:
- Manual HTML Coding: Open your HTML document in Dreamweaver and switch to the “Code” view. Use HTML markup to define the structure of your web form, including <form>, <input>, <textarea>, <select>, and <button> elements for form fields and controls. Add attributes such as name, type, placeholder, and required for input validation.
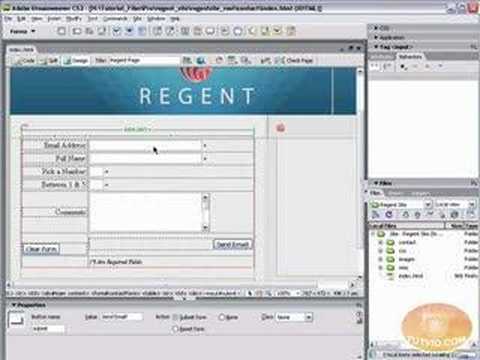
- Visual Design Tools: Switch to the “Design” view in Dreamweaver to use visual design tools for creating web forms. Drag and drop form elements from the “Insert” panel onto your web page, and use the Properties panel to customize attributes such as field labels, input types, and validation rules.
- Pre-built Form Templates: Explore Dreamweaver’s pre-built form templates or third-party extensions that provide customizable form layouts and styles. Insert pre-built form templates into your web page and customize them to match your design requirements and branding.
Step 3: Implementing Form Validation Adobe Dreamweaver provides built-in support for client-side and server-side form validation, as well as integration with third-party JavaScript libraries and frameworks. Here’s how to implement form validation in Dreamweaver:
- Client-Side Validation: Use HTML5 form validation attributes such as required, pattern, min, and max to perform basic validation checks on the client side. Dreamweaver’s visual design tools automatically generate HTML5 form validation attributes for form fields based on your input validation rules.
- JavaScript Validation: Customize form validation using JavaScript to implement more advanced validation logic and custom error messages. Write JavaScript functions to validate form fields, handle form submission events, and display error messages dynamically. Dreamweaver’s code editor provides syntax highlighting, code hinting, and debugging tools to streamline JavaScript development.
- Server-Side Validation: Implement server-side form validation using server-side scripting languages such as PHP, ASP.NET, or Node.js to perform validation checks on the server before processing form data. Write server-side scripts to validate form input, handle form submission, and generate response messages or redirect users based on validation results.
Step 4: Customizing Form Styles and Layout Once you’ve implemented form validation in Adobe Dreamweaver, you can customize the appearance and layout of your web form to match your design preferences and branding. Consider the following customization options:
- CSS Styling: Apply CSS styles to customize the appearance of form elements, including fonts, colors, borders, backgrounds, and spacing. Use CSS frameworks or grid systems to create responsive and visually appealing form layouts that adapt to different screen sizes and devices.
- Form Layout: Design an intuitive and user-friendly form layout by organizing form fields logically and grouping related fields together. Use fieldset and legend elements to create field groups with corresponding labels and descriptions.
- Error Styling: Customize the styling of validation error messages and indicators to make them stand out and easy to identify. Use CSS to style error messages with contrasting colors, icons, or animations, and position them strategically near the corresponding form fields.
- Feedback Mechanisms: Enhance user feedback mechanisms by adding visual indicators such as checkmarks, tooltips, or progress bars to indicate successful form submission and completion. Use CSS animations or JavaScript effects to provide real-time feedback during form interaction and validation.
Step 5: Testing and Optimization After customizing your web form with validation in Adobe Dreamweaver, it’s essential to test its functionality and performance across different browsers, devices, and screen sizes. Conduct thorough testing to ensure that form validation works correctly, error messages are displayed as expected, and user interactions are smooth and intuitive. Monitor form performance metrics such as submission rates, error rates, and user satisfaction to identify any usability issues or performance bottlenecks and make necessary optimizations to improve the overall effectiveness of your web form.
Step 6: Deployment and Maintenance Once you’re satisfied with your web form with validation in Dreamweaver, deploy your website to a live server to make the form accessible to users. Regularly monitor and maintain the form to ensure it remains up-to-date, functional, and secure. Test the form periodically to verify its performance and compatibility with evolving web standards and technologies. Update form validation rules, error messages, and styling as needed to address user feedback, improve usability, and enhance the overall user experience.
Conclusion: Creating web forms with validation in Adobe Dreamweaver allows web developers to design seamless and user-friendly form experiences that enhance communication, data collection, and user interaction on websites. By following the steps outlined in this guide and leveraging Dreamweaver’s features and tools, you can create effective and secure web forms that meet the needs of your users and align with your website’s design aesthetics and objectives. Whether you’re a beginner or experienced web developer, mastering the art of creating web forms with validation in Dreamweaver empowers you to create compelling and interactive form experiences that drive engagement and achieve your business goals.