Mastering the Art of Fusion: A Comprehensive Guide on How to Blend Two Images in Photoshop
Introduction:
Photoshop, the powerhouse of image editing, provides a plethora of tools and techniques for creative expression. One such skill that elevates your editing capabilities is blending two images seamlessly. Whether you’re crafting surreal landscapes, enhancing portraits, or creating captivating digital art, this comprehensive guide will walk you through the step-by-step process of blending two images in Photoshop, unlocking a world of creative possibilities.
Section 1: Understanding Image Blending Concepts
1.1 Introduction to Image Blending:
- Image blending involves seamlessly combining elements from two or more images to create a cohesive and visually appealing composition. Understanding the concepts of blending modes, layers, and masks is crucial for achieving professional-looking results.
1.2 Choosing Complementary Images:
- Selecting images that complement each other in terms of color, lighting, and perspective is essential for a successful blend. Consider the narrative or theme you want to convey through the final composition.
Section 2: Preparing Your Images in Photoshop
2.1 Importing Images:
- Open Photoshop and import the images you intend to blend. Ensure that each image is on a separate layer, allowing for independent adjustments.
2.2 Organizing Layers:
- Organize your layers by naming them descriptively and arranging them in a logical order. This facilitates a systematic workflow and makes it easier to track adjustments.
Section 3: Using Blending Modes
3.1 Introduction to Blending Modes:
- Photoshop offers various blending modes that dictate how layers interact with each other. Experiment with modes like Overlay, Multiply, Screen, and more to achieve different blending effects.
3.2 Applying Blending Modes:
- Select the top layer of the image you want to blend and experiment with blending modes until you find the one that best suits your composition. Adjust opacity as needed for subtle or pronounced effects.
Section 4: Layer Masks for Precise Blending
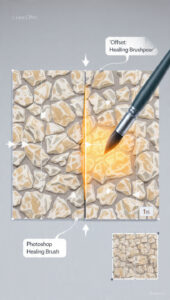
4.1 Understanding Layer Masks:
- Layer masks allow for non-destructive editing by selectively revealing or hiding parts of a layer. Mastering layer masks is crucial for precise image blending.
4.2 Creating Layer Masks:
- Add a layer mask to the top image layer and use brushes or gradients to paint on the mask, revealing or concealing portions of the image. This technique helps seamlessly integrate elements from both images.
Section 5: Adjustment Layers for Harmonization
5.1 Introduction to Adjustment Layers:
- Adjustment layers provide a non-destructive way to apply color corrections, tonal adjustments, and more. Utilize adjustment layers to harmonize colors and tones between blended images.
5.2 Color Grading Techniques:
- Experiment with techniques such as color balance, hue/saturation, and selective color adjustments to unify the color palette across both images. This enhances visual cohesion in the final composition.
Section 6: Warp and Transform Tools for Perspective
6.1 Perspective Adjustment:
- The Warp and Transform tools are powerful for adjusting the perspective of elements in your images. Use these tools to match the angles and proportions between the blended elements for a seamless integration.
6.2 Content-Aware Scale:
- The Content-Aware Scale feature allows you to resize and stretch specific elements in an image while intelligently preserving important details. This is particularly useful for fitting elements into a new composition.
Section 7: Adding Realistic Shadows and Highlights
7.1 Creating Shadows:
- Realism in image blending often hinges on the inclusion of shadows. Use the Brush tool with a low-opacity setting to paint realistic shadows beneath elements, ensuring they visually interact with the scene.
7.2 Enhancing Highlights:
- Similar to shadows, adding highlights helps integrate elements seamlessly. Use dodge and burn tools to enhance highlights and shadows, sculpting the lighting in a way that aligns with the overall composition.
Section 8: Final Touches and Fine-Tuning
8.1 Global Adjustments:
- Evaluate the overall composition and make any necessary global adjustments. This may include fine-tuning contrast, saturation, or overall color grading to achieve a polished and cohesive look.
8.2 Checking for Consistency:
- Pay attention to details and ensure consistency throughout the blended image. Check for uniform lighting, matching color temperatures, and seamless transitions between elements.
Section 9: Saving and Exporting the Final Composition
9.1 Saving for Future Editing:
- Save your Photoshop project file (.PSD) to retain all layers and adjustments for future editing. This is crucial if you want to revisit and make changes to the composition.
9.2 Exporting the Final Image:
- When satisfied with the result, export the final blended image in a suitable file format (e.g., JPEG, PNG). Consider the intended use and resolution requirements for optimal quality.
Conclusion: Unleashing Creative Fusion in Photoshop
Blending two images in Photoshop is a skill that opens doors to endless creative possibilities. Whether you’re merging landscapes, creating surreal portraits, or crafting imaginative digital art, mastering the art of fusion enhances your ability to visually communicate ideas. This comprehensive guide has equipped you with the knowledge and techniques to seamlessly blend two images, turning your visions into captivating and cohesive compositions. Welcome to the realm of creative fusion, where Photoshop becomes your canvas for boundless artistic expression.