Mastering Precision: A Comprehensive Guide on How to Apply a Smart Filter in Photoshop CS3

Introduction:
Adobe Photoshop CS3 introduced a revolutionary feature that transformed the landscape of digital image editing – Smart Filters. This innovative addition allowed users to apply filters in a non-destructive manner, offering unprecedented flexibility and control over the editing process. In this extensive guide, we will delve into the intricacies of applying a Smart Filter in Photoshop CS3, providing a comprehensive exploration of the steps and techniques to harness the power of this groundbreaking feature.
Section 1: Understanding the Genesis of Smart Filters in CS3
Smart Filters represent a paradigm shift in image editing, allowing users to apply filters to a layer in a dynamic and non-destructive manner. In Photoshop CS3, this feature was introduced to address the limitations of traditional filters, providing a more flexible approach to editing that enables adjustments at any stage of the workflow.
Section 2: Identifying Compatible Layers for Smart Filters
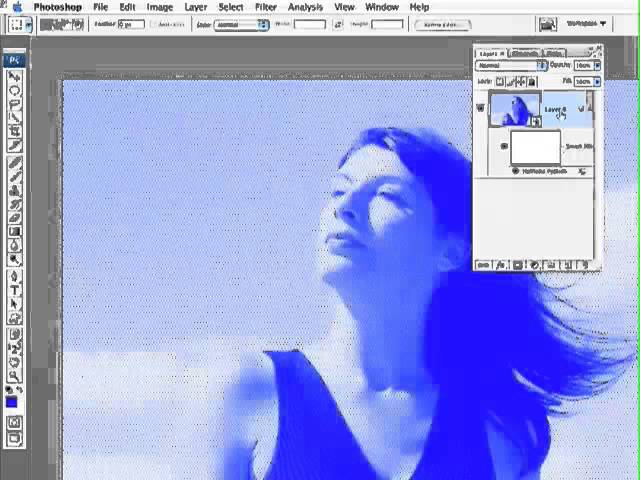
Before applying a Smart Filter in Photoshop CS3, it’s crucial to choose the right layer and convert it into a Smart Object. Smart Objects serve as the foundation for Smart Filters, preserving the original pixel data and allowing for dynamic adjustments without permanent alterations. Right-click on the desired layer in the Layers panel and select “Convert to Smart Object” to initiate the process.
Section 3: Navigating to the Filter Menu
With the layer converted into a Smart Object, the next step is to navigate to the Filter menu. This menu houses a plethora of filter options, ranging from blurs and distortions to artistic effects and sharpening tools. Select the specific filter that aligns with your creative vision, and it will be applied as a Smart Filter to the Smart Object layer.
Section 4: Applying the Chosen Filter
Upon selecting the desired filter from the Filter menu, a dialog box will appear, allowing you to customize the settings of the chosen filter. Adjust parameters such as radius, intensity, or style based on your preferences. This step is pivotal in tailoring the filter effect to achieve the desired outcome.
Section 5: The Versatility of Smart Filters
Smart Filters in Photoshop CS3 offer a versatile array of options, enabling users to experiment with a multitude of filter effects. Whether it’s applying blurs for a soft focus, adding artistic filters for a painterly touch, or enhancing details with sharpening filters, the versatility of Smart Filters empowers users to explore diverse creative possibilities.
Section 6: Leveraging Multiple Filters
Photoshop CS3’s Smart Filters extend beyond the singular application, allowing users to layer multiple filters on a single Smart Object. This layering technique provides a nuanced approach to image editing, enabling the creation of intricate and complex effects. Experiment with combinations of filters to achieve unique and visually compelling results.
Section 7: Adjusting Filter Settings Post-Application
One of the distinguishing features of Smart Filters in Photoshop CS3 is the ability to adjust filter settings after the initial application. Double-click on the filter name in the Layers panel to reopen the filter dialog box and fine-tune the settings. This dynamic adjustment capability ensures flexibility and precision throughout the editing process.
Section 8: Navigating the Layers Panel for Smart Filters
Smart Filters are seamlessly integrated into the Layers panel in Photoshop CS3, providing a clear and organized overview of the applied filters. The Layers panel displays each Smart Filter, allowing users to toggle them on or off, reorder them, or adjust their settings with ease. This intuitive interface contributes to an efficient and streamlined editing workflow.
Section 9: Incorporating Smart Filters into Non-Destructive Workflows
The non-destructive nature of Smart Filters makes them an invaluable asset in non-destructive workflows. Whether you’re refining a photograph, creating digital art, or designing graphics, the ability to apply, adjust, and experiment with filters non-destructively ensures that your original image remains intact, allowing for endless iterations and creative exploration.
Section 10: Saving and Exporting Smart Filter-Enhanced Images
Once you have applied and fine-tuned your Smart Filters in Photoshop CS3 to achieve the desired effect, it’s time to save or export your image. Smart Filters are preserved when saving the file in formats that support layers, such as PSD. This ensures that the non-destructive edits can be revisited and adjusted in future editing sessions.
Conclusion:
Applying a Smart Filter in Photoshop CS3 is a transformative process that elevates image editing to new heights of precision and flexibility. By understanding the foundational principles, converting layers to Smart Objects, navigating the Filter menu, and leveraging the dynamic capabilities of Smart Filters, users can unlock the full potential of this groundbreaking feature. This comprehensive guide serves as a roadmap for navigating the intricacies of applying Smart Filters in Photoshop CS3, encouraging users to embrace a non-destructive and precise approach to image enhancement.


