Mastering Motion: A Comprehensive Guide to Crafting Camera Shake Effects in Adobe After Effects

Introduction: Camera shake effects add a dynamic and immersive quality to videos, enhancing realism, intensity, and engagement. Whether used to simulate the chaos of an action sequence or the intimacy of a handheld documentary, camera shake effects can elevate the visual storytelling of any project. Adobe After Effects provides a versatile set of tools and techniques for creating realistic camera shake effects that enhance the impact and realism of your footage. In this comprehensive guide, we’ll explore the intricacies of creating camera shake effects in After Effects, covering everything from basic setups to advanced techniques for adding depth, complexity, and realism to your compositions.
Understanding Camera Shake Effects: Camera shake effects simulate the movement and instability of a handheld camera, adding a sense of realism, urgency, and immersion to videos. By replicating the subtle vibrations, jolts, and movements of a handheld camera, artists can create dynamic and cinematic visuals that draw viewers into the action and emotion of the scene. Whether used for enhancing action sequences, adding tension to suspenseful moments, or conveying documentary-style authenticity, camera shake effects offer endless possibilities for creative expression and visual storytelling.
Getting Started with Camera Shake Effects in After Effects: To begin creating camera shake effects in Adobe After Effects, follow these steps:
Step 1: Import Footage: Open After Effects and create a new composition by selecting “Composition” > “New Composition” from the menu. Import the footage to which you want to add the camera shake effect by dragging it into the composition timeline or selecting “File” > “Import” from the menu.
Step 2: Stabilize Footage (Optional): If your footage is already shaky or unstable, stabilize it before adding the camera shake effect. Right-click on the footage layer in the timeline, select “Stabilize Motion,” and adjust the tracking settings to stabilize the footage. This step ensures that the camera shake effect is added on top of a stable base, resulting in a more realistic and controlled effect.
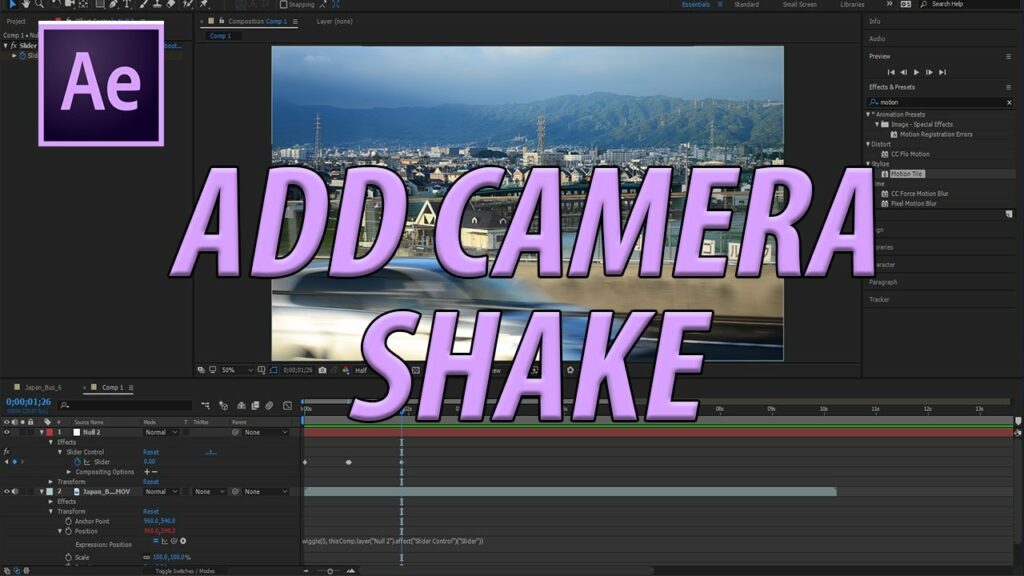
Step 3: Add Null Object: Create a new null object by selecting “Layer” > “New” > “Null Object” from the menu. Rename the null object to “Camera Shake Control” or a similar name for easy reference. This null object will serve as the control layer for the camera shake effect, allowing you to adjust the intensity, frequency, and direction of the shake.
Step 4: Apply Wiggle Expression: Apply the Wiggle expression to the position property of the null object to create the camera shake effect. Alt-click (Windows) or Option-click (Mac) on the stopwatch icon next to the position property in the null object layer. In the expression editor, type the following expression:
wiggle(frequency, amplitude)
Replace “frequency” with the desired frequency of the shake (e.g., 5 for five shakes per second) and “amplitude” with the desired amplitude of the shake (e.g., 10 for a 10-pixel shake).
Step 5: Link Footage to Null Object: Link the position property of the footage layer to the null object layer to ensure that the camera shake effect affects the entire composition. Alt-click (Windows) or Option-click (Mac) on the stopwatch icon next to the position property of the footage layer. Then, pick whip the position property to the position property of the null object layer.
Step 6: Customize Camera Shake: Customize the camera shake effect by adjusting the frequency, amplitude, and other parameters of the Wiggle expression. Experiment with different values to achieve the desired intensity and style of the camera shake. You can also add additional expressions or effects to further enhance the realism and impact of the shake.
Advanced Techniques and Tips: To take your camera shake effects to the next level, consider exploring the following advanced techniques and tips:
- Multi-Dimensional Shake: Create more dynamic and realistic camera shake effects by applying the Wiggle expression to multiple properties of the null object, such as rotation and scale. Experiment with different combinations of properties to simulate complex camera movements and vibrations.
- Smooth and Jittery Shake: Use keyframe interpolation and easing techniques to create smooth and natural camera shake effects. Adjust the temporal interpolation of the null object’s position keyframes to create a gradual buildup and release of the shake, adding realism and impact to the effect. Alternatively, use the separate Wiggle Selector plugin to add jittery, erratic movements to the camera shake for a more chaotic and intense effect.
- Directional Shake: Add directional shake effects to simulate specific types of camera movements, such as handheld walking or running. Use expressions or keyframes to animate the position, rotation, and scale of the null object in different directions, creating dynamic and immersive camera shake effects that enhance the storytelling and emotion of the scene.
- Dynamic Intensity and Frequency: Create dynamic and responsive camera shake effects by linking the intensity and frequency of the shake to other parameters in the composition, such as audio levels or character movement. Use expressions or scripting to automate the intensity and frequency of the shake based on external factors, adding realism and synchronization to the effect.
- Integration with 3D Scenes: Integrate camera shake effects with 3D scenes and elements in After Effects to create seamless composites and visual effects. Use 3D cameras and lights to add depth and dimensionality to the composition, enhancing the realism and immersion of the camera shake effect within the scene.
Conclusion: Creating camera shake effects in Adobe After Effects offers a thrilling opportunity to add realism, intensity, and immersion to your videos. By mastering the techniques and principles outlined in this guide, you’ll be equipped to create camera shake effects that captivate, engage, and inspire audiences across a wide range of projects and genres.
As you embark on your journey to create camera shake effects in After Effects, remember to embrace experimentation, iteration, and innovation. Explore new techniques, push the boundaries of your creativity, and let your imagination soar as you craft dynamic and immersive camera shake effects that elevate the visual storytelling of your videos. With dedication, practice, and a willingness to explore new possibilities, you’ll unlock the full potential of camera shake effects in After Effects and create visuals that resonate with viewers for years to come.


