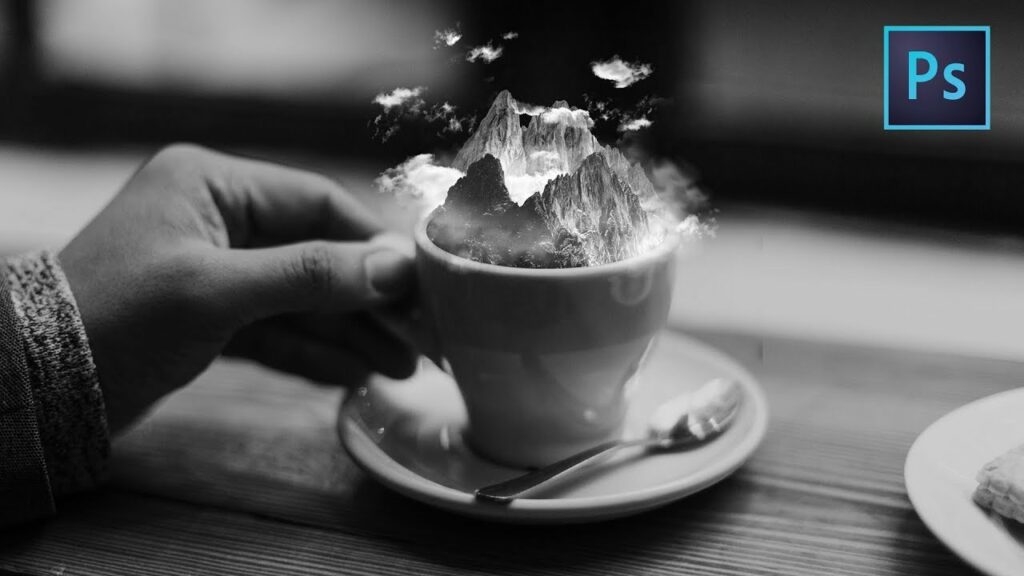
Unveiling Reality: A Comprehensive Tutorial on Creating Surreal Photomanipulation with Realistic Clouds in Coffee

Introduction:
Embark on a surreal journey into the realm of digital artistry as we explore the step-by-step process of creating a captivating photomanipulation featuring realistic clouds in a coffee-themed landscape. This comprehensive tutorial will guide you through the techniques and tools in Adobe Photoshop, empowering you to transform a mundane coffee scene into a surreal dreamscape. Whether you are a seasoned digital artist or an enthusiastic beginner, this tutorial aims to unlock the secrets of blending reality with imagination, creating an artwork that transcends the ordinary.
I. Conceptualizing the Surreal Photomanipulation:
Before delving into the tutorial, let’s establish the key concepts that define the surreal photomanipulation:
A. Imaginative Concept:
- Envision a scene where reality merges seamlessly with surreal elements.
- Consider the emotional impact and narrative you want to convey through the juxtaposition of coffee and clouds.
B. Realistic Cloud Integration:
- Visualize clouds that appear seamlessly integrated into the coffee scene.
- Focus on achieving a sense of realism by paying attention to lighting, shadows, and perspective.
C. Coffee Aesthetic:
- Embrace the coffee theme by incorporating details such as coffee cups, steam, or coffee beans.
- Consider how these elements interact with the surreal clouds to enhance the overall composition.
II. Setting Up the Photoshop Document:
Prepare your canvas for the surreal photomanipulation:
A. Creating a New Document:
- Open Adobe Photoshop and create a new document with dimensions suitable for your artwork.
- Consider a canvas size that allows for intricate details while maintaining a manageable file size.
B. Importing Source Images:
- Gather high-resolution images of a coffee scene and realistic clouds.
- Import these images into Photoshop as separate layers.
III. Blending Coffee and Clouds:
Merge the elements of coffee and clouds seamlessly:
A. Layer Masking:
- Use layer masks to blend the coffee and cloud layers together.
- Refine the edges of the coffee elements to seamlessly integrate them with the clouds.
B. Adjustment Layers:
- Apply adjustment layers, such as Levels or Curves, to match the color and tonality of the coffee and cloud layers.
- Ensure a cohesive look by adjusting brightness, contrast, and color balance.
C. Realistic Lighting:
- Analyze the lighting direction in the source images and replicate it in your composition.
- Add shadows and highlights to the coffee elements to create a realistic interaction with the surreal clouds.
IV. Creating Dreamy Cloud Textures:
Enhance the surreal atmosphere with dreamy cloud textures:
A. Cloud Brushes or Textures:
- Utilize cloud brushes or textures to add depth and complexity to the cloud formations.
- Experiment with different brush sizes and opacities to create a variety of cloud shapes.
B. Layering Clouds:
- Create multiple layers of clouds with varying opacities to achieve a natural and layered look.
- Pay attention to the placement of clouds to enhance the overall composition.
C. Blending Modes:
- Experiment with blending modes such as Overlay or Soft Light to seamlessly blend the clouds with the coffee scene.
- Adjust the opacity of the cloud layers to achieve a balance between realism and surrealism.
V. Introducing Coffee Elements:
Infuse coffee-themed details into the surreal landscape:
A. Coffee Cups and Steam:
- Add coffee cups or mugs to the scene, placing them strategically within the composition.
- Create realistic steam effects using brush tools or stock images to enhance the coffee atmosphere.
B. Coffee Beans or Grounds:
- Scatter coffee beans or grounds on the surface, integrating them with the existing elements.
- Adjust the size and placement of the coffee details to complement the overall aesthetic.
C. Reflections and Shadows:
- Add reflections of coffee elements on the surface, considering the lighting and perspective.
- Introduce subtle shadows beneath the coffee cups or beans to enhance the realism.
VI. Atmospheric Adjustments:
Fine-tune the atmosphere to achieve a cohesive and surreal look:
A. Color Grading:
- Apply color grading adjustments to evoke the desired mood.
- Experiment with warm or cool tones to enhance the surreal and dreamlike quality of the scene.
B. Saturation and Contrast:
- Adjust saturation and contrast to create a visually striking and harmonious composition.
- Consider the interplay of colors between the coffee and clouds to achieve a balanced palette.
C. Depth of Field Effects:
- Simulate depth of field by applying a Gaussian Blur to certain elements in the foreground or background.
- Emphasize focus on key elements while creating a gradual blur for added depth.
VII. Detailing and Texturing:
Refine details and add textures for a polished finish:
A. Texture Overlays:
- Apply subtle texture overlays to the entire composition for added depth and character.
- Experiment with textures that complement the surreal nature of the scene.
B. Fine Details:
- Zoom in and add fine details to enhance realism.
- Pay attention to small elements like droplets on coffee cups or nuanced cloud formations.
C. Brush Techniques:
- Use various brush techniques to create intricate patterns or accents within the scene.
- Experiment with brushes that emulate coffee stains or ethereal wisps.
VIII. Real-World Applications: Sharing Surreal Photomanipulation:
Share your surreal photomanipulation with the world through various platforms and formats:
A. Digital Art Platforms:
- Showcase your artwork on digital art platforms such as DeviantArt, ArtStation, or Behance.
- Engage with the online art community to receive feedback and exposure.
B. Social Media:
- Share your creation on social media platforms with appropriate hashtags to reach a broader audience.
- Consider creating before-and-after posts to showcase your transformative process.
C. Printed Artwork:
- Print your surreal photomanipulation as posters or art prints for physical exhibitions or personal collections.
- Explore online platforms for selling prints to reach a broader audience.
IX. Tips for Surreal Photomanipulation Excellence:
Optimize your creative process with these tips for crafting exceptional surreal photomanipulations:
A. Experimentation is Key:
- Embrace experimentation and try different techniques to achieve the desired surreal effect.
- Don’t be afraid to deviate from conventional norms and explore your artistic intuition.
B. Attention to Detail:
- Pay meticulous attention to details to enhance realism and captivate viewers.
- Zoom in and refine small elements to ensure a polished and professional finish.
C. Consistent Lighting:
- Maintain consistent lighting throughout the composition to enhance realism.
- Ensure that all elements, including coffee cups and clouds, adhere to the same lighting direction.
D. Narrative Element:
- Consider incorporating a narrative element or story within your photomanipulation.
- Engage viewers by sparking their imagination and inviting them to interpret the surreal scene.
X. Conclusion:
Creating a surreal photomanipulation with realistic clouds in coffee is a testament to the limitless possibilities of digital artistry. As you navigate the intricate process of blending coffee elements with dreamlike clouds, remember that each brushstroke and adjustment contributes to the enchanting narrative. May your creation transport viewers to a realm where reality intertwines with imagination, leaving an indelible impression of wonder and awe. Embrace the surreal aesthetic, celebrate the fusion of ordinary and extraordinary, and may your artwork stand as a testament to the transformative power of digital art. May your surreal photomanipulation inspire others to explore the boundaries of creativity and discover the magic that lies within the intersection of reality and dreams.


