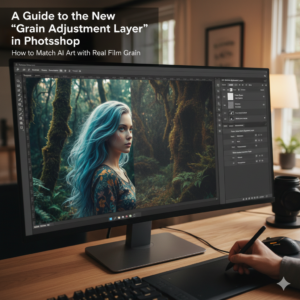
The Most Effective Export Settings in Photoshop for the Web and Social Media Pages (2025 Edition)
The Most Effective Export Settings in Photoshop for the Web and Social Media Pages (2025 Edition)
The Importance of Export Settings in the Digital Age to Consider Introduction
If your design is not exported properly, it may seem pixelated, huge, or altogether off when it is published to the internet. This is true regardless of how wonderful your design is. Whether you are making images for Pinterest, Instagram carousels, YouTube banners, or website headers, the export settings in Photoshop may have a significant impact on the overall quality of the material you create. However, with platforms becoming more designed for quick loading and mobile-first presentation, it is just as crucial to understand the appropriate export settings as it is to learn the design process itself. Many artists skip this last step. In this tutorial, we will take you through the process of exporting your graphics from Photoshop in 2025 in a way that is appropriate for both the web and social media platforms, without compromising the quality of the images or the speed at which they load.
Get familiar with the following image formats: JPEG, PNG, GIF, and WebP
Depending on the reason you are using the file, selecting the appropriate file format is vital. JPEG is a compressed and lightweight image format that may be used for photographs and designs that have gradients or a large number of colors. PNG is the format of choice for visuals that have sharp edges or transparency, such as logos and user interface elements. The GIF file format is mostly used for brief animations and has a color maximum of 256. The new WebP format combines compression efficiency and quality, making it a perfect choice for websites who want to speed up download times without sacrificing clarity.
In the year 2025, the recommended export dimensions for each platform
Each platform has its own set of size restrictions to follow. Just one example:
- 1080×1080 (square) and 1080×1350 (portrait) are the dimensions of Instagram posts.
- Images shared on Facebook are 1200×630 pixels.
- Images on Twitter: 1600×900 pixels
- YouTube Thumbnails are 1280×720 pixels in size.
- Pins on Pinterest: 1000×1500 pixels
- Web banners are available in a variety of sizes, including 728×90, 300×250, and 1200×628.
Because you are able to generate custom canvas sizes in Photoshop, you should always begin your project with platform-specific proportions. This will help you prevent problems with cropping or scaling pictures in the future.
In terms of resolution, 72 against 300 DPI: Which Is Better for the Web?
It is important to have a resolution of 300 DPI for printing, although the norm for digital usage is 72 DPI. Despite the fact that it maintains a sufficient level of sharpness for screen viewing, it keeps file sizes short. Before exporting, you should always make sure that your resolution in Photoshop is set to 72 DPI, unless you also want to utilize the asset for printing anything.
When Choosing the Right Color Mode: RGB vs. CMYK Differences
The two primary color options that are available in Photoshop are RGB (Red, Green, Blue) for the screen and CMYK (Cyan, Magenta, Yellow, and Black) for printing a document. Because displays rely on light to show color, the usage of RGB is necessary for platforms such as the web and social media. Ensure that your document is set to RGB by going to Image > Mode > RGB Color. This should be done before you export the document.
Utilizing the “Save for Web (Legacy)” Configuration
Up to the year 2025, this tried-and-true way of exporting is still accessible. Follow these steps: File > Export > Save for Web (Legacy). What you get from this dialog box is:
- Quality control over the compression process
- Choose from JPEG, PNG, and GIF as your file format.
- Look at the image
- The embedding of color profiles
For use on the web and social media, the JPEG quality should be set at between 60 and 80 percent. It strikes a healthy balance between the quality of the picture and the size of the file. When working with PNGs, consider using PNG-24 for improved quality and transparency.
Dialog for “Export As” for Exports That Are Easier to Use
One more contemporary approach is to choose File > Export > Export As. The process of exporting photographs is simplified, and it provides choices for the following:
- (JPEG, PNG, SVG, and WebP) The kind of file.
- A slider for the quality %
- The resizing of the canvas
- Including or excluding metadata components
- For novices, this approach is both quicker and more visually cleaner. This is particularly true when dealing with smaller tasks such as thumbnails or graphics for a single page.
Maintaining a Lightweight File Weight Through Image Compression
Sites and applications that use large picture files are slower. Above and beyond the format choices and quality sliders, Photoshop does not automatically reduce your files without your intervention. Further reducing the size of the file:
- Adjust the quality settings for JPEGs to a lower level, between 60 and 75%.
- It is recommended that you attempt exporting and then compressing PNG files using a program such as TinyPNG.
- As opposed to PNG or JPEG, WebP maintains the image’s quality while significantly reducing the file size. WebP should be used wherever feasible.
- Both the speed at which your website loads and the optimization of your assets for mobile visitors are improved as a result of this.
Stripping of Metadata and Copyright for the Web It is a good practice to remove extraneous metadata (camera information, GPS position, copyright tags, and so on) when exporting photographs, particularly for social media and websites. It is possible to opt to remove information from the export dialog boxes in Photoshop, which will further minimize the size of the file and preserve your privacy.
Utilizing Image Generators and Slices to Export Multiple Assets at the Same Time
Photoshop gives you the ability to export numerous artboards or use the Slice Tool to split a single canvas, which is useful when you are producing various copies of the same visual for usage on social media platforms. Then, choose numerous layers or slices and export them all at once by going to the File menu, selecting Export, and then selecting Export As. This not only helps save time but also helps maintain uniformity across all platforms.
Achieving and Maintaining Text and Vector Sharpness
Your text and shape layers will be flattened when you use raster formats such as JPEG and PNG. When exporting your picture, if it is necessary for it to maintain its sharpness (for example, for app interfaces or a crisp user interface), export it as SVG or PDF. When creating thumbnails and visuals for Instagram, it is important to exercise caution when using thin typefaces and to ensure that the text size is big enough to facilitate readability even after compression.
Know When to Make Use of Smart Objects When Exporting
By using Smart Objects inside your PSD file, you can maintain the quality of your layers even when you resize them. As an example, if you are adding a picture or logo that you may modify at a later time, you should convert it to a Smart Object before you add it. This will prevent Photoshop from deteriorating the image when it is scaled. Because of this, the completed exports will be more precise.
Transferring Layers to Files in Batch with Exporting Layers
You have the option of using the script project > Scripts > Export Layers to Files if your Photoshop project has a number of different layouts or variants. The process of storing each layer group as a distinct file is automated by this, which saves you hours of time that would have been spent manually exporting material by hand when you are making huge batches of social media content.
The Final Words on Sharing Across Multiple Platforms
The compression of your uploads varies from social platform to social platform. So as to prevent unanticipated deterioration:
- Maintain a little buffer of sharpness and contrast in the image.
- Remember to preview your exported file on both your desktop computer and your mobile device.
- Make sure the colors look well in both the bright and dark app themes.
- Photoshop gives you the ability to keep creative control, but if you get familiar with how different platforms handle uploads, you will be able to foresee problems before they arise.
Exporting is not the last step; rather, it is a decision that is made within the design process.
The majority of individuals believe that the design process is over once the “Save” button is clicked. Professionals, on the other hand, are aware that the export process is a stage of design in its own right. The correct export settings in Photoshop not only protect the artistic purpose you have for your project, but they also guarantee the highest possible performance and consistency across all platforms. The ability to control the balance of quality, file size, and format allows you to guarantee that your work appears crisp, loads quickly, and delivers impact, regardless of whether it is being watched on the screen of a 5G phone or integrated in a website that is accessible to people all over the world. In the year 2025, a good design is not only visually appealing but also functionally effective.