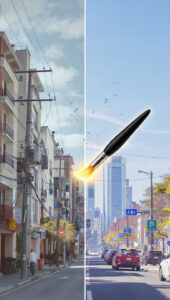
Techniques for Removing Harsh Sunlight Spots Without Losing Detail

Techniques for Removing Harsh Sunlight Spots Without Losing Detail
When it comes to photography, harsh sunshine may cause overexposed patches, which results in highlights that are blown out and detract from the subject of the shot. The use of rigorous post-processing methods in Photoshop is required in order to correct these regions without affecting the texture or the individual details. The ability to restore balance to a picture while preserving its realism may be accomplished by the use of selective edits, blending techniques, and texture preservation procedures.
Acquiring an Understanding of the Effects of Strong Sunlight
Hotspots, glare, and uneven exposure throughout the frame are all potential outcomes of exposure to bright sunshine. The regions that are overexposed often lose detail, color becomes flat, and might seem unnatural if the exposure is not adjusted appropriately. Reducing the brightness in a selected manner while maintaining the underlying texture, curves, and tonal diversity is the technique that is essential.
Utilizing Adjustment Layers in Order to Make Distinctive Changes
To begin, you should create an adjustment layer for either curves or levels. A gentle brush with a low opacity should be used on the layer mask in order to apply the repair solely to the highlights that are impacted. The exposure should be gradually decreased, or the tones should be lightened or darkened, until the hotspot merges in perfectly with the regions around it. Adjustment layers maintain flexibility, which enables repeated refining without affecting the original picture in any way.
Using the Clone Stamp in conjunction with the Healing Tools
Utilize the Clone Stamp or Healing Brush on a duplicate layer in order to apply it to hotspots that are more severe. It is important to gently paint over portions that are overexposed and to sample surrounding areas that have a similar tone and texture. Make use of a low opacity and gradually build up the correction in order to avoid generating patterns that are repetitious or textures that are not natural.
A High-Pass Blending Technique for the Preservation of Texture
During the process of fixing highlights, it is essential to keep the small details intact. After isolating the texture by applying a High-Pass filter to a duplicated layer, mix the texture over the picture that has been altered by using either the Overlay or Soft Light technique. By using this method, it is possible to make tonal adjustments while still maintaining the delicate structure of the skin, cloth, or natural surfaces.
The Separation of Frequencies for Surfaces That Are Complex
A color/tonal layer and a detail/texture layer are separated from one another in a picture using frequency separation. In order to fix the brightness of the low-frequency layer, either reduce the exposure or modify the color. However, the high-frequency layer should maintain its own level of detail. This is especially useful for skin, foliage, or objects with a rough surface since it enables exact changes to be made without rendering the image blurry or losing its clarity.
Burning and dodging in order to achieve seamless integration
On a second layer that is fifty percent gray and set to either Overlay or Soft Light, use the Dodge and Burn method. Adjusting the localized brightness and shadows may be accomplished by lightly painting with black or white. Through the use of this technique, small tone changes may be made, which simultaneously enhance dimensionality and integrate the highlight in a seamless manner with the surrounding regions.
Adjustments to the Brightness and Contrast
Check the color and contrast balance once you have eliminated the spots caused by sunshine. There is a possibility that highlights could seem desaturated or will fluctuate in hue. To bring back the brightness of the image and preserve the natural transitions between tones, you may use Curves, Hue/Saturation, or Selective Color.
Practices of Workflow that are Non-Destructive
Every correction should be kept on a distinct layer or adjustment layer that has masks applied to it. Whenever it is feasible, make use of Smart Objects in order to maintain flexibility. Through the use of non-destructive approaches, you are able to iteratively improve adjustments and rollback modifications without having an effect on the original picture.
The Final Examination and Adjustments
Zoom in to examine the textures of the surrounding area and sections that were previously overexposed. Check to see that the areas that have been adjusted blend in naturally, that shadows are constant, and that the overall exposure is balanced. Even even little adjustments may have a significant impact on the image’s level of realism and prevent it from seeming flat or manipulated.
To eliminate bright sunlight spots without sacrificing detail, it is necessary to use a variety of approaches that include selective modifications, the preservation of texture, and accurate blending. It is possible for photographers to repair regions that have been overexposed by using adjustment layers, high-pass filters, frequency separation, and meticulous dodging and burning techniques. This allows them to preserve natural textures and tonal harmony. When it comes to outdoor photography, portraiture, and otherwise complicated scenarios, having a mastery of these approaches guarantees repairs of a professional level.


