Mastering the Art of Colorization: A Comprehensive Guide on How to Color Black and White Photos with Photoshop’s Colorize Filter
Introduction:
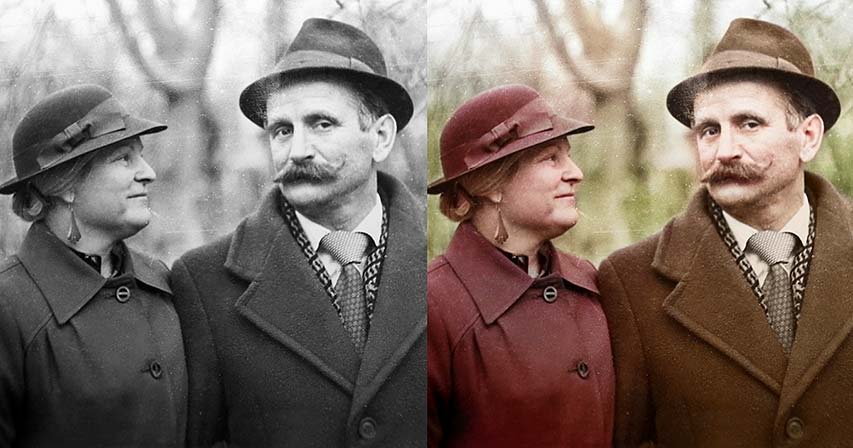
Photography has undergone a transformative journey, from the era of black and white images to the vibrant, color-rich photos we see today. However, there’s a timeless charm to black and white photography that continues to captivate enthusiasts and artists alike. To bridge the gap between the past and present, the process of colorizing black and white photos has gained popularity. In this comprehensive guide, we’ll delve into the intricate world of digital colorization using Adobe Photoshop’s Colorize Filter, unlocking the potential to breathe new life into monochromatic images while preserving their historical essence.
Section 1: Understanding Colorization and Photoshop’s Colorize Filter
- The Art of Colorization:
- Colorization is the process of adding color to black and white images, providing a fresh perspective on historical or vintage photographs. It involves carefully selecting and applying colors to different elements within the image.
- Introduction to Photoshop’s Colorize Filter:
- Adobe Photoshop, a powerhouse in photo editing, offers a dedicated Colorize Filter to simplify the colorization process. This filter intelligently applies color to grayscale images, providing a user-friendly approach to colorization.
Section 2: Preparing Your Workspace
- Importing the Black and White Photo:
- Begin by opening your black and white photo in Adobe Photoshop. Ensure that the image is of sufficient resolution for detailed colorization.
- Creating a Duplicate Layer:
- Duplicate the original photo layer. This step serves as a precaution, allowing you to retain the unaltered black and white image on one layer while experimenting with colorization on the duplicate layer.
- Adjusting Image Size and Resolution:
- If necessary, adjust the image size and resolution to meet your project requirements. Maintaining a high-resolution is crucial for preserving the quality of the colorized image.
Section 3: Utilizing Photoshop’s Colorize Filter
- Accessing the Colorize Filter:
- Navigate to the “Image” menu, select “Adjustments,” and choose “Colorize.” This action activates the Colorize Filter, providing a new layer with colorization options.
- Choosing Base Colors:
- Experiment with the Hue and Saturation sliders in the Colorize Filter to select base colors for your image. This step sets the overall tone of the colorization.
- Fine-Tuning with Opacity and Blending Modes:
- Adjust the opacity and experiment with blending modes to fine-tune the colorization effect. This allows you to control the intensity of colors and achieve a harmonious blend with the original grayscale tones.
Section 4: Precision Colorization Techniques
- Selective Colorization:
- Employ the brush tool with a low opacity setting to selectively color specific areas. This technique adds a touch of artistic flair, emphasizing certain elements while maintaining a grayscale appearance in other areas.
- Refining Edges:
- Pay attention to the edges of objects to ensure a seamless integration of color. Use a soft-edged brush for subtle transitions and employ tools like the Eraser tool to refine edges and avoid color bleeding.
- Coloring Skin Tones:
- Achieving natural-looking skin tones is crucial in portrait colorization. Experiment with different hues and saturations to find the right balance, and use the brush tool with precision for realistic results.
- Adding Details:
- Enhance the colorized image by adding finer details. This includes coloring accessories, background elements, and intricate patterns, contributing to a more immersive and lifelike result.
Section 5: Advanced Techniques for Realistic Colorization
- Gradient Maps for Tonal Control:
- Explore the use of Gradient Maps to gain precise control over tonal variations. This advanced technique allows you to map specific grayscale values to corresponding colors, offering unparalleled control over the colorization process.
- Overlaying Textures:
- Overlaying textures onto your colorized image can add depth and dimension. Experiment with textures that mimic the feel of aged photographs or introduce subtle grain for a vintage touch.
- Colorizing Shadows and Highlights:
- Pay attention to the interplay of light and shadow. Utilize Photoshop’s advanced features to selectively colorize shadows and highlights, ensuring a nuanced and realistic appearance.
Section 6: Saving and Exporting Your Colorized Image
- Saving in Photoshop Format:
- Save your project in Photoshop format (.psd) to retain all layers and adjustments for future editing. This format preserves the flexibility of your colorized image.
- Exporting as a Standard Image:
- When satisfied with your colorized image, export it in a standard image format (JPEG or PNG). This facilitates easy sharing, printing, or incorporation into various digital platforms.
Section 7: Troubleshooting Common Issues
- Dealing with Color Bleeding:
- If colors bleed into unintended areas, refine your brushwork and utilize layer masks to control color application. Adjusting brush opacity and employing precision tools can mitigate this issue.
- Achieving Realistic Skin Tones:
- Experiment with different color tones, blending modes, and opacity levels to achieve realistic skin tones. Refer to reference images to ensure accuracy in colorizing human subjects.
- Balancing Color Saturation:
- Maintain a balanced color saturation throughout the image. Avoid overly vibrant or desaturated areas that may detract from the overall realism of the colorized photo.
Section 8: Showcasing Your Colorized Masterpiece
- Sharing on Social Media:
- Showcase your colorized masterpiece on social media platforms to garner feedback and appreciation. Share insights into your colorization process to engage with fellow enthusiasts.
- Printing and Framing:
- Consider printing your colorized image for physical display. Select high-quality printing options and frame the image to create a stunning piece of art that combines historical charm with a contemporary touch.
Conclusion:
Colorizing black and white photos with Photoshop’s Colorize Filter is a captivating journey that bridges the past and present, unlocking a realm of creative possibilities. This comprehensive guide has equipped you with the knowledge and techniques needed to navigate the intricate process of colorization. From the basics of accessing the Colorize Filter to advanced techniques for achieving realism, you are now empowered to breathe new life into monochromatic images while preserving the timeless allure of black and white photography. As you embark on your colorization endeavors, let your creativity flourish, and revel in the artistry of transforming history through the vibrant lens of color.