How to install a CPU cooler
Installing a CPU cooler is a critical step in building or upgrading a computer system, ensuring that the processor remains cool and operates efficiently under load. A CPU cooler helps dissipate heat generated by the CPU during operation, preventing overheating and potential damage. This comprehensive guide will walk you through the process of installing different types of CPU coolers, including air coolers and liquid coolers, on both Intel and AMD platforms, covering preparation, installation steps, and best practices for optimal cooling performance.
Understanding CPU Coolers
Types of CPU Coolers
- Air Coolers:
- Use heatsinks and fans to dissipate heat away from the CPU.
- Typically more affordable and easier to install than liquid coolers.
- Range from compact designs to larger, high-performance models with multiple heat pipes.
- Liquid Coolers (AIO and Custom Loops):
- Use liquid coolant circulated through tubes and a radiator to cool the CPU.
- Provide efficient cooling for overclocked CPUs and high-performance systems.
- AIO (All-in-One) coolers are pre-assembled and easier to install than custom loop coolers.
Importance of CPU Cooling
- Heat Dissipation: Prevents the CPU from overheating and ensures stable performance.
- Enhanced Lifespan: Prolongs the lifespan of the CPU by maintaining optimal operating temperatures.
- Performance Boost: Allows for higher overclocking potential and sustained performance under heavy loads.
How to Install a CPU Cooler: Step-by-Step Guide
Preparation
- Gather Supplies:
- CPU cooler (air cooler or liquid cooler).
- Thermal paste (if not pre-applied on the cooler).
- Isopropyl alcohol and lint-free cloth (for cleaning CPU and heatsink).
- Screwdriver (typically Phillips-head) appropriate for your cooler’s mounting screws.
- Read the Manual:
- Review the installation instructions provided by the CPU cooler manufacturer.
- Ensure compatibility with your CPU socket (Intel LGA or AMD AM4, for example).
Installing an Air Cooler
Step 1: Remove Old Cooler (If Necessary)
- Power Off and Disconnect: Shut down your computer and disconnect the power cable.
- Remove Old Cooler: Unscrew the cooler’s mounting screws or clips and gently lift it off the CPU.
Step 2: Prepare the CPU and Heatsink
- Clean CPU and Heatsink:
- Use isopropyl alcohol and a lint-free cloth to clean any thermal paste residue from the CPU heat spreader and the base of the new cooler.
- Allow surfaces to dry completely before proceeding.
Step 3: Apply Thermal Paste (if not pre-applied)
- Apply Thermal Paste:
- Apply a small, pea-sized amount of thermal paste to the center of the CPU heat spreader.
- Avoid spreading the paste; the pressure from the heatsink will spread it evenly.
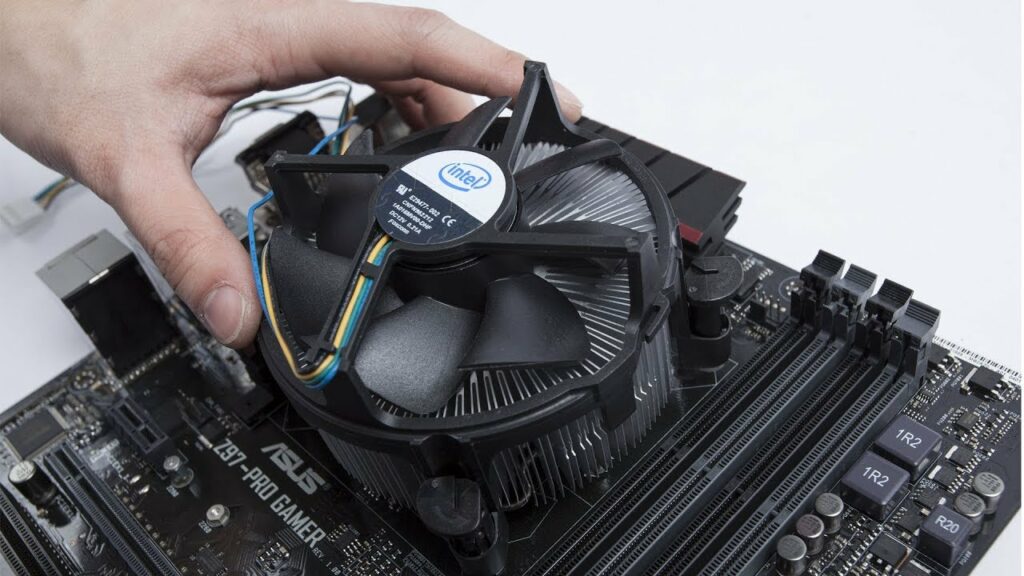
Step 4: Install Air Cooler
- Align Heatsink with CPU Socket:
- Align the heatsink with the CPU socket, ensuring it fits over the mounting holes.
- Confirm the fan orientation for optimal airflow (typically towards the rear or top of the case for exhaust).
- Secure Heatsink:
- Use the provided mounting brackets or screws to secure the heatsink to the CPU socket.
- Tighten screws diagonally and evenly to ensure even pressure on the CPU.
- Connect Fan to Motherboard:
- Attach the fan’s power connector to the CPU fan header on the motherboard for PWM control.
Installing a Liquid Cooler (AIO)
Step 1: Prepare the Case and Mounting
- Mount Radiator and Fans:
- Install the radiator and fans in the case according to manufacturer instructions, typically at the top or front for intake or exhaust.
Step 2: Prepare the CPU and Apply Thermal Paste
- Clean and Apply Thermal Paste:
- Clean the CPU heat spreader and apply thermal paste as described in the air cooler installation section.
Step 3: Install Pump and Cold Plate
- Mount Pump/Cold Plate Assembly:
- Position the pump/cold plate over the CPU with the pre-applied thermal paste or apply a small amount if necessary.
- Secure the pump/cold plate to the CPU socket using the provided brackets and screws.
- Connect Pump to Motherboard:
- Connect the pump’s power cable to a CPU fan header or dedicated AIO pump header on the motherboard.
Step 4: Install Radiator and Connect Fans
- Mount Radiator and Fans:
- Attach the radiator to the case mounting points and secure it with screws.
- Connect the radiator fans to the motherboard or fan controller, ensuring they are set up for optimal airflow direction (intake or exhaust).
Common Tips and Best Practices
- Check Clearance: Ensure the CPU cooler fits within your case and does not obstruct other components like RAM or VRM heatsinks.
- Tighten Screws Evenly: Apply equal pressure when tightening screws to avoid uneven contact with the CPU.
- Test Before Final Assembly: Test boot your system briefly after installation to ensure the cooler is functioning correctly and temperatures are stable.
Conclusion
Installing a CPU cooler is a crucial step in building or upgrading a computer system, ensuring the CPU operates at optimal temperatures for performance and longevity. By following the steps outlined in this guide for both air coolers and liquid coolers on Intel and AMD platforms, you can effectively install a CPU cooler and maintain stable temperatures under varying workloads. Remember to refer to manufacturer instructions and specifications for your specific cooler model and CPU socket type to ensure compatibility and proper installation. If unsure, seek assistance from professional technicians or consult online resources for additional guidance.